> ## Documentation Index
> Fetch the complete documentation index at: https://docs.probaseapp.com/llms.txt
> Use this file to discover all available pages before exploring further.
# Your contact form
> Capture new leads with a shareable, branded contact form
## What is the contact form?
The contact form is a branded web page you can share anywhere — link it from your social media bio, print a QR code on your truck or a flyer, or drop the link into an email. When someone fills it out, their details land in Probase automatically as a new **lead**, so you can follow up and turn them into a paying customer.
The form lives at its own web address (for example `yoursite.com/f/your-business`) and shows your business name and logo. Visitors don't need a Probase account — anyone with the link can reach out to you.
The contact form is turned **off** by default. You enable it and pick its web address from your Business Profile settings, described below.
## Turning on your contact form
The contact form is managed from **Settings → Business Profile**, in the **Contact Form** section. Only the business owner and admins can change these settings.
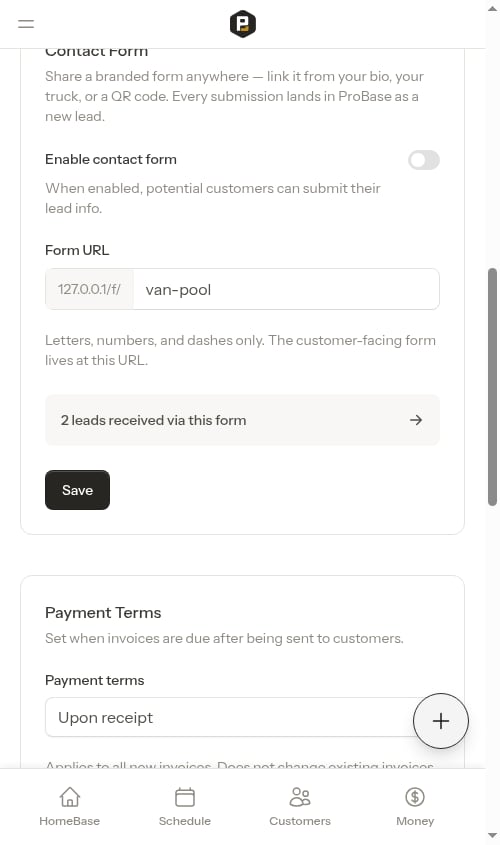 Click **Settings** in the sidebar (under BUSINESS) and scroll to the **Contact Form** section.
Under **Form URL**, type the ending you want for your link — letters, numbers, and dashes only. This is the address customers will visit (for example, `van-pool` becomes `…/f/van-pool`). Pick something short and recognizable, like your business name.
Turn on the **Enable contact form** toggle. When enabled, potential customers can submit their information through your form.
Click **Settings** in the sidebar (under BUSINESS) and scroll to the **Contact Form** section.
Under **Form URL**, type the ending you want for your link — letters, numbers, and dashes only. This is the address customers will visit (for example, `van-pool` becomes `…/f/van-pool`). Pick something short and recognizable, like your business name.
Turn on the **Enable contact form** toggle. When enabled, potential customers can submit their information through your form.
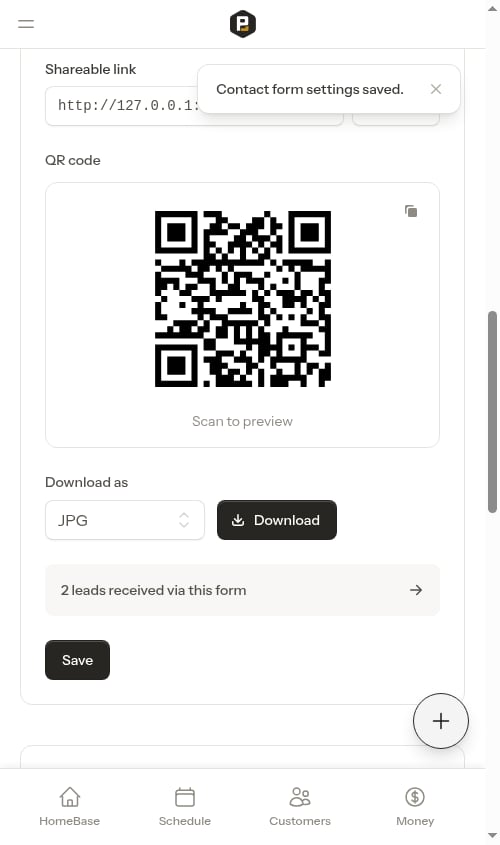
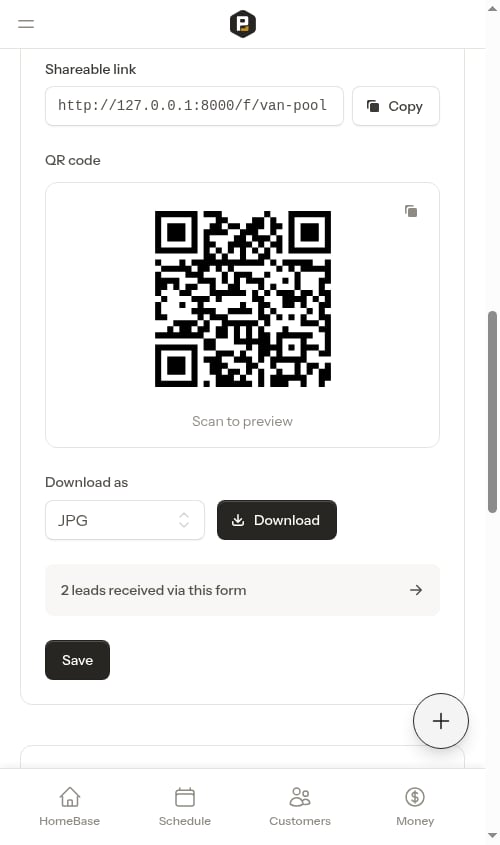 Click **Save**. Your form is now live at its web address, and the shareable link and QR code appear so you can start sharing right away.
 ## Sharing your form
Once the form is enabled, two ways to share it appear in the settings:
### Shareable link
Your form's full web address shows in the **Shareable link** field. Click **Copy** to copy it to your clipboard, then paste it into your social media bio, a text message, an email signature, or anywhere else your customers will see it.
### QR code
A scannable QR code is generated automatically from your form's link. Customers can point their phone camera at it to open your form instantly — perfect for printed materials like yard signs, flyers, business cards, or a sticker on your truck.
You can:
* **Copy the QR code** — click the copy icon in the top-right of the QR code box to copy the image, then paste it into a design or document.
* **Download the QR code** — choose **JPG** or **SVG** from the **Download as** dropdown and click **Download**. Use JPG for most documents and printing; choose SVG if your designer needs a sharp, resizable version for large signage.
The QR code always points to your current form address. If you change your form's web address (see below), download and reprint your QR codes so they point to the new link.
## Changing your form's web address
You can update your form's web address at any time by editing the **Form URL** field and saving.
Changing your web address breaks printed QR codes and previously shared links **after 30 days**. Your old address keeps working for 30 days and automatically forwards visitors to the new one — giving you time to reprint signage and update your links. After 30 days, the old address stops working.
When a change would retire your current address, Probase shows a reminder in the settings before you save so the 30-day window is never a surprise.
## What your customers see
When someone opens your form, they see a clean, branded page with your business name and logo at the top.
## Sharing your form
Once the form is enabled, two ways to share it appear in the settings:
### Shareable link
Your form's full web address shows in the **Shareable link** field. Click **Copy** to copy it to your clipboard, then paste it into your social media bio, a text message, an email signature, or anywhere else your customers will see it.
### QR code
A scannable QR code is generated automatically from your form's link. Customers can point their phone camera at it to open your form instantly — perfect for printed materials like yard signs, flyers, business cards, or a sticker on your truck.
You can:
* **Copy the QR code** — click the copy icon in the top-right of the QR code box to copy the image, then paste it into a design or document.
* **Download the QR code** — choose **JPG** or **SVG** from the **Download as** dropdown and click **Download**. Use JPG for most documents and printing; choose SVG if your designer needs a sharp, resizable version for large signage.
The QR code always points to your current form address. If you change your form's web address (see below), download and reprint your QR codes so they point to the new link.
## Changing your form's web address
You can update your form's web address at any time by editing the **Form URL** field and saving.
Changing your web address breaks printed QR codes and previously shared links **after 30 days**. Your old address keeps working for 30 days and automatically forwards visitors to the new one — giving you time to reprint signage and update your links. After 30 days, the old address stops working.
When a change would retire your current address, Probase shows a reminder in the settings before you save so the 30-day window is never a surprise.
## What your customers see
When someone opens your form, they see a clean, branded page with your business name and logo at the top.
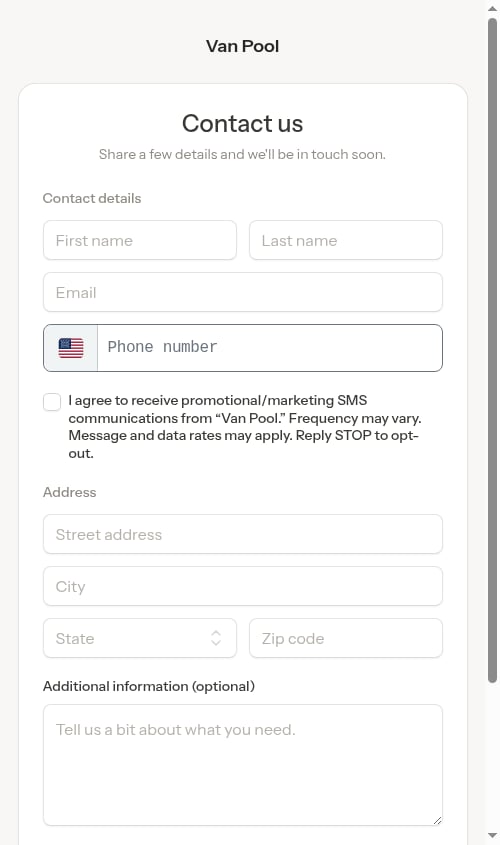 They can fill in:
* **First name** and **Last name** (required)
* **Email** (required)
* **Phone number** (optional)
* A checkbox to **agree to receive promotional/marketing text messages** from your business (optional — leaving it unchecked still lets them submit)
* **Address** — street address, city, state, and ZIP code (required, so every lead arrives with a serviceable location)
* **Additional information** — a free-text box for them to describe what they need (optional)
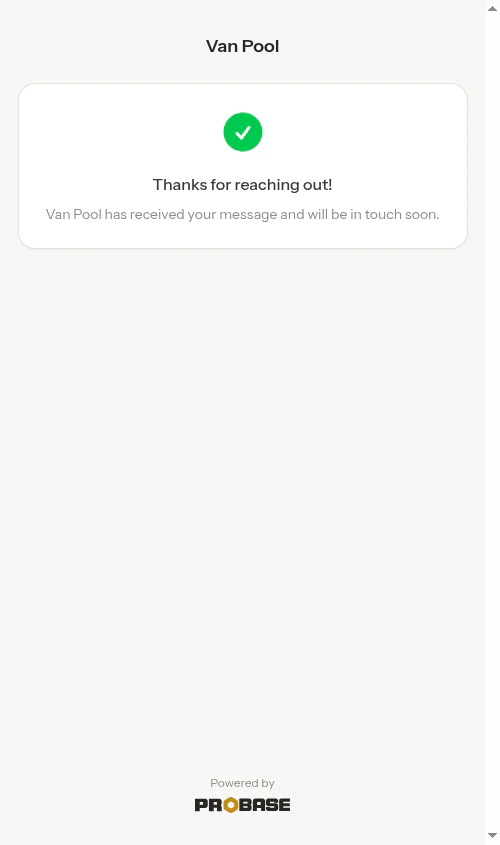
After they submit, they see a friendly confirmation that you've received their message and will be in touch soon. No further action is needed on their part.
They can fill in:
* **First name** and **Last name** (required)
* **Email** (required)
* **Phone number** (optional)
* A checkbox to **agree to receive promotional/marketing text messages** from your business (optional — leaving it unchecked still lets them submit)
* **Address** — street address, city, state, and ZIP code (required, so every lead arrives with a serviceable location)
* **Additional information** — a free-text box for them to describe what they need (optional)
After they submit, they see a friendly confirmation that you've received their message and will be in touch soon. No further action is needed on their part.
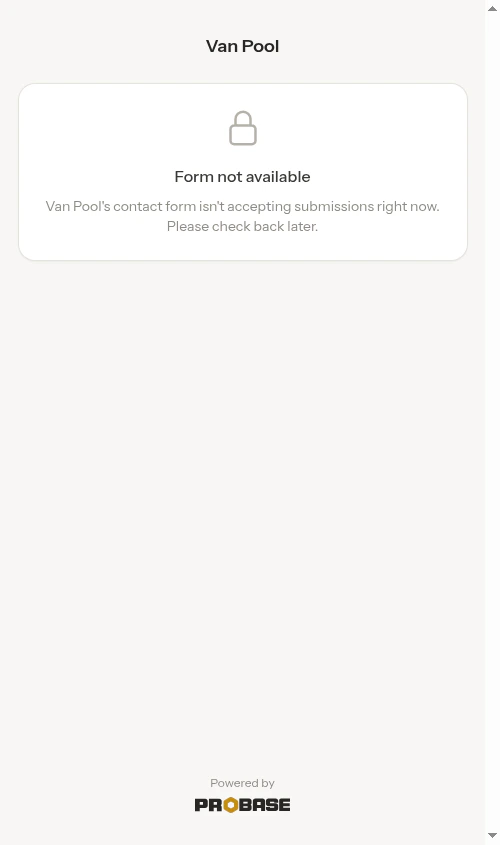
 If you've turned the form **off**, anyone who visits the link sees a short "form not available" message instead, so the page never looks broken.
 ## What happens to a submission
Every submission becomes a new **lead** in Probase automatically:
* A new customer is created with the **Lead** status and a property for any address they provided.
* If they wrote something in **Additional information**, it's saved as a note on their property so you can read what they need before calling back. The note is labeled **Lead Form** so your team knows it came from the customer, not a teammate.
* If they checked the text-message consent box, that agreement is recorded with the date for your records.
* You get an email letting you know a new lead came in through your form.
The **Contact Form** settings section shows a running count — for example, "2 leads received via this form." Click it to jump to your customer list filtered to the leads that came in through the form, so you can work through your new inquiries.
New leads appear in your customer list with the **Lead** status. See [Understanding customer status](/customers/customer-status) for how leads move to Active once you start work, and [Adding new customers](/customers/adding-customers) for the other ways customers get into Probase.
## Spam protection
Probase quietly filters out automated spam submissions and limits how often the same visitor can submit, so your lead list stays clean. This happens behind the scenes — you don't need to configure anything.
## Next steps
* [Understanding customer status](/customers/customer-status) — how leads progress to active customers
* [Creating quotes](/customers/creating-quotes) — send a quote to a lead to win the work
* [Adding customer notes](/customers/adding-notes) — keep track of what each lead needs
## What happens to a submission
Every submission becomes a new **lead** in Probase automatically:
* A new customer is created with the **Lead** status and a property for any address they provided.
* If they wrote something in **Additional information**, it's saved as a note on their property so you can read what they need before calling back. The note is labeled **Lead Form** so your team knows it came from the customer, not a teammate.
* If they checked the text-message consent box, that agreement is recorded with the date for your records.
* You get an email letting you know a new lead came in through your form.
The **Contact Form** settings section shows a running count — for example, "2 leads received via this form." Click it to jump to your customer list filtered to the leads that came in through the form, so you can work through your new inquiries.
New leads appear in your customer list with the **Lead** status. See [Understanding customer status](/customers/customer-status) for how leads move to Active once you start work, and [Adding new customers](/customers/adding-customers) for the other ways customers get into Probase.
## Spam protection
Probase quietly filters out automated spam submissions and limits how often the same visitor can submit, so your lead list stays clean. This happens behind the scenes — you don't need to configure anything.
## Next steps
* [Understanding customer status](/customers/customer-status) — how leads progress to active customers
* [Creating quotes](/customers/creating-quotes) — send a quote to a lead to win the work
* [Adding customer notes](/customers/adding-notes) — keep track of what each lead needs