> ## Documentation Index
> Fetch the complete documentation index at: https://docs.probaseapp.com/llms.txt
> Use this file to discover all available pages before exploring further.
# Customer properties & addresses
> Manage property locations
## Add a property
Go to **Customers** and click on the customer's name.
Find the **Properties** section and click the **Add property** button in the section header.
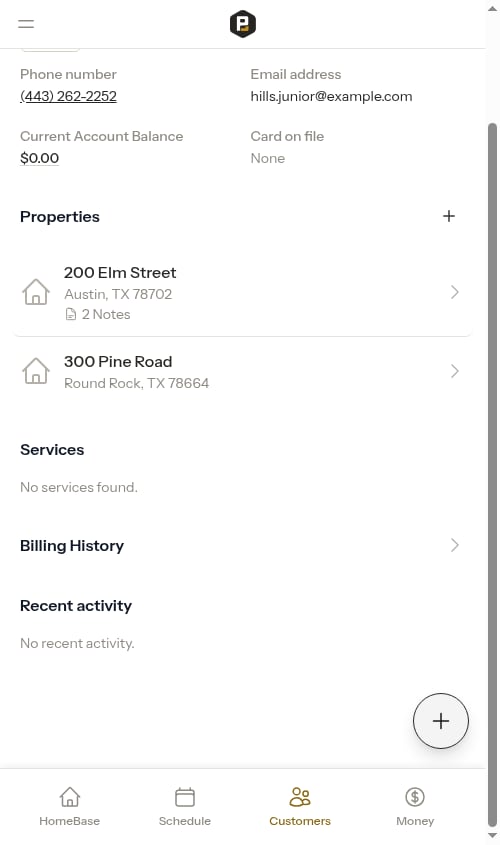 Fill in the property address:
* **Address line 1** — Start typing the street address and suggestions will appear. Select one to auto-fill the city, state, and postcode fields automatically.
* **Address line 2** (optional — apartment, suite, etc.)
* **City**, **State**, **Postcode** — Filled in automatically when you select an address suggestion, or enter manually
Fill in the property address:
* **Address line 1** — Start typing the street address and suggestions will appear. Select one to auto-fill the city, state, and postcode fields automatically.
* **Address line 2** (optional — apartment, suite, etc.)
* **City**, **State**, **Postcode** — Filled in automatically when you select an address suggestion, or enter manually
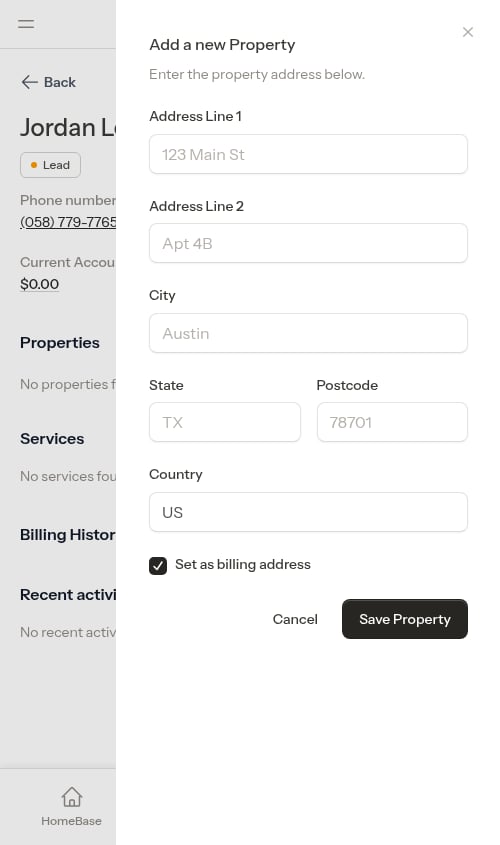 Check the **Set as billing address** box if you want this property address to appear as the billing address on the customer's invoices. This is useful when the service address and billing address are the same.
The billing address can also be added or changed any time by editing the customer directly. See [Adding new customers](/customers/adding-customers) for how to update billing address through the customer edit form.
Click **Save Property**. The system will automatically geocode the address for mapping and routing.
## View property location on map
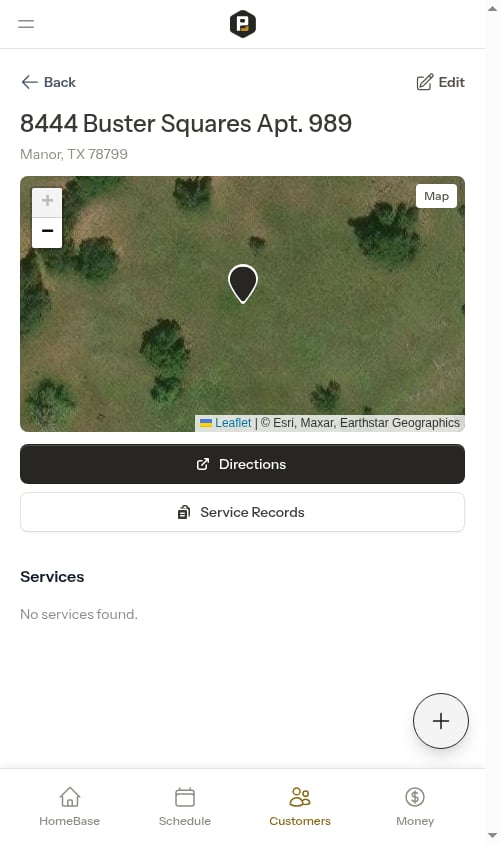
Properties are automatically geocoded when created or updated. The property page shows a map with the property location marked by a single pin.
The map opens zoomed all the way in on the property, in **satellite** view so you can see the rooftop and lot.
Check the **Set as billing address** box if you want this property address to appear as the billing address on the customer's invoices. This is useful when the service address and billing address are the same.
The billing address can also be added or changed any time by editing the customer directly. See [Adding new customers](/customers/adding-customers) for how to update billing address through the customer edit form.
Click **Save Property**. The system will automatically geocode the address for mapping and routing.
## View property location on map
Properties are automatically geocoded when created or updated. The property page shows a map with the property location marked by a single pin.
The map opens zoomed all the way in on the property, in **satellite** view so you can see the rooftop and lot.
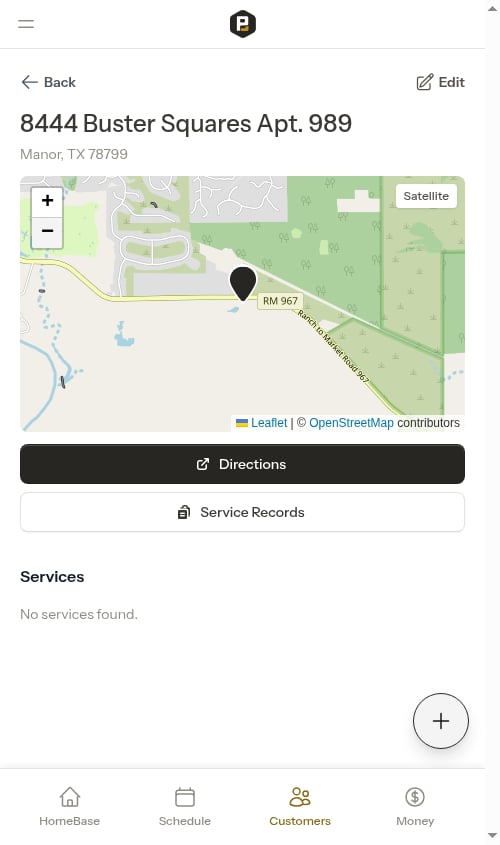
 Use the button in the top-right corner of the map to switch between **Satellite** imagery and the full-color street **Map**. The map view shows streets, labels, and surroundings in full color, which makes it easy to confirm the pin sits on the right street and block. As you zoom the map in and out, it also switches between street and satellite views automatically until you press the toggle yourself.
 To verify the location is correct:
1. Click on the property from the customer's page
2. View the map on the property details page
3. If the location is wrong, edit the address and save again
## View property service records
Tap the **Service Records** button in the map section of the property page to open that property's full service history across all services:
* Observations, measurements, materials, and service records
* Searchable by content, service name, or entry details
* Ordered by most recent first
* Click any entry to view the associated service
This provides a complete service history for the property in one place.
See [Service records](/routes/service-records) for details.
## Add property notes
To add notes about a property (gate codes, access instructions, hazards):
**Adding the first note:**
1. Go to the property page
2. Click the **Edit** button
3. In the edit modal, click **Add Property Note**
4. Enter your notes in the rich text editor
5. Optionally attach photos or documents
6. Click **Save**
**Adding more notes (when notes already exist):**
Once a property has at least one note, a Notes section is visible directly on the property page. Click the **+** button in the Notes section header to add another note.
See [Adding notes](/customers/adding-notes) for more details on the notes system.
## Add multiple properties
1. On the customer's page, click **Add property** again
2. Enter the second property address
3. Repeat for each additional property
## Edit property information
Navigate to **Customers** > click the customer name > click the property address.
Click the **Edit** button on the property details page.
Make your changes to the address fields. You can also check **Set as billing address** to use this property address as the billing address on the customer's invoices.
Click **Save**. The property will be re-geocoded with the updated address.
To verify the location is correct:
1. Click on the property from the customer's page
2. View the map on the property details page
3. If the location is wrong, edit the address and save again
## View property service records
Tap the **Service Records** button in the map section of the property page to open that property's full service history across all services:
* Observations, measurements, materials, and service records
* Searchable by content, service name, or entry details
* Ordered by most recent first
* Click any entry to view the associated service
This provides a complete service history for the property in one place.
See [Service records](/routes/service-records) for details.
## Add property notes
To add notes about a property (gate codes, access instructions, hazards):
**Adding the first note:**
1. Go to the property page
2. Click the **Edit** button
3. In the edit modal, click **Add Property Note**
4. Enter your notes in the rich text editor
5. Optionally attach photos or documents
6. Click **Save**
**Adding more notes (when notes already exist):**
Once a property has at least one note, a Notes section is visible directly on the property page. Click the **+** button in the Notes section header to add another note.
See [Adding notes](/customers/adding-notes) for more details on the notes system.
## Add multiple properties
1. On the customer's page, click **Add property** again
2. Enter the second property address
3. Repeat for each additional property
## Edit property information
Navigate to **Customers** > click the customer name > click the property address.
Click the **Edit** button on the property details page.
Make your changes to the address fields. You can also check **Set as billing address** to use this property address as the billing address on the customer's invoices.
Click **Save**. The property will be re-geocoded with the updated address.