> ## Documentation Index
> Fetch the complete documentation index at: https://docs.probaseapp.com/llms.txt
> Use this file to discover all available pages before exploring further.
# Adding your first customer
> Add a customer and set up their first property
## Two ways to add your first customer
You can add a customer using:
1. **Quick Actions (Job creation)** - Fastest way to create customer + property + service + appointment all at once. See [Creating jobs](/getting-started/creating-jobs).
2. **Step-by-step approach** (described below) - Create customer first, then add property and services separately.
If you want to get a customer scheduled quickly, use the [Job creation feature](/getting-started/creating-jobs) from the Quick Actions button. If you prefer more control over each step, follow the instructions below.
## Create a customer step-by-step
Click **Customers** in the sidebar. With no customers yet, you'll see a friendly empty state ("No customers added yet") with an **Add customer** button right in the middle of the page.
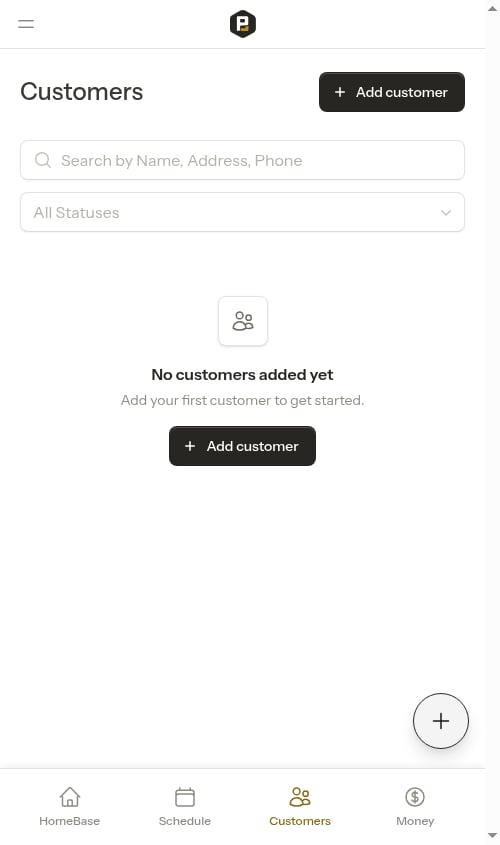 Click **Add customer** to open the customer creation modal.
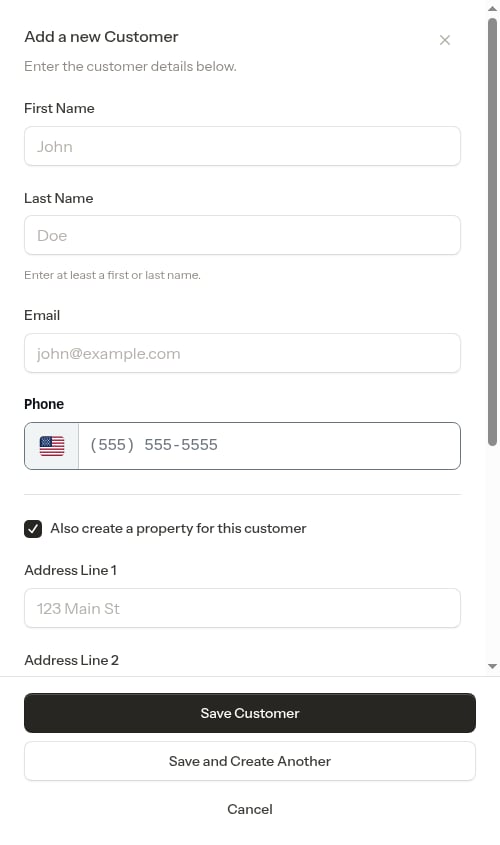 Fill in the customer information:
* **First name** and **Last name** — enter at least one of the two (just a first name, just a last name, or both)
* **Phone number** (optional) — automatically formatted as you type
* **Email address** (optional, but recommended for sending payment links)
Fill in the customer information:
* **First name** and **Last name** — enter at least one of the two (just a first name, just a last name, or both)
* **Phone number** (optional) — automatically formatted as you type
* **Email address** (optional, but recommended for sending payment links)
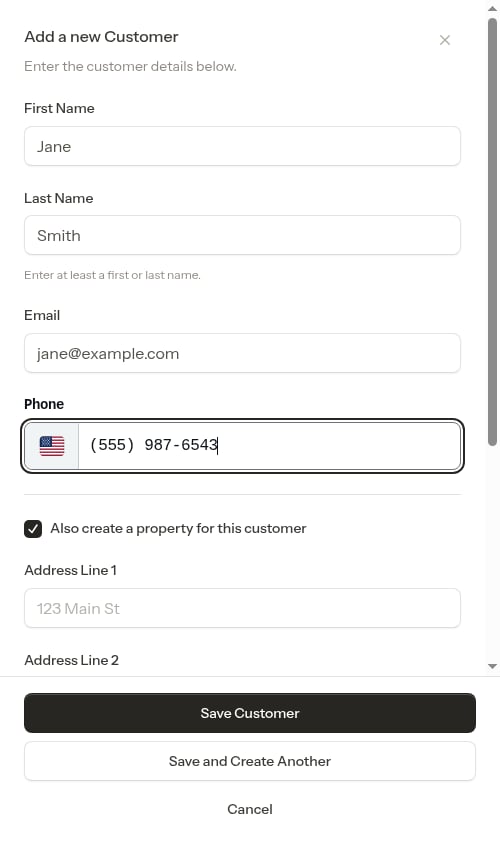 Check **Also create a property for this customer** to expand the property fields. This lets you add the customer and their first property at the same time.
Enter the property address:
* **Address line 1**
* **Address line 2** (optional)
* **City**
* **State**
* **Postcode**
Check **Also create a property for this customer** to expand the property fields. This lets you add the customer and their first property at the same time.
Enter the property address:
* **Address line 1**
* **Address line 2** (optional)
* **City**
* **State**
* **Postcode**
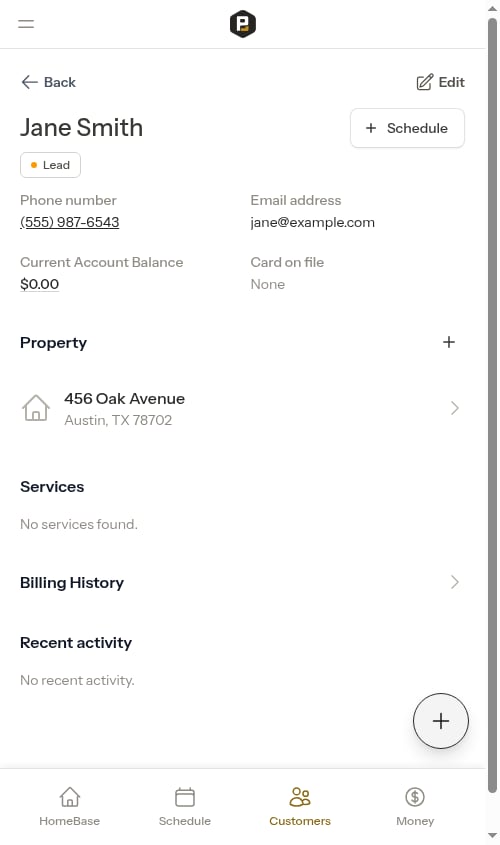
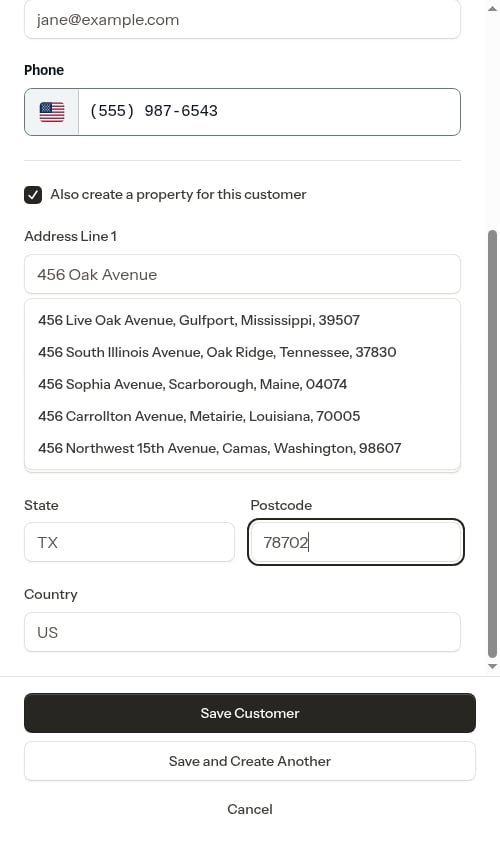 Click **Save Customer**. You'll be taken to the customer page — if you added a property, it appears in the Properties section there.
 Because this is the first customer on your account, Probase shows a quick celebration — **"First customer added."** — with a shortcut to keep the momentum going:
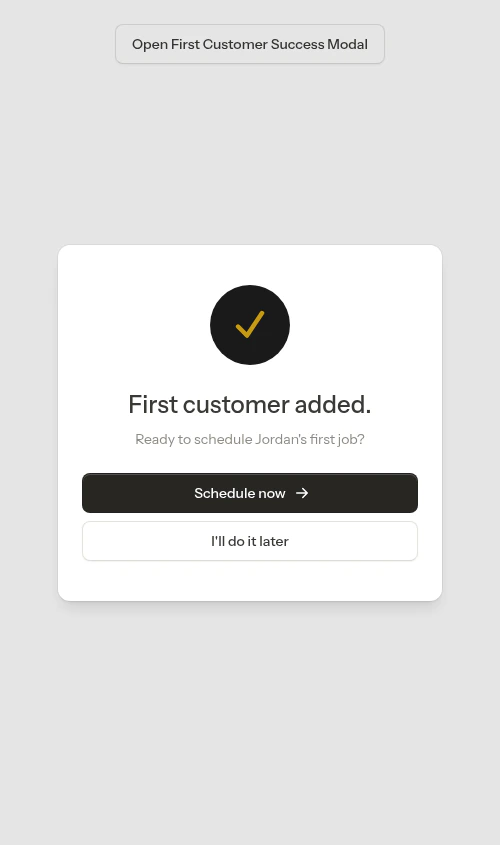 * Tap **Schedule now** to jump straight into creating a job for this customer (they're already selected for you).
* Tap **I'll do it later** to close the message and finish setting up at your own pace.
This celebration appears only once, for your very first customer.
You can skip the property step during customer creation and add properties later from the customer's page.
Have several customers to enter? Use **Save and Create Another** instead of **Save Customer** — it saves the current customer and instantly clears the form for the next one without closing the window. See [Adding new customers](/customers/adding-customers).
## Add a service for the customer
In Probase you add a service by creating a **job** (confirmed work) or a **quote/assessment** (work that needs approval or a site visit first). The guided wizard handles the customer, property, and service in one flow:
1. Tap the **+** Quick Actions button (bottom-right) and choose **New Job** — or tap **New Job** from the customer's page to pre-fill the customer
2. Choose **Schedule a Job** for confirmed work
3. Confirm the customer and property
4. Configure the service details — pick a service template or build a custom one, then set the price, billing, and frequency
5. Set the start date and create the job
When you create a job, Probase sets up the service and its first appointment automatically.
See [Creating jobs](/getting-started/creating-jobs) for the full wizard, and [Managing your service catalog](/getting-started/service-catalog) for details on service templates.
## Schedule more appointments
A job's first appointment is scheduled as part of the wizard. To add another appointment to an existing service:
1. Open the service to view its details
2. Click **Schedule Appointment** (appears near the top of the page when no upcoming appointment exists)
3. Select the date and time
4. Optionally assign a crew (when your team has more than one crew)
5. Click **Schedule**
See [Creating appointments](/scheduling/creating-appointments) for the full appointment workflow.
## Share the payment link
Once you've completed work and the customer has a balance, send them a payment link:
1. Go to **Money** in the sidebar and tap the invoice you want to send
2. Tap **Send Invoice** to open the SMS sharing flow
3. Tap **Send SMS** to open your messaging app with a pre-filled message, or **Copy** to copy the link
You can also send an invoice directly from a completed appointment's detail page using the **Send Invoice** button.
See [Customer payment portal](/customers/customer-portal) for details on the payment page.
* Tap **Schedule now** to jump straight into creating a job for this customer (they're already selected for you).
* Tap **I'll do it later** to close the message and finish setting up at your own pace.
This celebration appears only once, for your very first customer.
You can skip the property step during customer creation and add properties later from the customer's page.
Have several customers to enter? Use **Save and Create Another** instead of **Save Customer** — it saves the current customer and instantly clears the form for the next one without closing the window. See [Adding new customers](/customers/adding-customers).
## Add a service for the customer
In Probase you add a service by creating a **job** (confirmed work) or a **quote/assessment** (work that needs approval or a site visit first). The guided wizard handles the customer, property, and service in one flow:
1. Tap the **+** Quick Actions button (bottom-right) and choose **New Job** — or tap **New Job** from the customer's page to pre-fill the customer
2. Choose **Schedule a Job** for confirmed work
3. Confirm the customer and property
4. Configure the service details — pick a service template or build a custom one, then set the price, billing, and frequency
5. Set the start date and create the job
When you create a job, Probase sets up the service and its first appointment automatically.
See [Creating jobs](/getting-started/creating-jobs) for the full wizard, and [Managing your service catalog](/getting-started/service-catalog) for details on service templates.
## Schedule more appointments
A job's first appointment is scheduled as part of the wizard. To add another appointment to an existing service:
1. Open the service to view its details
2. Click **Schedule Appointment** (appears near the top of the page when no upcoming appointment exists)
3. Select the date and time
4. Optionally assign a crew (when your team has more than one crew)
5. Click **Schedule**
See [Creating appointments](/scheduling/creating-appointments) for the full appointment workflow.
## Share the payment link
Once you've completed work and the customer has a balance, send them a payment link:
1. Go to **Money** in the sidebar and tap the invoice you want to send
2. Tap **Send Invoice** to open the SMS sharing flow
3. Tap **Send SMS** to open your messaging app with a pre-filled message, or **Copy** to copy the link
You can also send an invoice directly from a completed appointment's detail page using the **Send Invoice** button.
See [Customer payment portal](/customers/customer-portal) for details on the payment page.