Overview
The customer payment portal is a simple, secure page where customers can view their invoices, see all charges, add a tip, and pay online with a credit card. Each customer gets a unique payment link that you can share via text or email. No login is required — customers just open the link.To accept online payments, you’ll need to connect your Stripe account first. Without Stripe, customers can still view their invoices but can’t complete payments online.
How it works
- You send a payment link to a customer (using the Send Invoice button)
- Customer opens the link (no login required)
- Customer sees a list of their invoices
- Customer clicks an invoice to view the full breakdown
- For eligible invoices, the customer is first shown a service review page where they can rate the service and optionally add a tip
- Customer enters their card details and completes payment (when Stripe is connected)
- Payment is processed and applied to the invoice automatically
Send a payment link
1
Open the invoice detail page
From the Money page, click on an invoice to open it. Or from a customer’s profile, find the invoice in the Invoices section.
2
Click Send Invoice
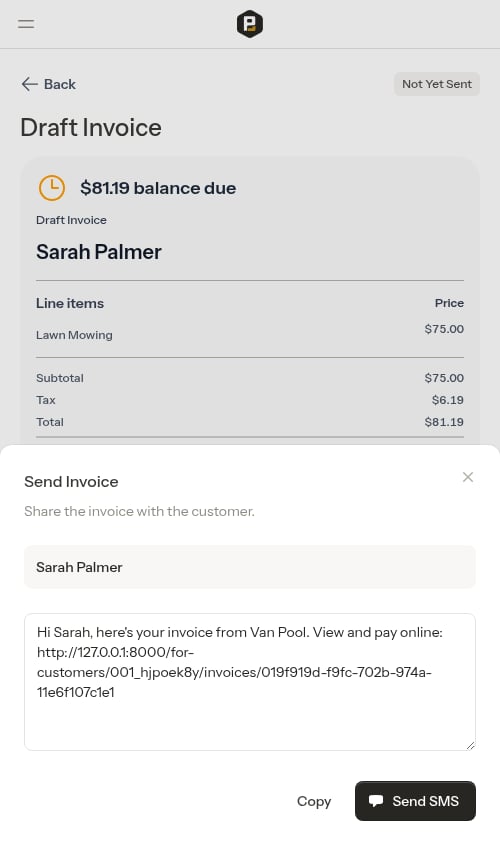
Tap Send Invoice. This sends the invoice and opens the SMS sharing modal.
3
Share the message
A pre-filled message is ready with the customer’s unique payment link. Either:
- Tap Send SMS to open your messaging app with the message ready to send (shown when a phone number is on file)
- Tap Copy Message to copy the message to your clipboard (shown when no phone number is on file)
-
Tap Copy to copy the message — including the payment link — to your clipboard
The payment link shows real-time data. When you add charges or credits to the customer’s account, the balance on the payment page updates automatically.
What customers see
Invoice list
When customers open their payment link, they see a list of their invoices and service reports. Each entry in the list shows one of the following: Invoices (with a dollar amount):- Unpaid — balance is outstanding
- Partially paid — a payment has been made but the full balance is not yet covered (shows the remaining amount owed alongside the original total)
- Paid — fully settled
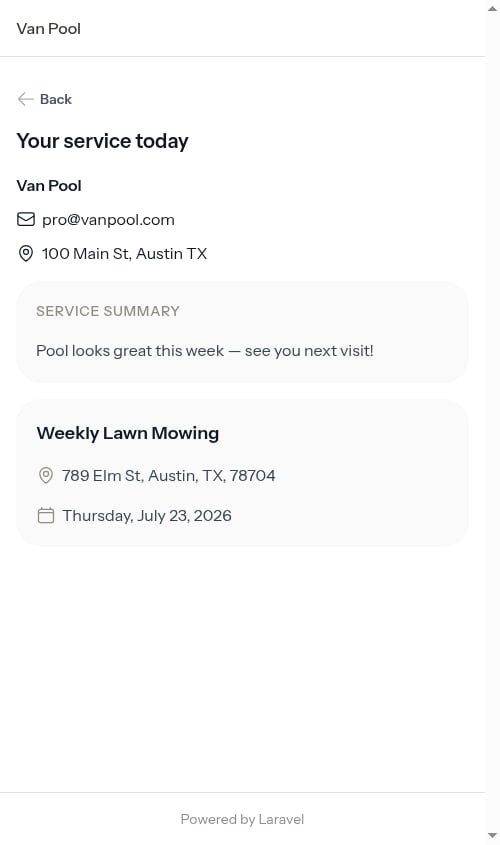
- Completed — a $0 service visit from a subscription service. No payment is required; tapping it shows the service details.
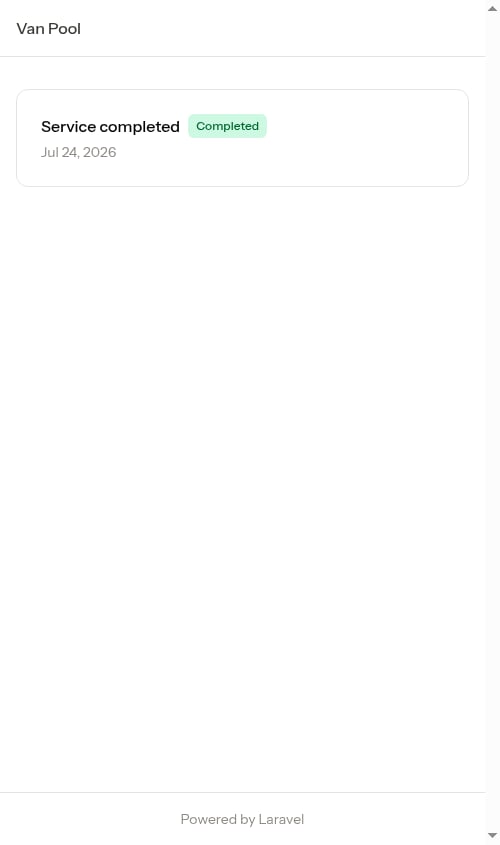
Service reports
When you complete a subscription service appointment at no charge (for example, a visit included in a flat-rate monthly plan), customers see a “Service completed” entry in their portal. Before viewing the service details, customers are shown a quick “How was your service?” page where they can rate the experience and optionally add a tip. Tips on service reports work the same way as on invoices — the tip selector only appears once the customer rates, with three percentage presets plus an Other option for a custom dollar amount.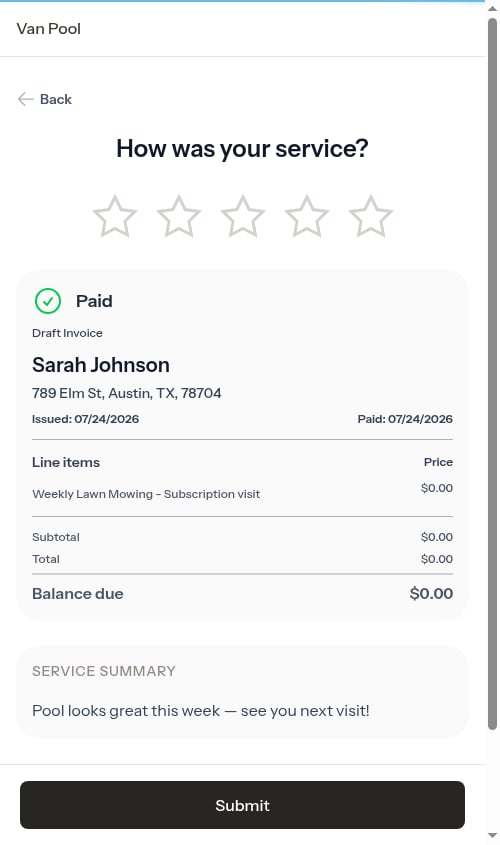
- An AI-generated service summary describing the work performed in plain language (when available)
- The service name and property address for each appointment
- The date of each visit
- Photos taken during the job
Checklist Service Report
If you use checklists and mark items to include in the customer summary, those filled-in items appear as a Service Report — showing the readings, completed tasks, and even a customer signature (labeled Signed by customer) captured on the visit. On the invoice, the Service Report is folded into the Service Summary card at the bottom of the page, appearing directly beneath the summary text and after-photos.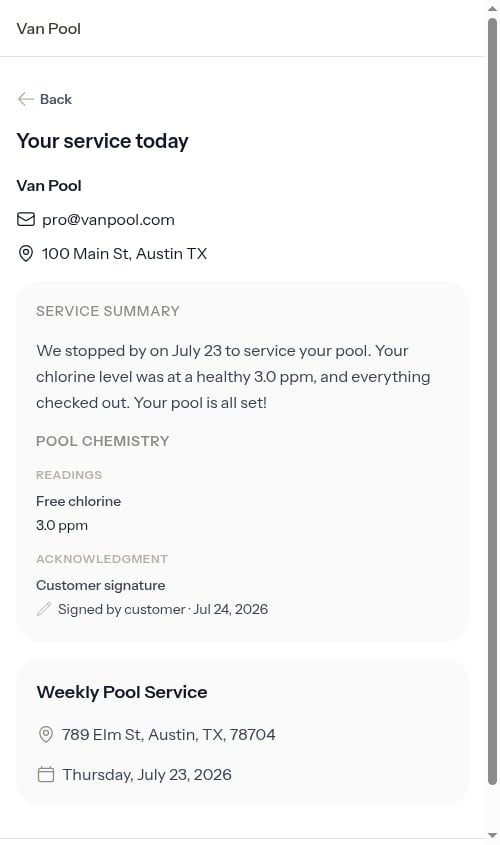
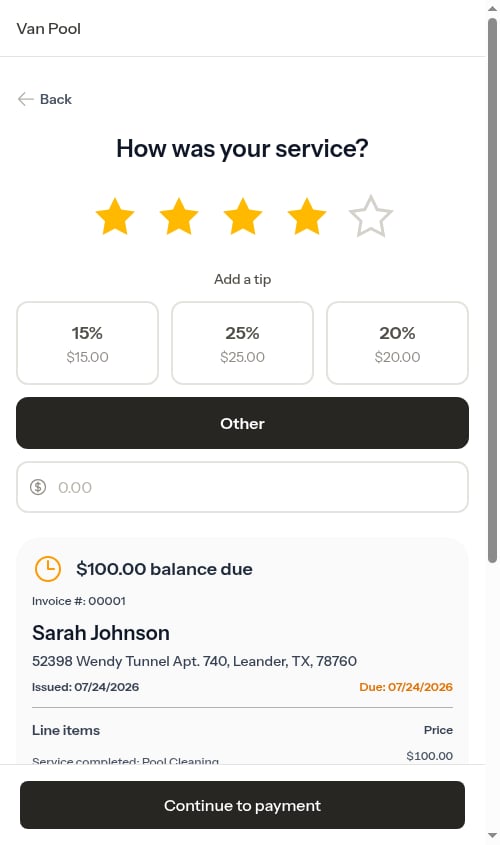
Service review
For invoices tied to a completed service appointment, customers are first shown a “How was your service?” page before they can pay. This gives them a chance to rate their experience, optionally add a tip, and preview the full invoice they’re about to pay.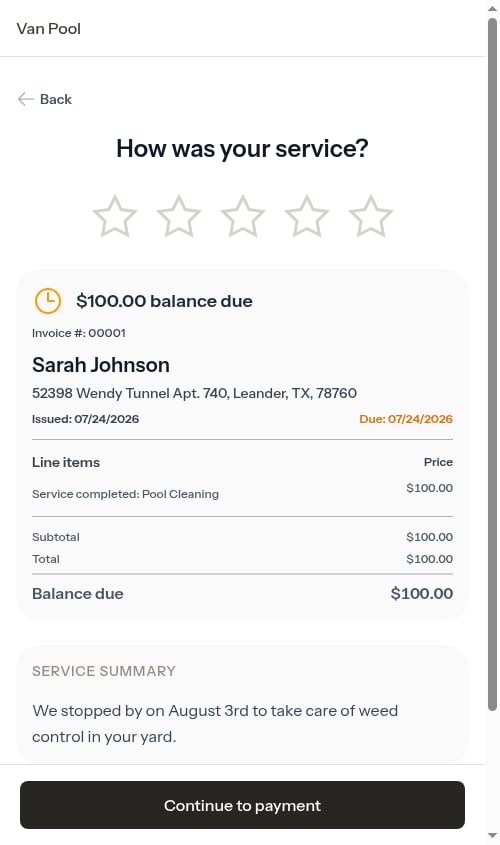
- Star rating at the top. Customers tap 1–5 stars to rate their service. No tip selector is shown until a rating is chosen.
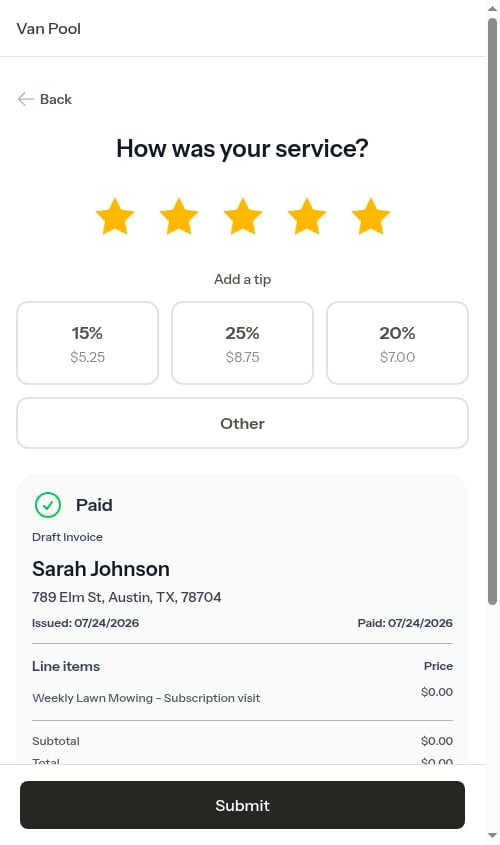
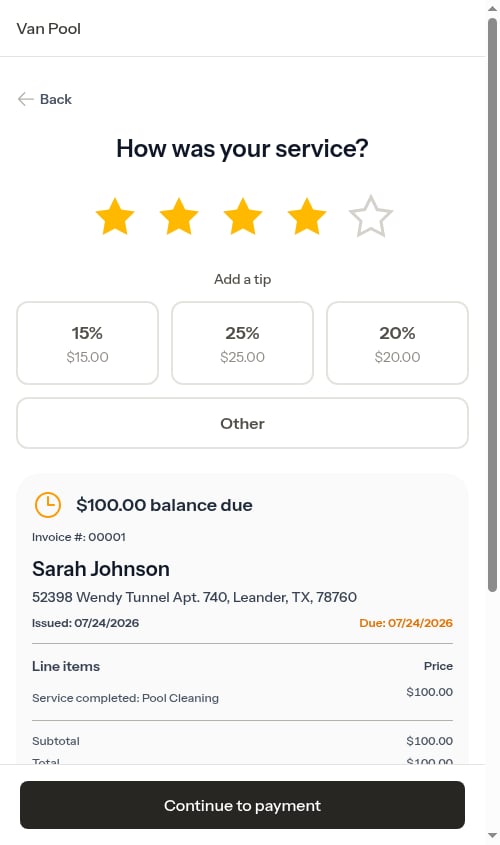
- Tip selector (appears after rating). Once the customer rates, three preset percentage buttons appear — 15%, 25%, and 20% — alongside a full-width Other button for a custom dollar amount. Nothing is pre-selected, so customers who don’t want to tip simply leave the section untouched.
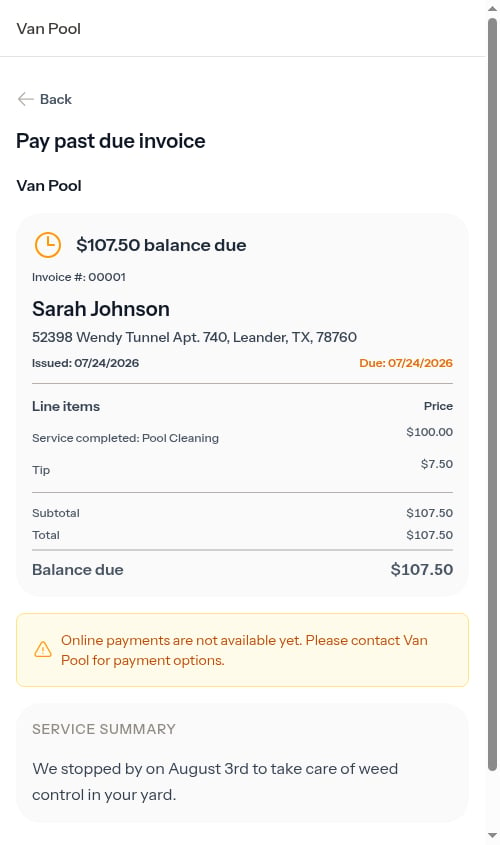
- Balance Due card. Directly below the tip selector, customers see the same Balance Due card they’d see on the payment page — their name and billing address, invoice number and dates, line items, totals, and the balance due. They can preview exactly what they’re about to pay before continuing.
- Service Summary card. Below the Balance Due card sits a separate Service Summary card (when there’s anything to show) — the plain-language summary of the work, any after-photos, and the checklist Service Report. This card always renders last, beneath the balance and payment area.
- Floating “Continue to payment” button. The CTA sticks to the bottom of the screen on mobile and desktop so it’s always within reach.

Invoice detail and payment
When a customer opens an individual invoice, the page is laid out top-to-bottom as:- Your business information (logo, name, address, phone, email, and website — whatever you’ve configured in Business Profile settings) shown above the cards
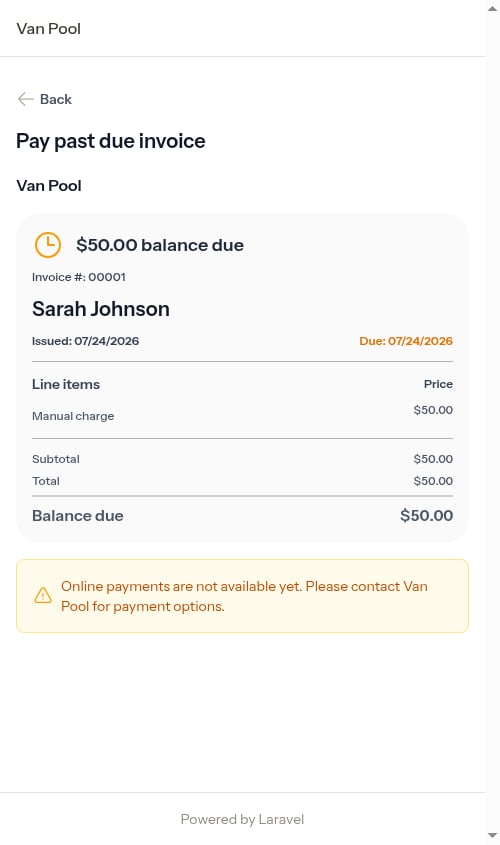
- A Balance Due card with their name and billing address, invoice number and dates (issued, due), all line items with titles and quantity, any carried-forward charges from previous invoices, and the totals (subtotal, tax, any credits applied, total, and balance due)
- The payment form (when Stripe is connected and a balance is owed)
- A separate Service Summary card at the bottom (when available) with an AI-generated description of what was done, any after-photos your crew uploaded during job completion, and — when a checklist is set to show on the invoice — the checklist Service Report items right below
QTY: 2). When a quantity is greater than 1, the unit price is shown below the item name and the total for that line is shown separately — giving customers a transparent breakdown.
If the invoice is overdue, the page title shows “Pay past due invoice.”
The tip the customer picked on the review screen is already applied as a line item on the invoice, so the payment page doesn’t ask them to choose a tip a second time — they go straight to entering their card details.
Payment form
When Stripe is connected, customers see a secure payment form where they can enter their credit card details and complete payment.
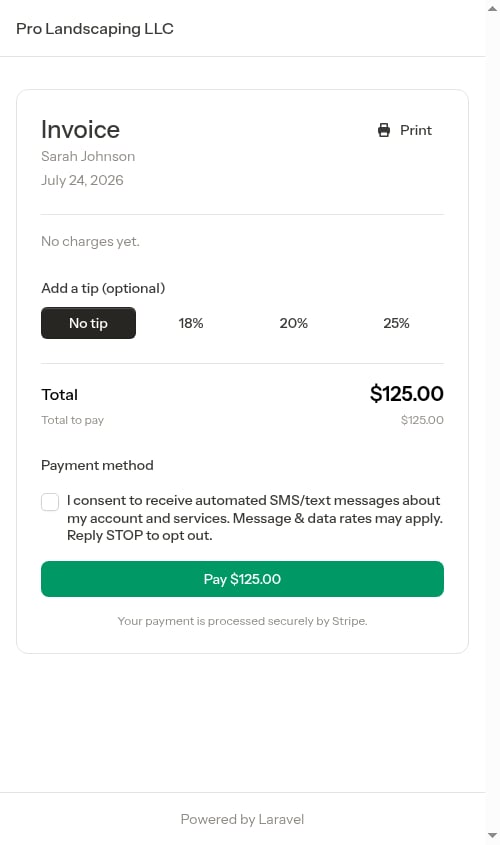
Communication consent (optional)
Customers may be asked to consent to receive text message communications about their account and services. This consent is optional and not required to complete payment.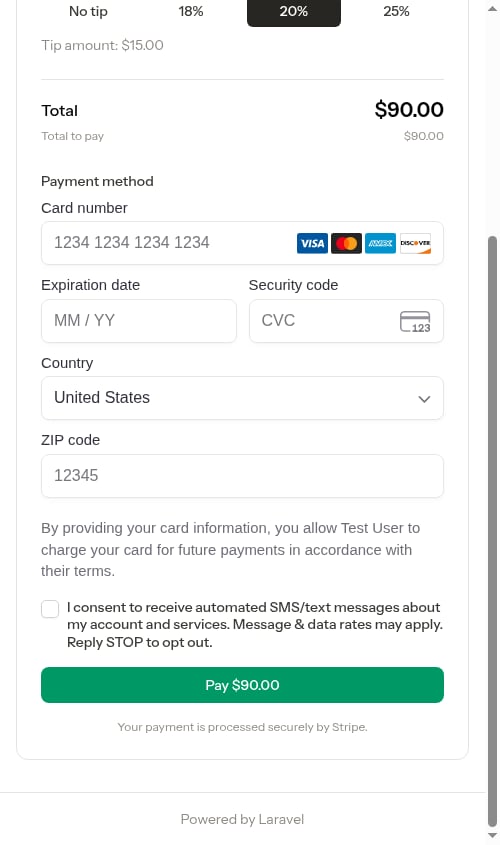
When Stripe isn’t connected
If you haven’t connected Stripe yet, customers will see a message that online payments aren’t available.
Quote links
In addition to payment links, you can also share quote links with customers. A quote link lets customers view the full quote details and approve or decline it on their own — no login required. When a quote is in Sent status, a customer quote link appears on the quote detail page in Probase. Copy and share that link via text, email, or any other method. Customers can:- Review the quote details and full pricing breakdown — base service, any additional line items, subtotal, tax, and total
- Tap Approve to accept the quote (the confirmation shows the full total including line items and tax)
- Tap Decline and select a reason (Too expensive, Found another provider, etc.)
Best practices
- Send after completing work — Use the Send Invoice action right after finishing a job to let the customer see their charge and pay
- Follow up on overdue invoices — Re-share the link when following up on outstanding balances
- Let customers bookmark it — The link never expires, so customers can return anytime to check their balance