Overview
When you need to change when work is scheduled, you can reschedule a visit. This creates a new visit on the new date and marks the original as “Rescheduled,” so the trail of what was booked stays intact.Only shuffling the visit within its day? You don’t need to reschedule. Tap the date-and-time row on the visit’s header card and choose Change time to set a new start time and duration, leaving the date alone — see The visit page.
Reschedule an appointment
1
Open the visit
Tap the visit anywhere it appears — your daily schedule, the calendar, HomeBase, the customer’s or property’s Visits card, or the job page — to open the visit page.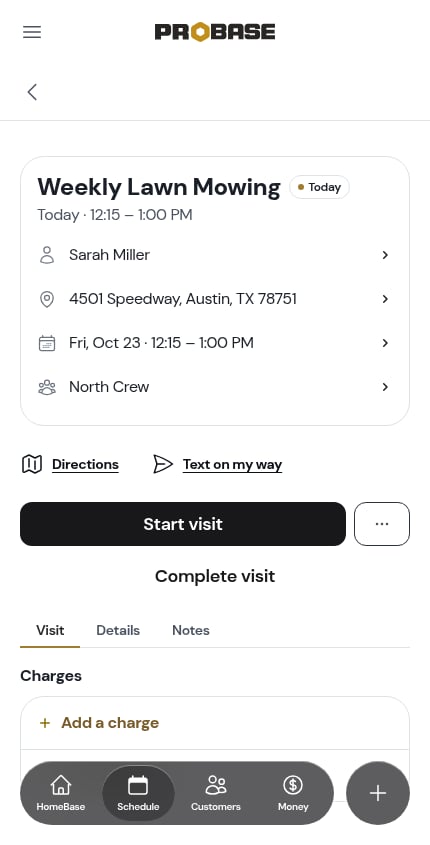
2
Tap ⋯ More
Tap the outlined ⋯ More button beside the main action to slide up the More sheet.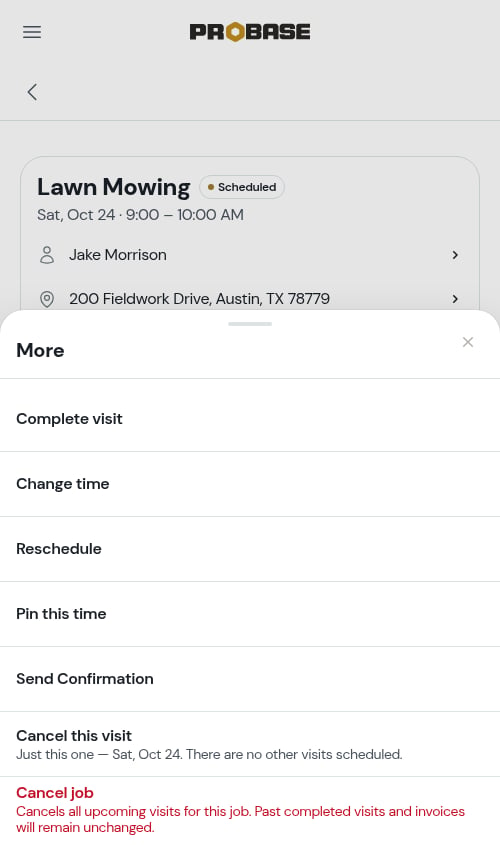
3
Tap Reschedule
Tap Reschedule in the sheet. The Reschedule Appointment window opens.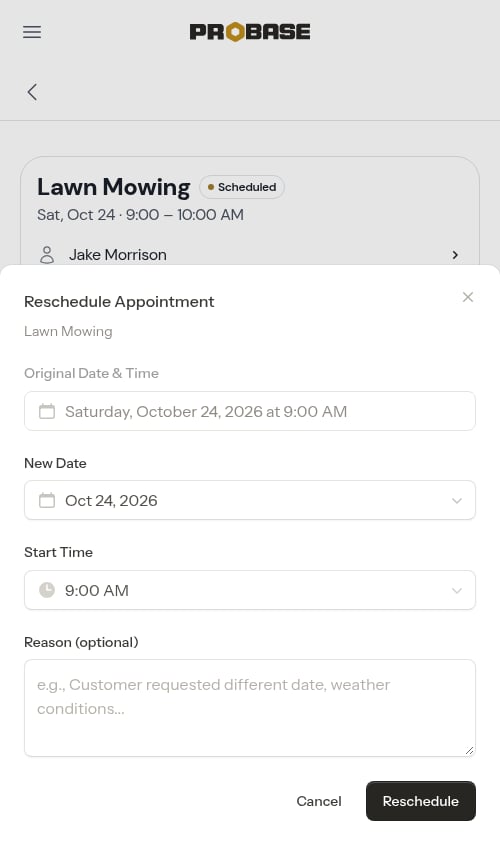
4
Choose new date, time, and crew
In the reschedule form:
- Select the new Date
- Set the new Start time (defaults to the same time as the original appointment)
- Reassign the Crew if needed — the picker pre-selects the crew already on the appointment, so you can leave it alone to keep the same crew. The crew picker only appears when your team has more than one crew; with a single crew the appointment stays assigned to it automatically.
-
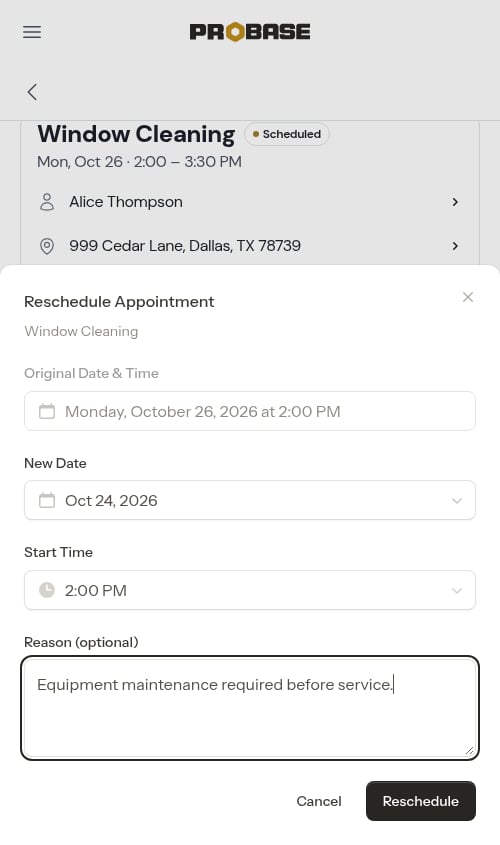
Enter a Reason for rescheduling (optional, up to 191 characters — the box stops accepting text once you reach the limit)
5
Save
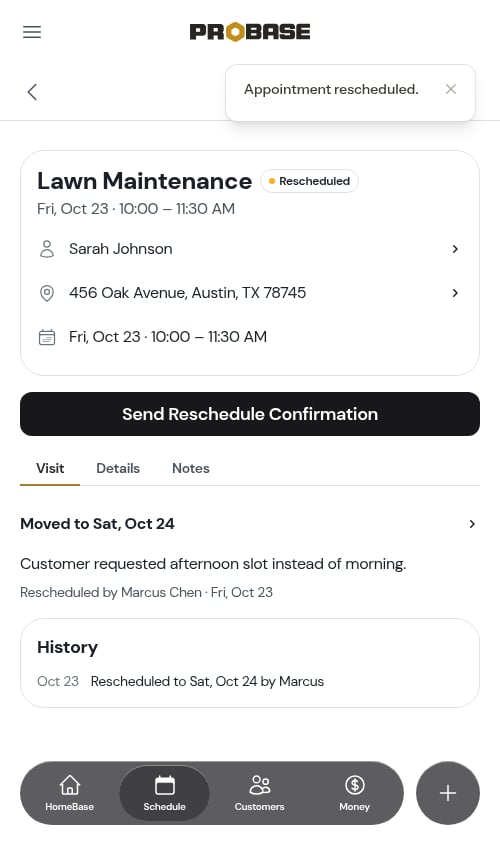
Click Reschedule to create the new appointment. The original appointment is marked as “Rescheduled” with your reason, and a new “Scheduled” appointment appears with the new date and time.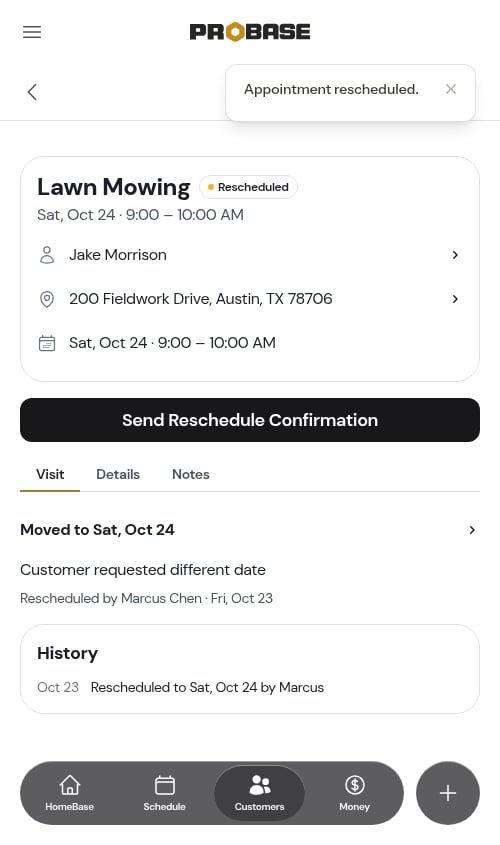
Drag a visit to another day
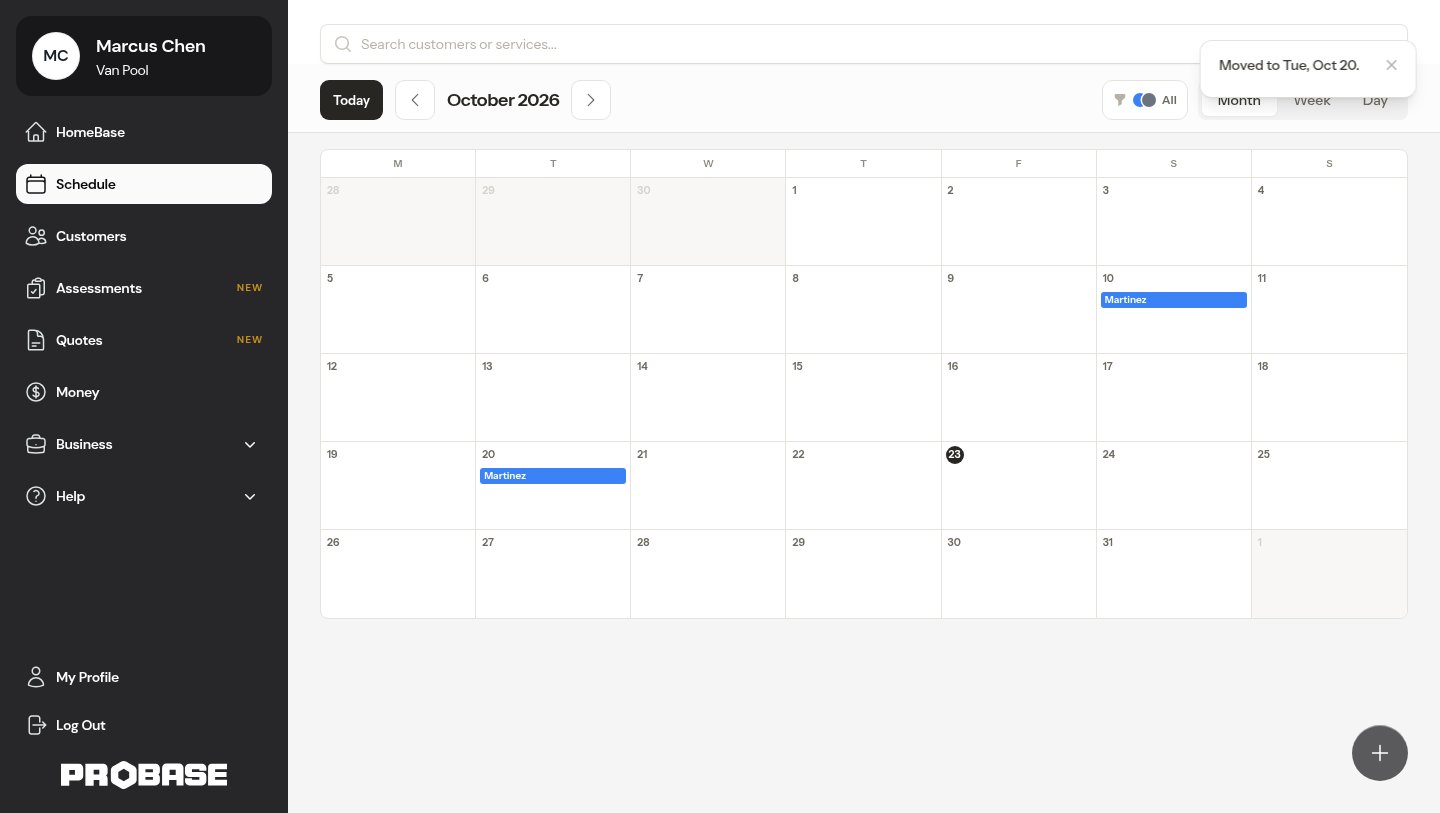
On a computer you don’t have to open the visit at all. In the Week and Month views you can pick a visit up with the mouse and drop it on another day — ProBase asks you to confirm, then reschedules it for you.1
Press and drag the visit
Press the mouse button on the visit’s box and move it. Nothing happens until you’ve moved about a centimetre, so a plain click still opens the visit as usual.
- In the Week view the box follows you across the columns and snaps to the nearest half hour, so you can change the day and the time in one go.
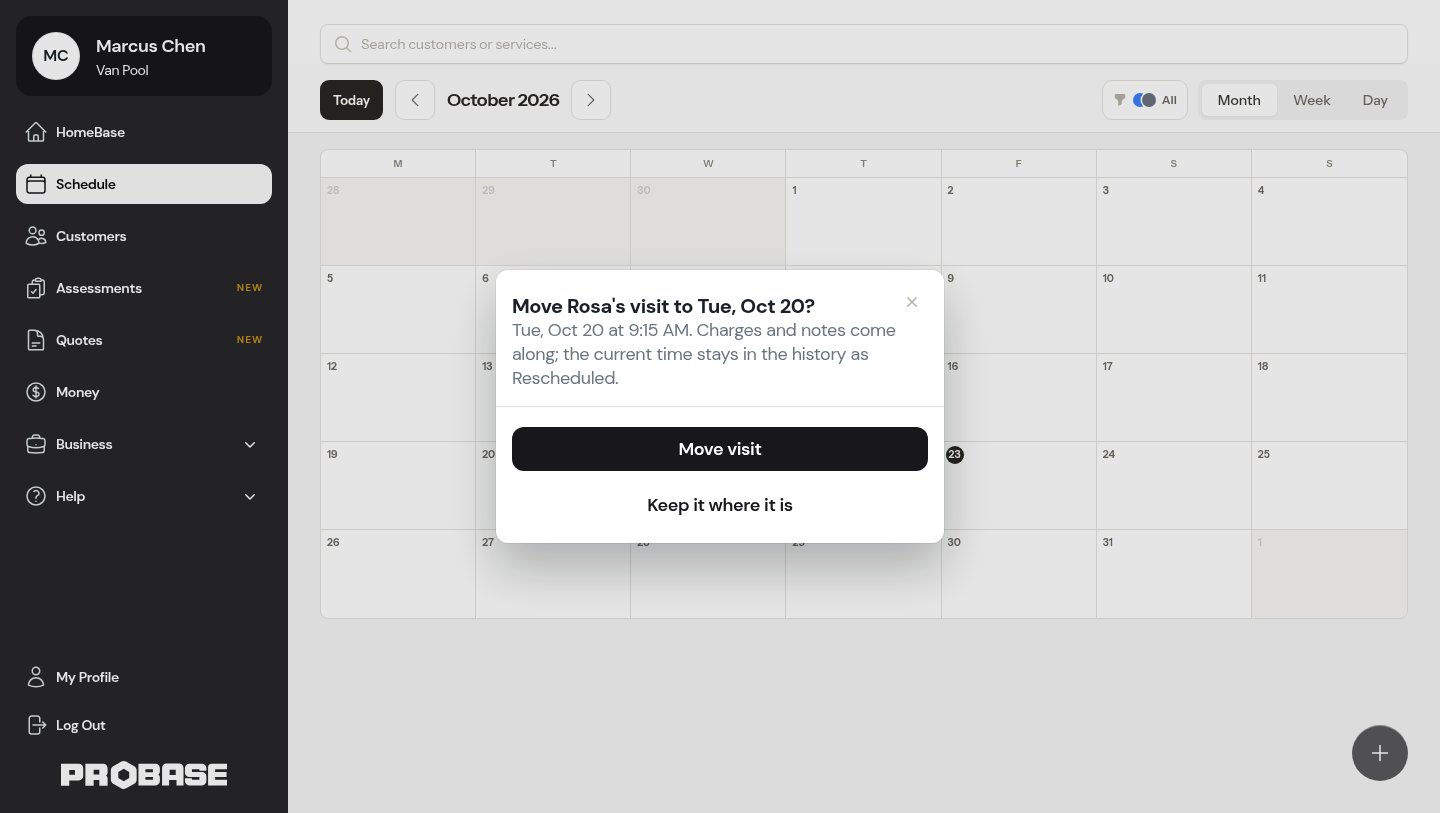
- In the Month view the box follows you from cell to cell and the visit keeps its own time of day.
2
Confirm the move
Drop the box and a sheet asks before anything is written: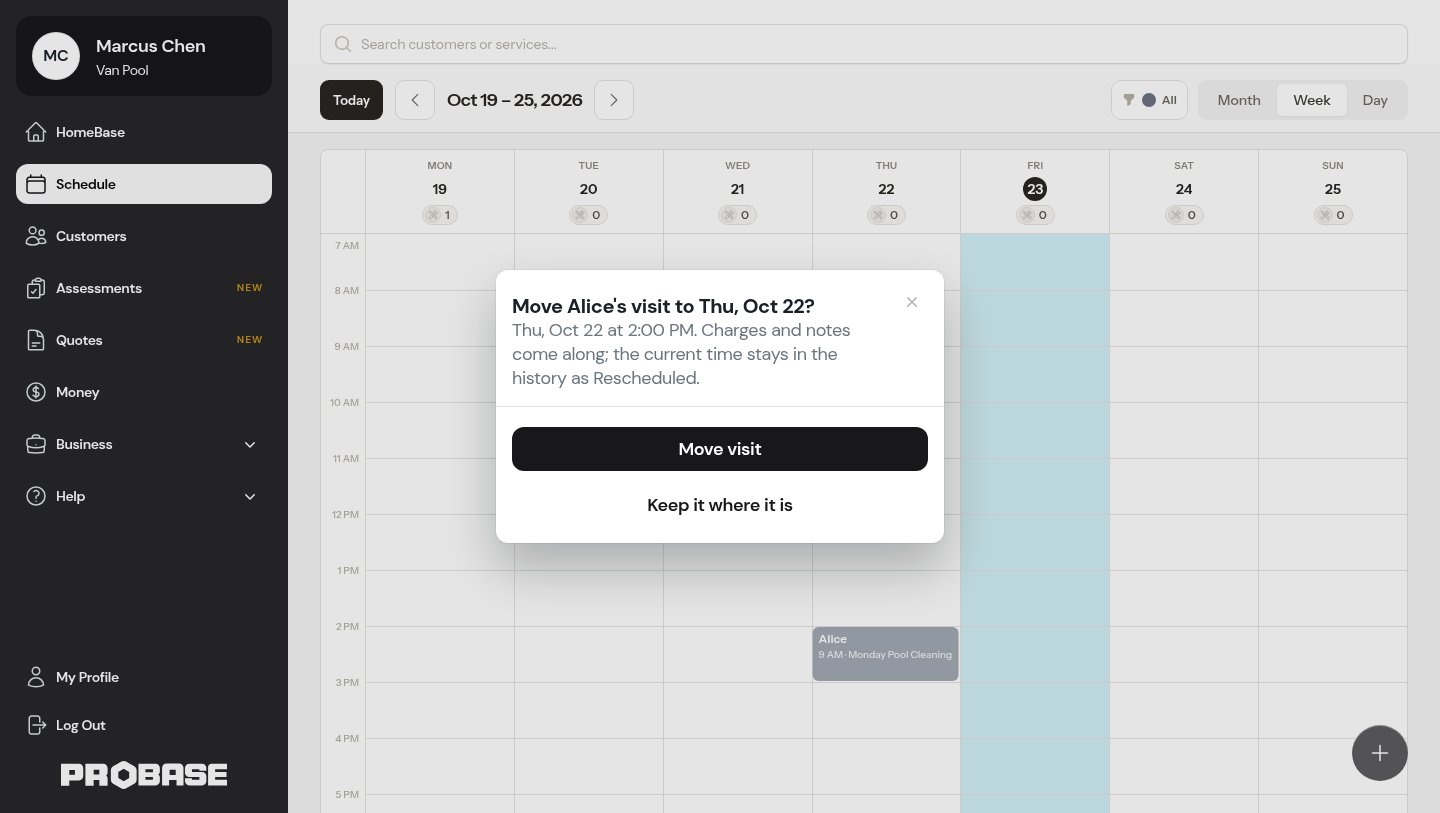
Move Sarah’s visit to Thu, Sep 3? Thu, Sep 3 at 10:30 AM. Charges and notes come along; the current time stays in the history as Rescheduled.
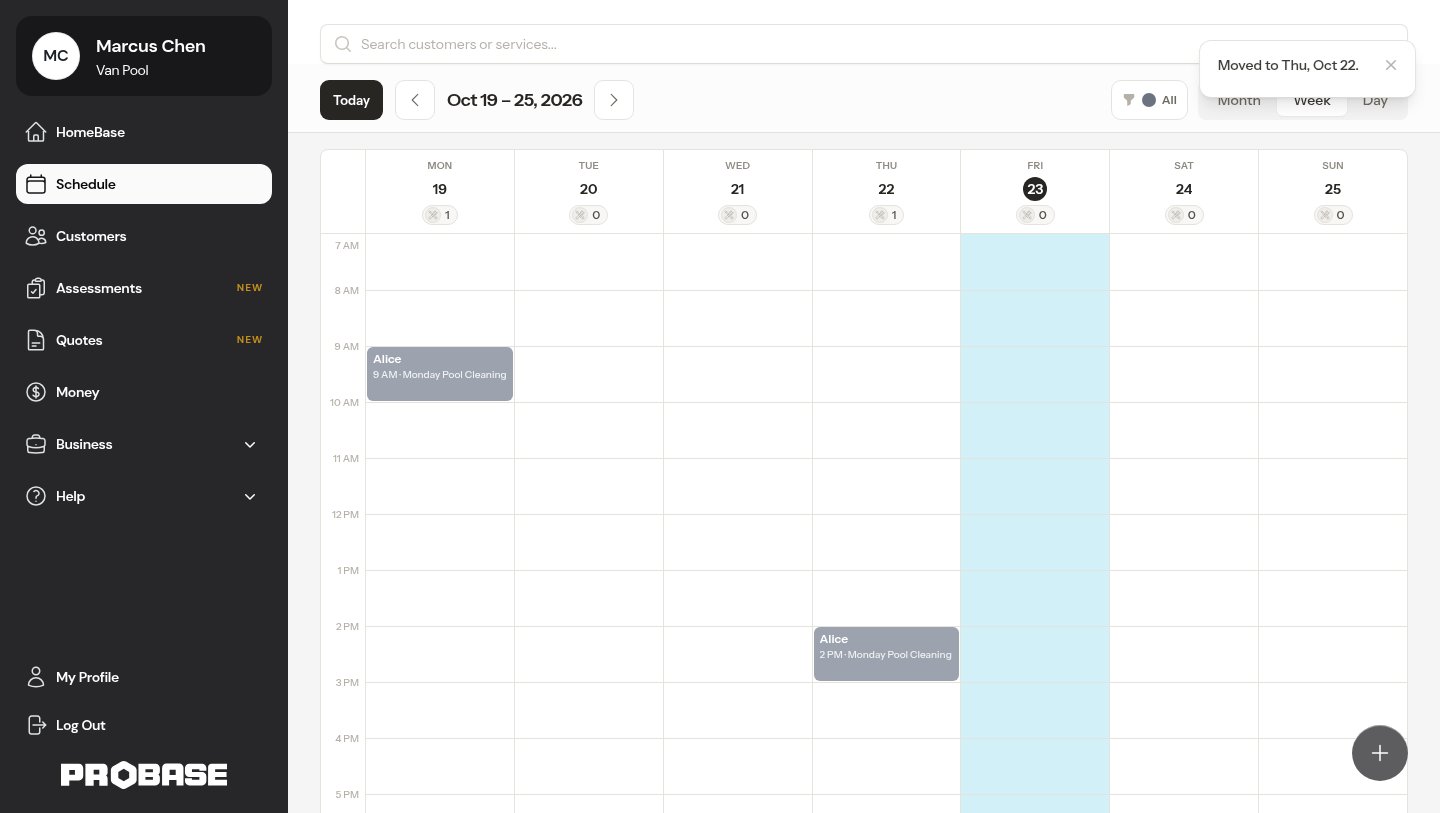
- Move visit reschedules it and confirms with “Moved to Thu, Sep 3.”
-
Keep it where it is writes nothing and the box springs back.
What you can and can’t drag
- Only scheduled visits drag. Completed, cancelled and rescheduled boxes stay put, and so do non-service stops.
- If the day is busy enough that the week grid has collapsed its visits into a +N more cluster, open the cluster and work from the visit itself.
- A visit you’re not allowed to reschedule doesn’t drag either. See Roles and permissions.
- Marketplace visits can’t be moved this way — the date belongs to the marketplace. ProBase refuses with “Reschedule this job in the LawnStarter app.” See Marketplace jobs.
- Dropping a visit back where it started changes nothing and asks nothing.
Dropping a visit on a day the crew doesn’t work asks the work-day question first — “Tuesday isn’t a working day for this crew. Schedule it anyway?” — before it asks you to confirm the move. See Scheduling on a day the crew doesn’t work.
Dragging is an accelerator for the mouse, not the only route. On a phone or tablet, open the visit and use ⋯ More → Reschedule as above.
Every move stays in the history
A drag is a real reschedule, so it leaves the same trail: the old visit is marked Rescheduled, a new Scheduled visit appears on the new day, and charges and notes come along. Drag a visit to Friday and back again and you’ll have two rescheduled records and one live visit — the full story of what was booked.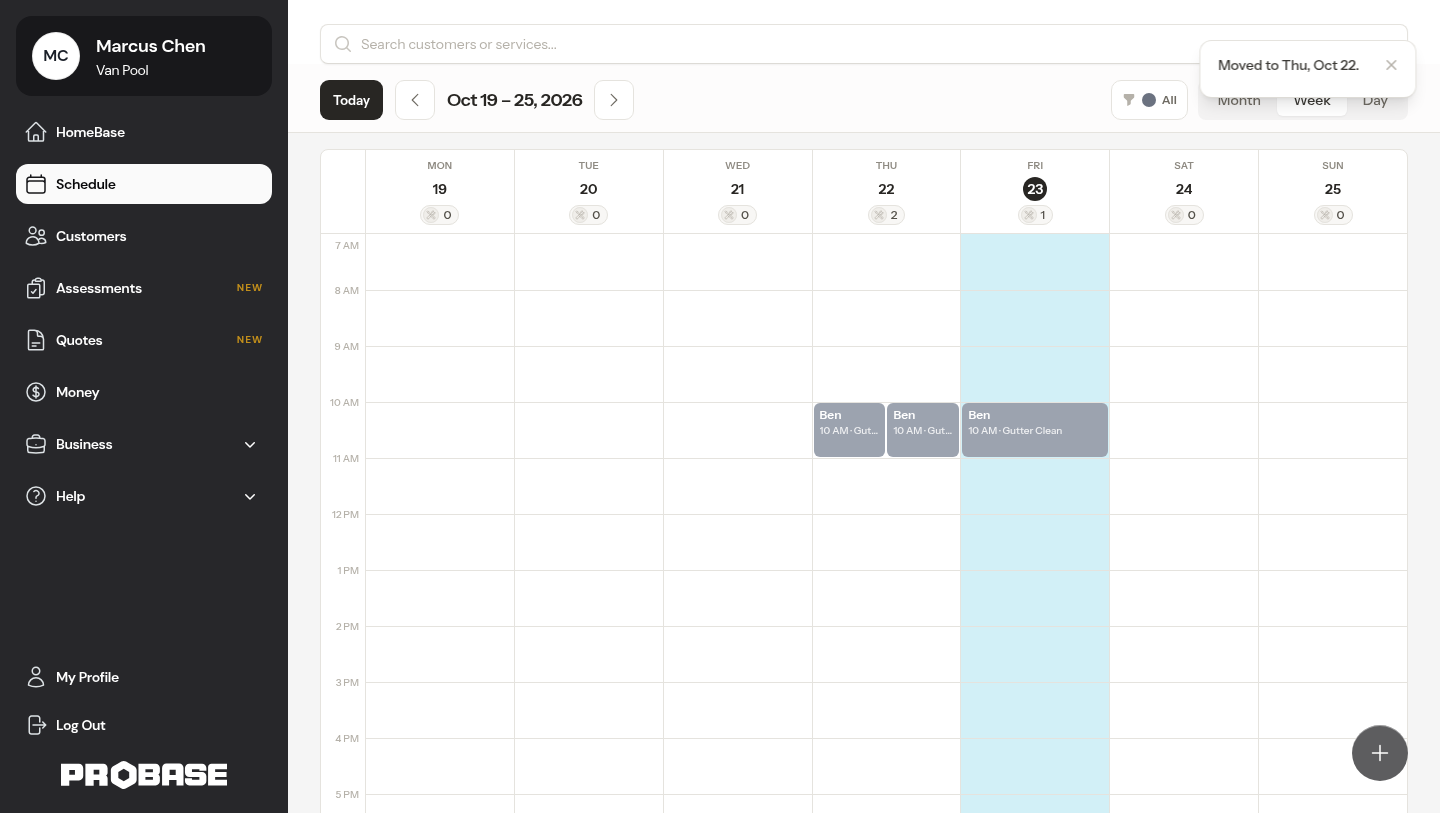
What happens when you reschedule
When you reschedule an appointment:- The original appointment status changes to Rescheduled
- The reason you entered is saved on the original appointment
- A new Scheduled appointment is created for the new date and time
- Any charges on the original appointment are moved to the new appointment
- Any notes attached to the original appointment are moved to the new appointment
- Any checklist answers and photos you’d already saved on an unfinished checklist come along too, so you pick up where you left off on the new date
- Both appointments remain in the history on the service details page
If someone still has the old visit open on another phone and saves a checklist answer or photo after it was moved, ProBase doesn’t save it on the old visit. Instead it reopens that visit, which now shows where the work went, so they can carry on from the new visit. The same happens on a visit that was cancelled.
Viewing rescheduled appointments
Rescheduled appointments appear with a “Rescheduled” status badge (orange) in the calendar and on the service details page. Open one and its Visit tab leads with where the work went:- Moved to [date] — a row you can tap to open the visit that replaced it
- The reason you typed when rescheduling, or No reason was recorded. if you left it blank
- Rescheduled by [name] · [date] — who moved it and when
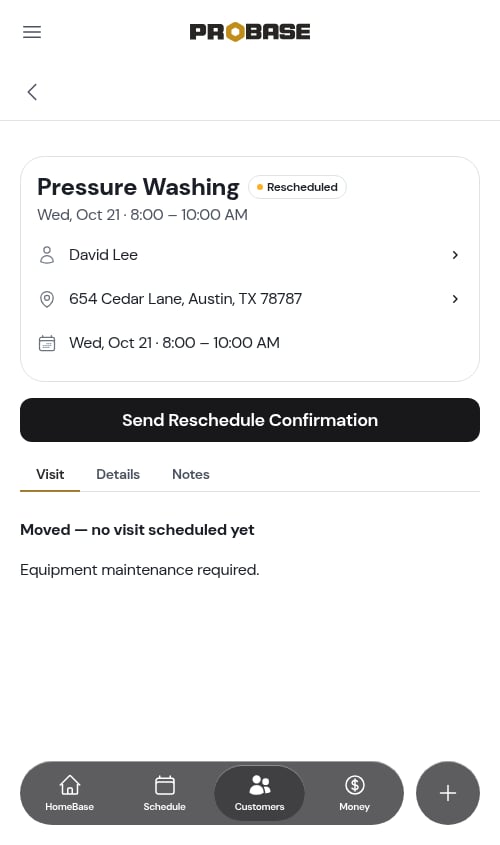
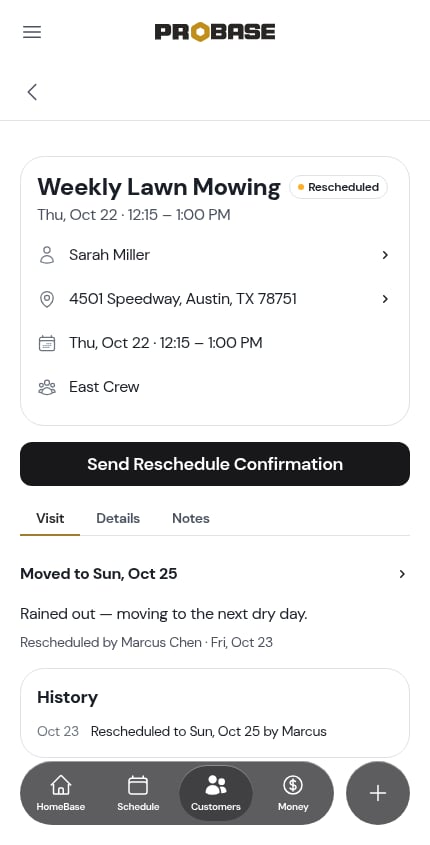
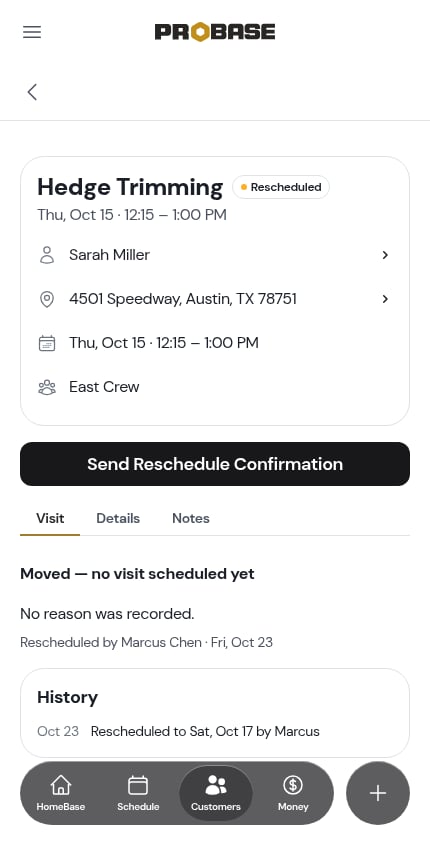
Visits rescheduled before ProBase started logging who moved them keep the lead and the reason, but no Rescheduled by line — there’s nothing recorded to show.
Sending a reschedule confirmation
When you open a rescheduled visit, its action row holds a single Send Reschedule Confirmation button. Use it to text the customer the details of the new visit that was created when you rescheduled.1
Open the rescheduled appointment
From the calendar or the service details page, click the rescheduled appointment (the one with the orange “Rescheduled” badge — not the new one).
2
Tap Send Reschedule Confirmation
The button opens a pre-filled SMS modal. The message references the next scheduled appointment linked to the same service — including the day of the week, date, start and end time, and the property address. If no follow-up appointment exists yet, the message simply notes that the appointment has been rescheduled and that you’ll follow up with the new date.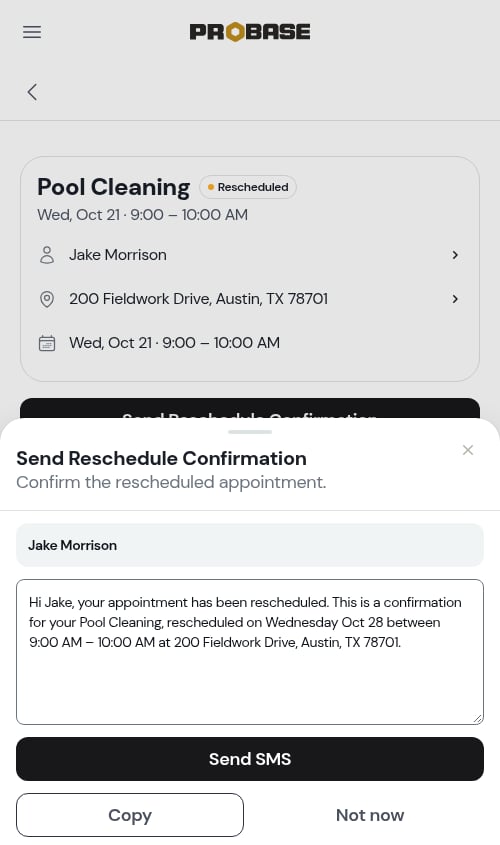
3
Review and send
Edit the message if you need to add context, then tap Send text (ProBase sends it from its own number) or Send SMS (your phone’s messaging app opens), depending on your account — see Texting your customers. The text goes to the customer’s phone number on file.
Customers don’t get an automatic notification when you reschedule. Sending the confirmation is what lets them know about the new date and time.
If the visit isn’t happening at all
There’s no Skip any more — cancelling a visit is the one way to call one off, and it asks what should happen to the charges and notes already sitting on it. See Cancelling a visit.Visits marked Skipped on older jobs still show correctly wherever they appear — that status is part of your history.
Next steps
- Cancelling a visit — when the visit isn’t happening
- The visit page — everything else the ⋯ More sheet holds
- How recurring visits are scheduled — what rescheduling does to the rest of the chain