Overview
The daily schedule view shows you the day’s work at a glance. It displays all appointments for the selected date with progress tracking, customer information, and easy access to appointment details. This view is optimized for mobile use in the field.Access the daily schedule
Click Schedule in the sidebar to view today’s appointments. The Day view is the default — if you’ve switched to the Week or Month view, tap Day in the view picker at the top of the page to return to it.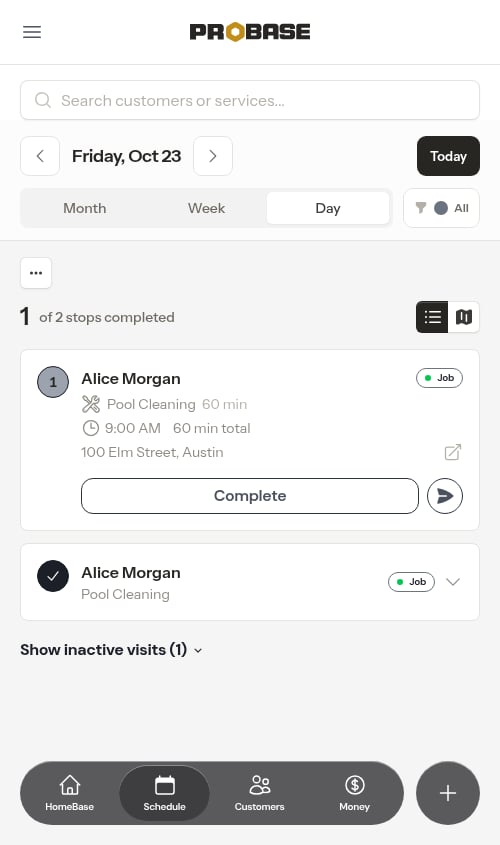
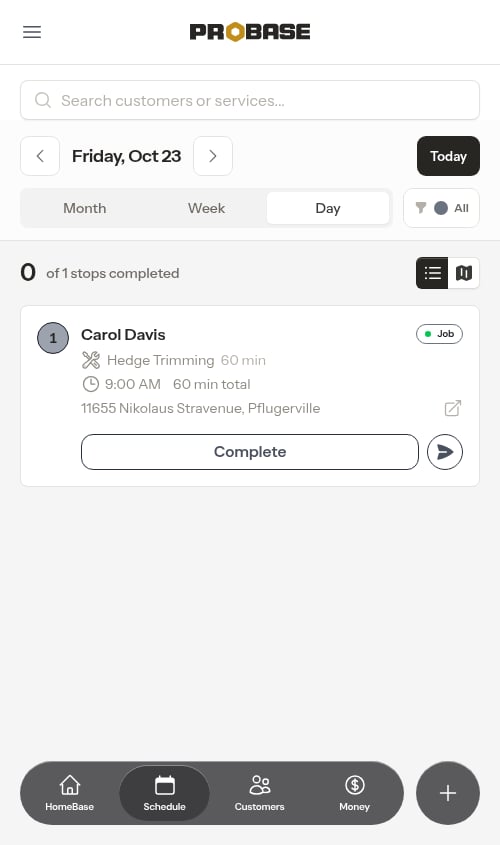
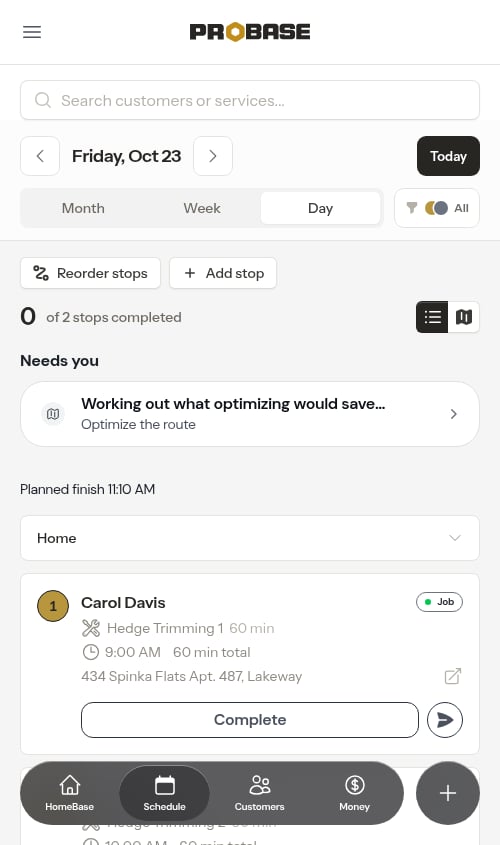
- Progress counter (e.g., “1 of 3 stops completed”)
- All appointments for the selected date
- Customer names and service information
- Appointment times and statuses
- Crew assignments with color coding
View modes
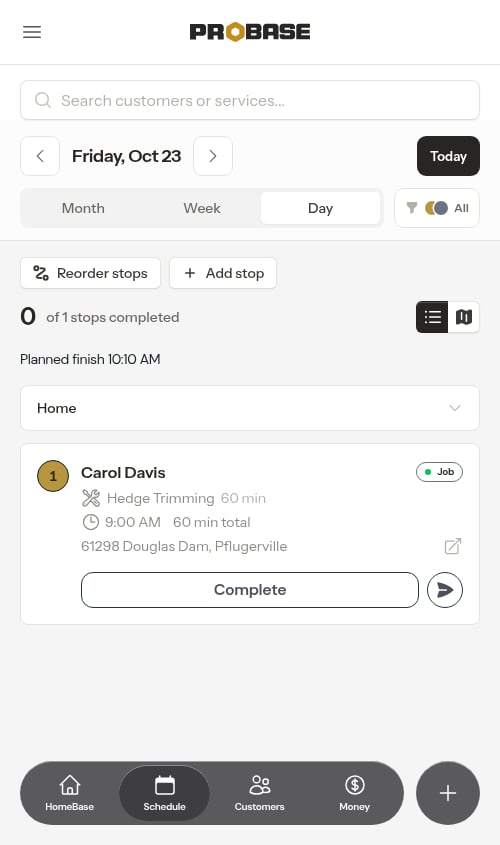
On a phone or other narrow screen, the daily schedule shows one panel at a time and gives you a toggle to switch between two view modes. On a wider desktop screen, both panels appear side by side at once — see Desktop layout below. The two view modes are:Card view (default)
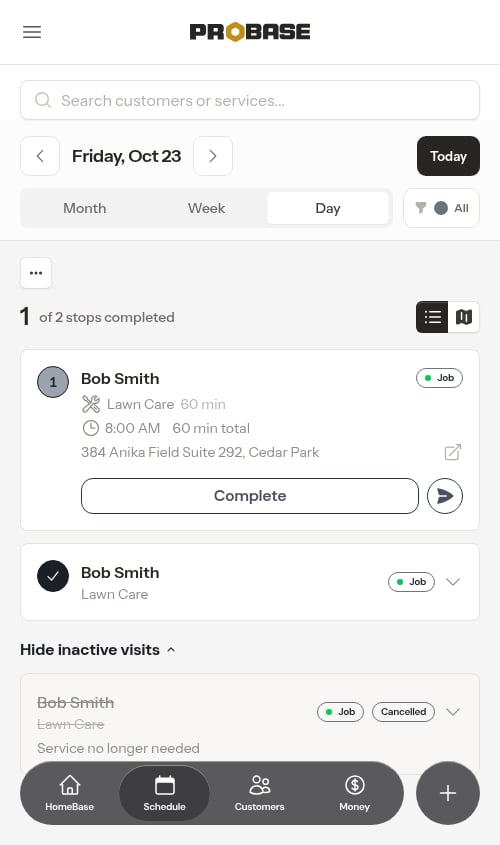
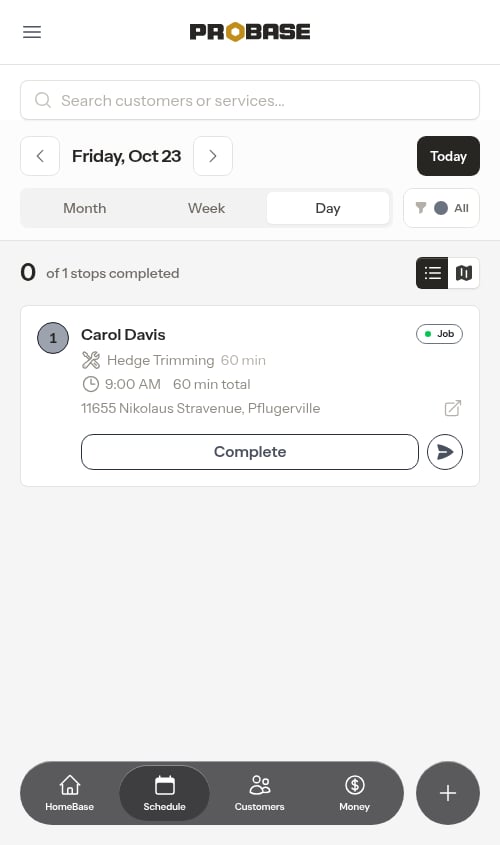
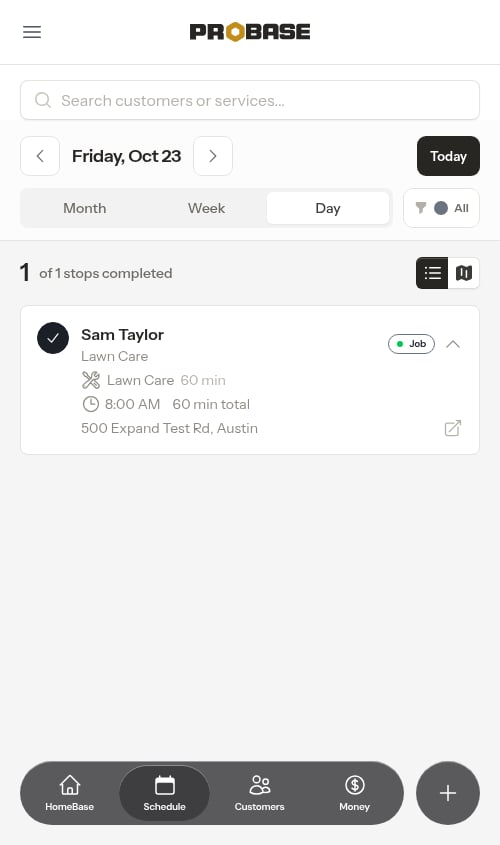
Shows appointments as cards with customer names, service details, addresses, and times. Scheduled appointments show as full cards you can tap anywhere to go to the appointment detail page. Each card displays:- The job name, with any charges added to this visit listed below it — each one a type icon, its name, and its price
- Total appointment duration
- Scheduled start time
- Property address
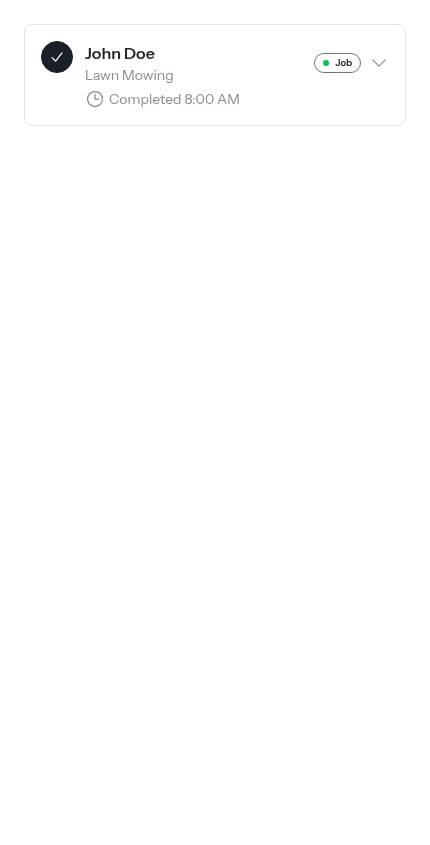
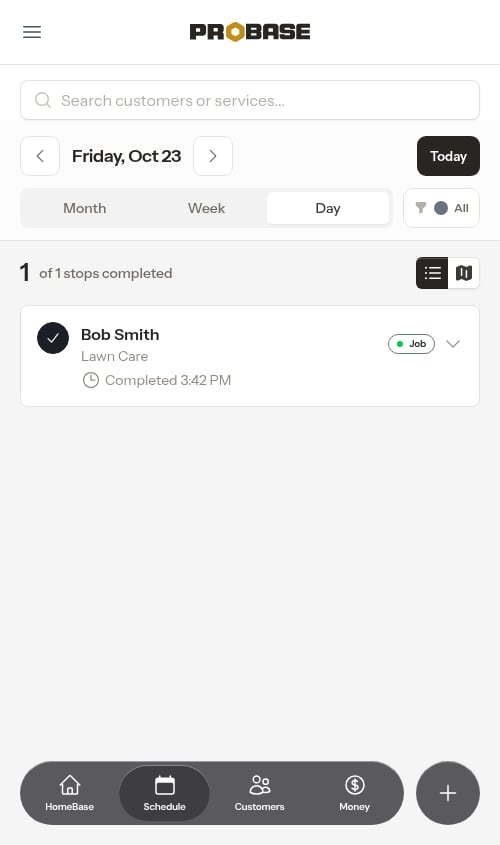
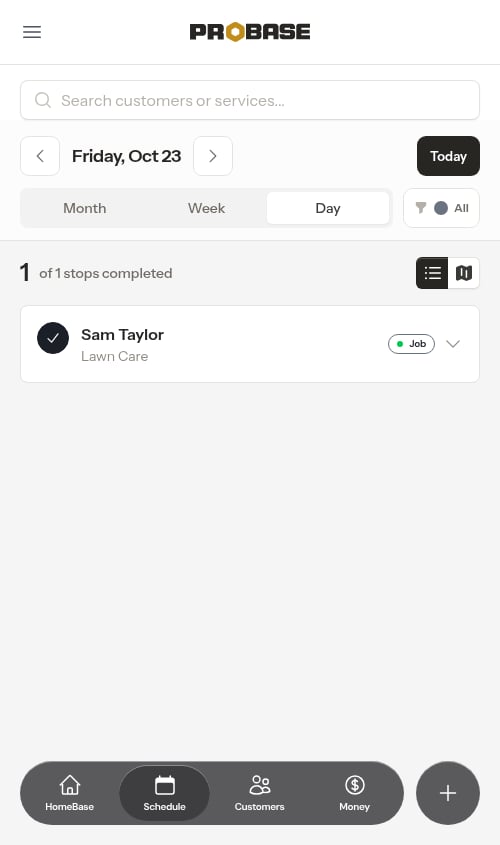
- Tap the chevron to expand the card and see full details — the time, the duration, the address, any charges — without navigating away from the schedule
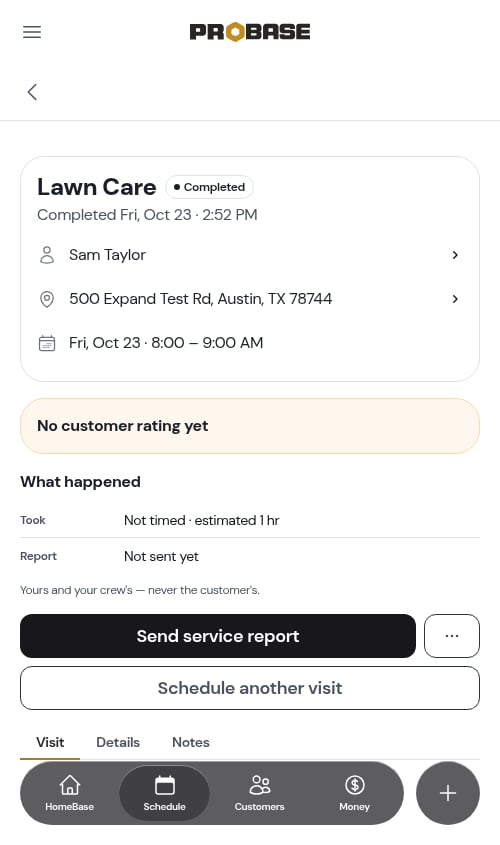
- Tap the customer name or service name to open the visit page. That link works whether the card is collapsed or expanded
Stop numbers
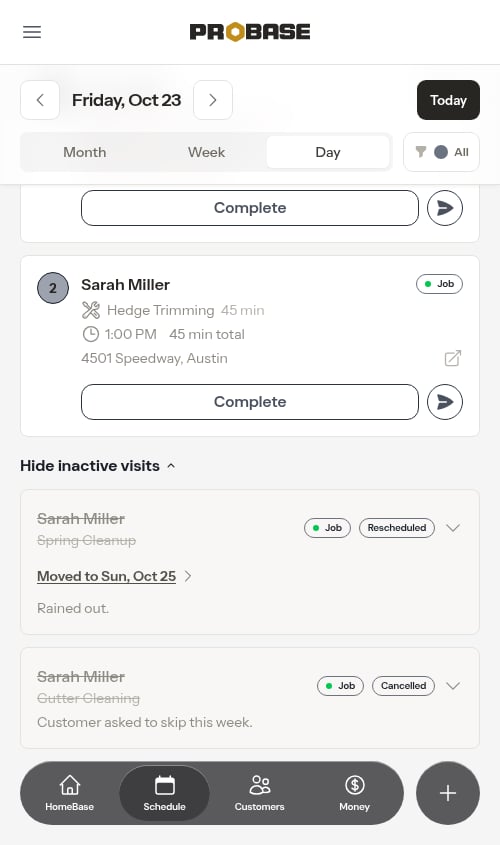
Every appointment card carries a number showing where that visit falls in its crew’s day. The number sits in a single circle filled with the crew’s colour — where the stop sits in the day and whether it’s done are the same circle, so a completed stop shows the check instead of the number, and a cancelled or rescheduled visit shows no circle at all because it isn’t a stop.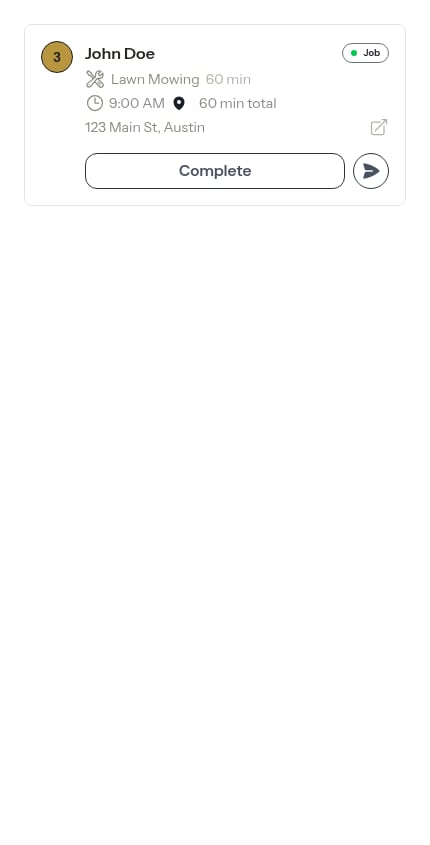
Stop numbers are a Day view feature — they follow one day’s running order, so the Week view doesn’t show them.
Map view
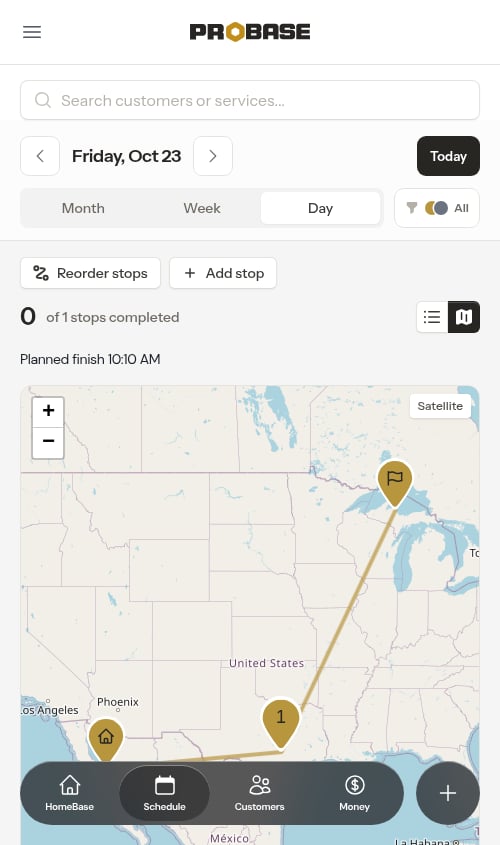
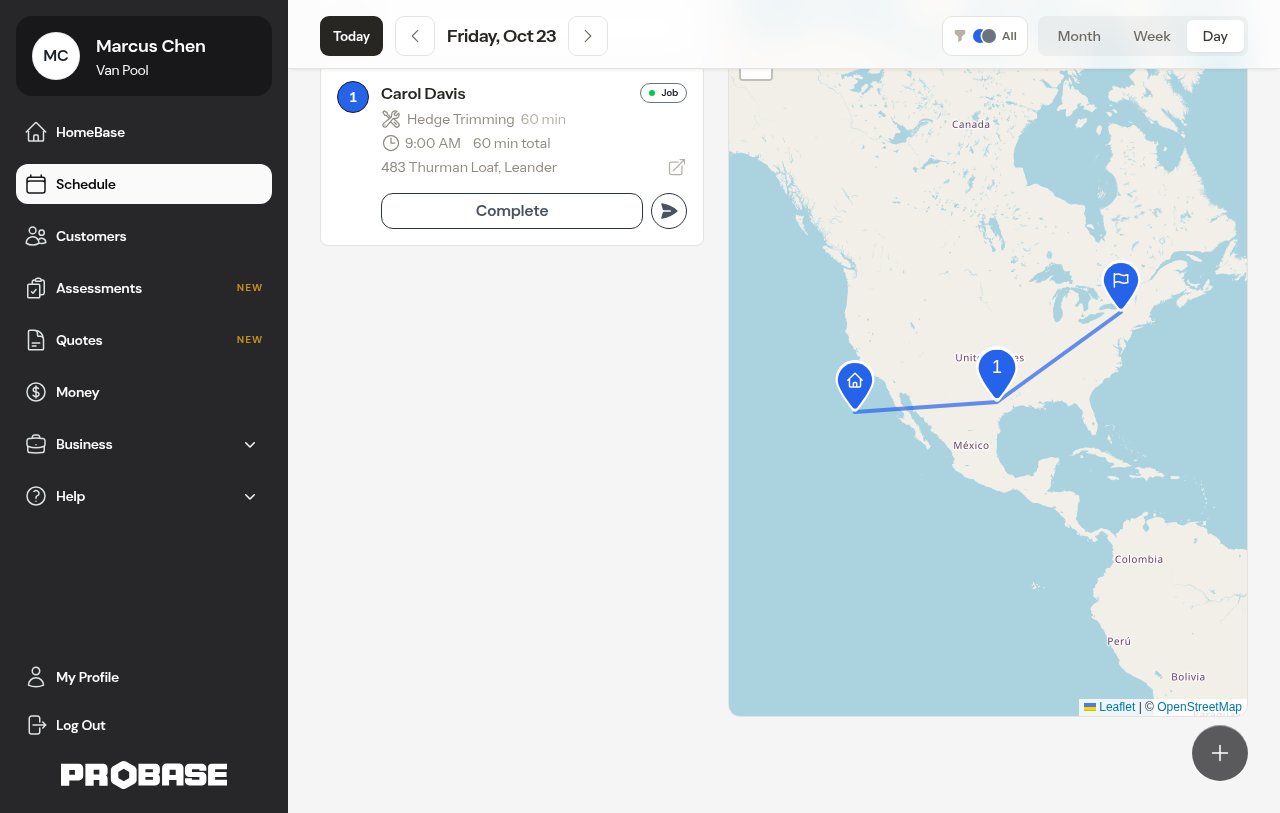
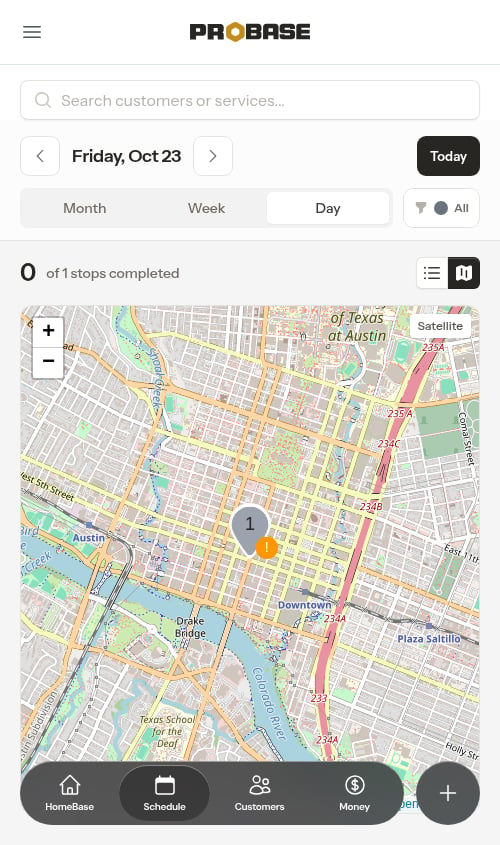
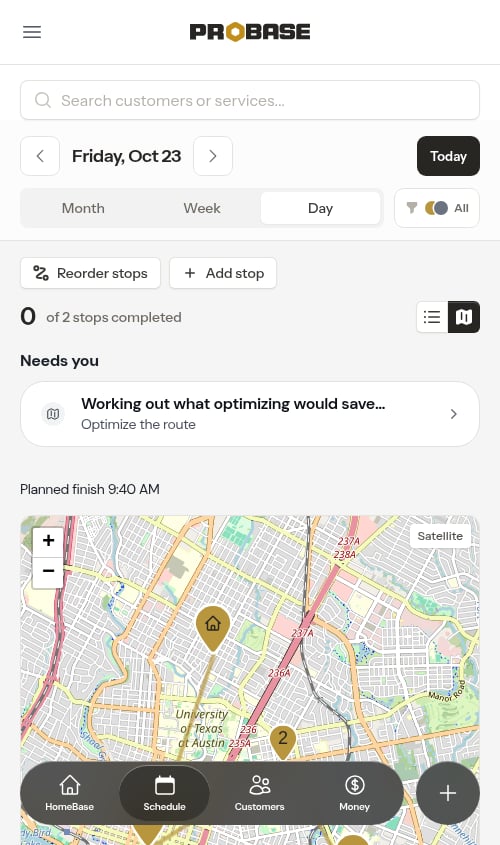
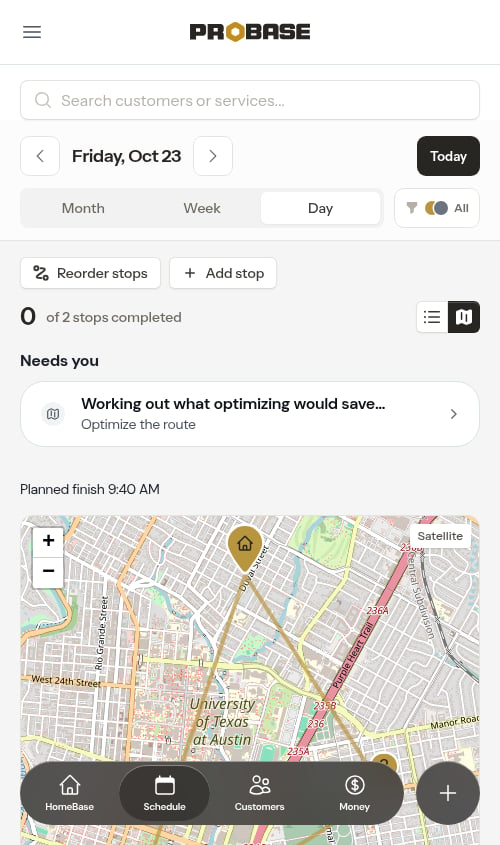
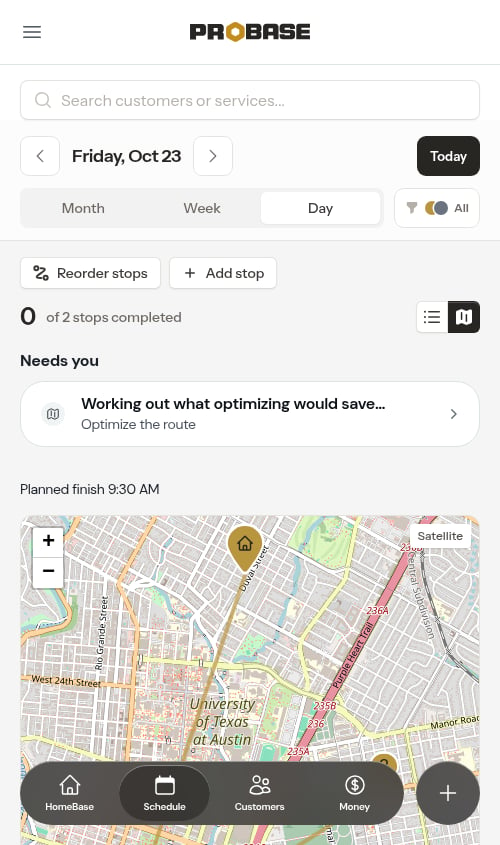
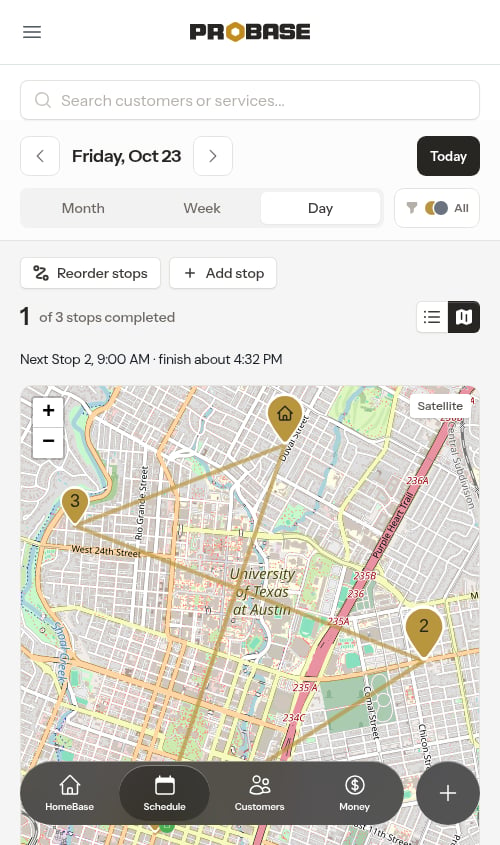
Shows all appointments plotted on a full-color, interactive map. The map displays:- Appointment locations as numbered pins in the crew’s color, numbered from 1 in the order that crew works the day — the same numbers shown on the cards in the card view. Each crew’s pins are numbered independently, so with several crews out you’ll see more than one pin 1 on the map.
- Any non-service stops (a lunch break, a supply run) as numbered pins too, in the same crew sequence as the jobs around them
- A small status badge on the corner of a pin when a stop is completed (green checkmark), cancelled (red X), or not yet assigned to a crew (amber)
- Where each crew starts and finishes, drawn as a home pin and a flag pin (one home pin alone when the crew ends where it starts, and nothing at the end when there’s no end address). When no crew filter is applied, every crew with a start location is drawn; when a crew is filtered, only that crew’s pins show
- The next stop — the first one on each crew’s route that isn’t done yet — drawn larger than the rest, so you can pick it out at a glance
- The driving path between the day’s stops, drawn as a line in the crew’s color
- Visual overview of the day’s route geography
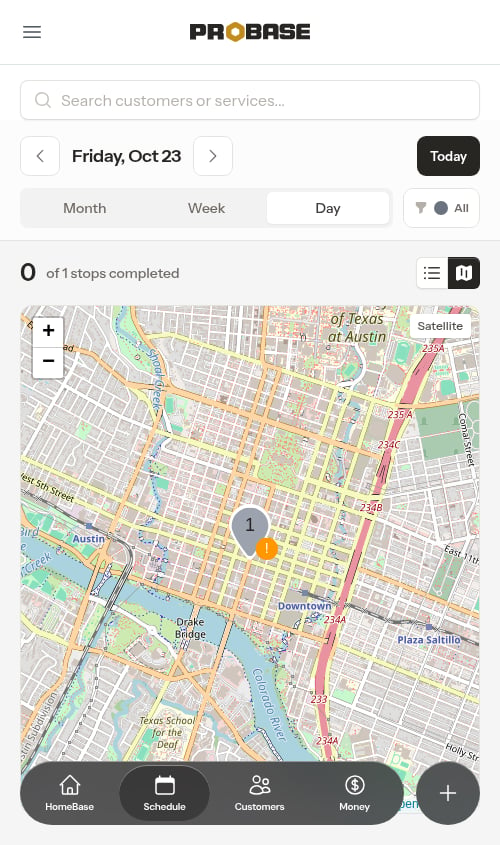
Street map or satellite
A small button in the corner of the map switches the background between the full-color street map and Satellite imagery. The button always names the view you’d switch to, so it reads Satellite while you’re looking at the street map, and Map once you’ve switched over. Until you press it, the map picks for you as you zoom: zoomed out to see the whole day it stays on the street map, where road names and neighbourhoods are easiest to read, and it flips to satellite once you zoom right in on a single stop. Pressing the button hands the choice to you and stops the automatic switching for that map.When the drive path can’t be shown
Sometimes the routing service can’t work out a driving path between the day’s stops. This happens when a stop’s address landed somewhere the road network can’t reach, and it comes in three flavours:- The stops can’t be connected to each other — for example one pin sits on an island, across a body of water, or somewhere only a ferry serves.
- A stop has no road anywhere near it — a mis-typed address, a pin dropped in the middle of a lake or an open field, or a very large rural parcel whose centre point sits far from the nearest street.
- The drive between two stops is impossibly long — an address that geocoded to the wrong country or continent (usually a typo in the street or city, or a missing state) puts thousands of miles between two of the day’s stops, which is further than the routing service will plan.
Route could not be computed between some of these stops, so the drive path isn’t shown.
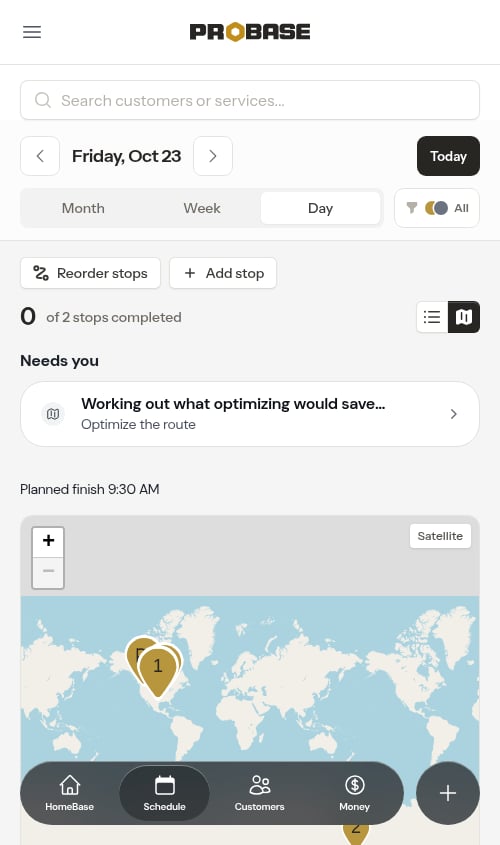
Desktop layout
On a wider desktop screen, the day view splits into two columns instead of one. The stop list stays on the left, and the route map fills the remaining space on the right. Because both panels are visible at the same time, the card/map toggle is hidden — there’s nothing to switch between.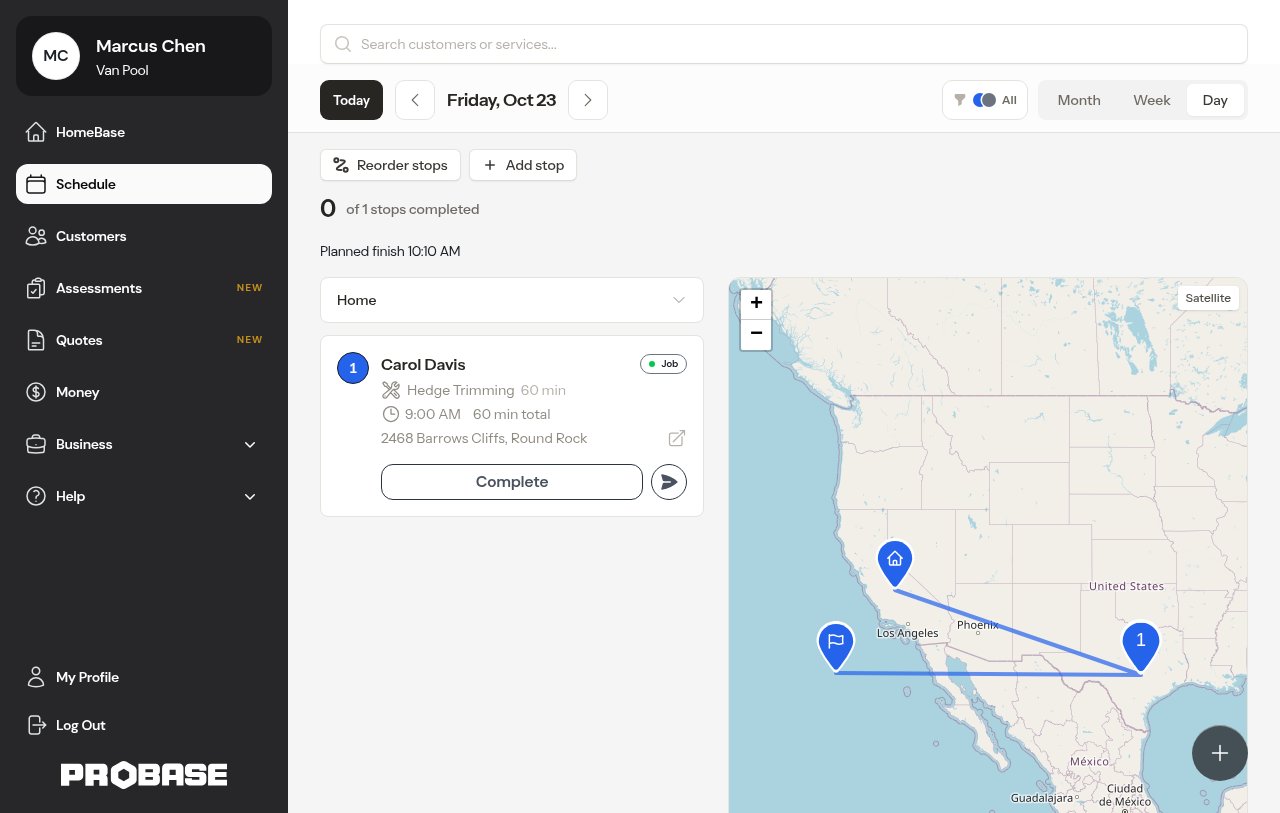
Filter appointments
Filter by crew
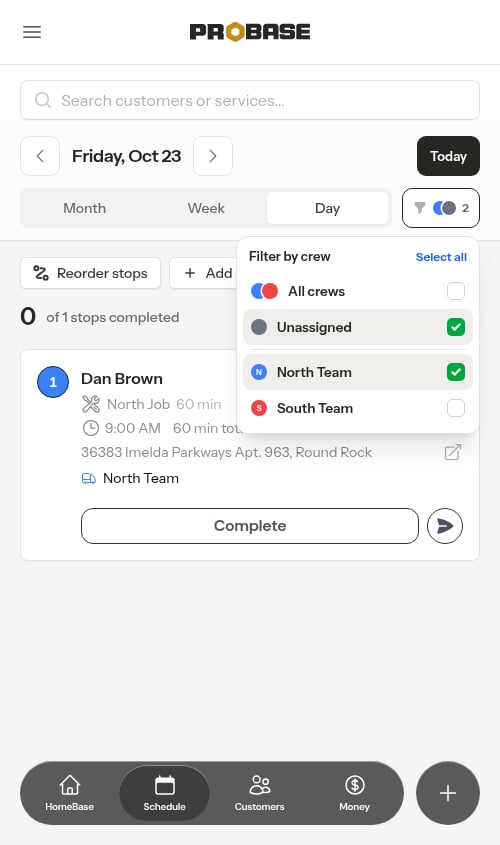
Tap the crew filter (the funnel icon with colored circles) to choose which crews appear. It’s a multi-select list, so you can show one crew, a few, or all of them — see Filter by crew for the full rundown. When you narrow it to a single crew that has a configured start location, a Home card appears at the top of the day’s stops in the card view, and start/end markers appear on the map view. If your account only has one crew, the filter is applied automatically — the Home card shows up without you having to choose a crew first.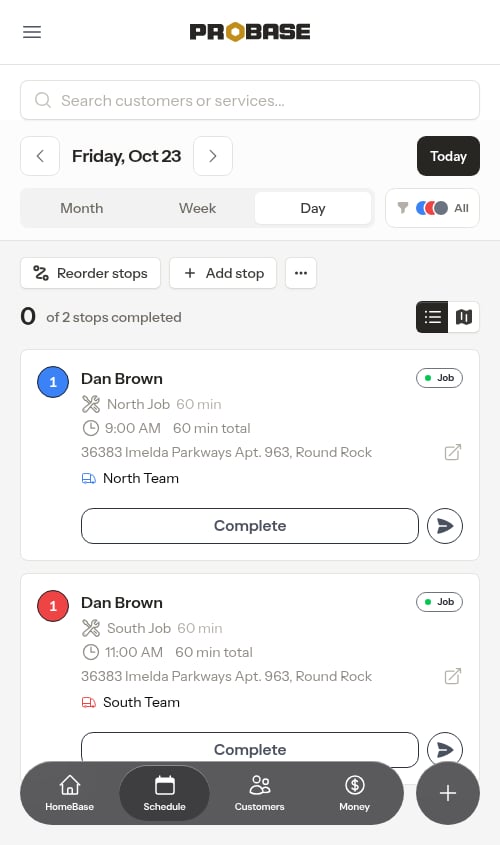
Search
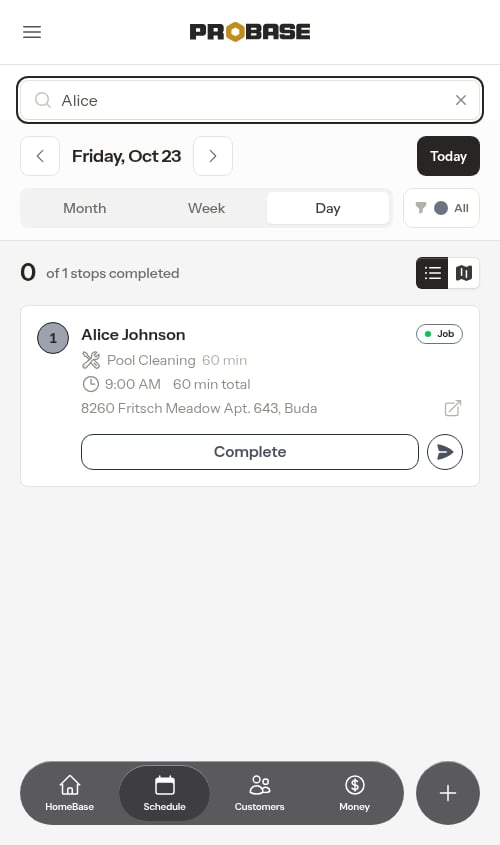
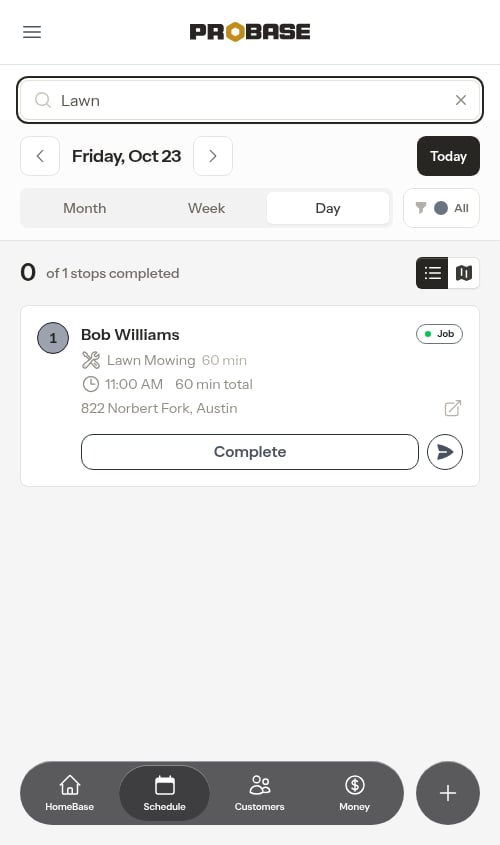
Type in the search box to filter appointments by:- Customer name
- Service name
View appointment details
Tap any scheduled appointment card to open the appointment detail page. For completed, cancelled, or rescheduled appointments, tap the chevron to expand the card first, then tap the customer name or service name to navigate to the detail page. From the appointment detail page you can:- See full customer and property information
- View service details and frequency
- Check scheduled times and assigned crew
- See appointment status and history
- Complete, reschedule, or cancel the appointment
- Add notes or view completion records
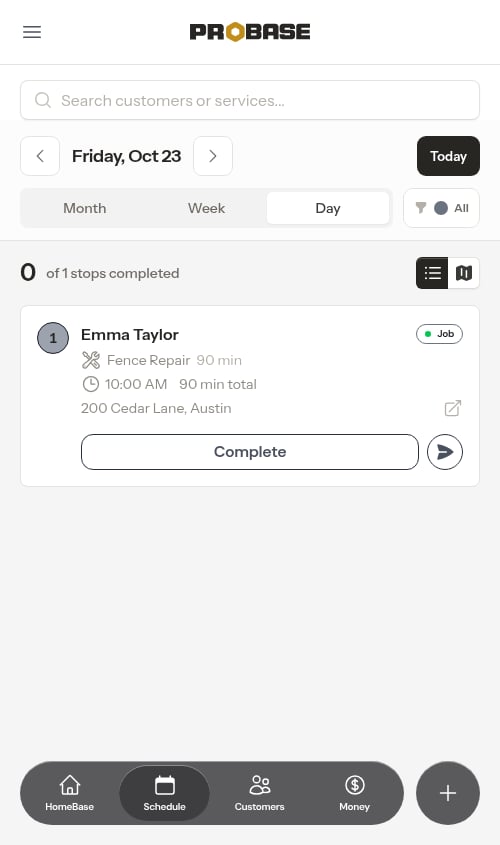
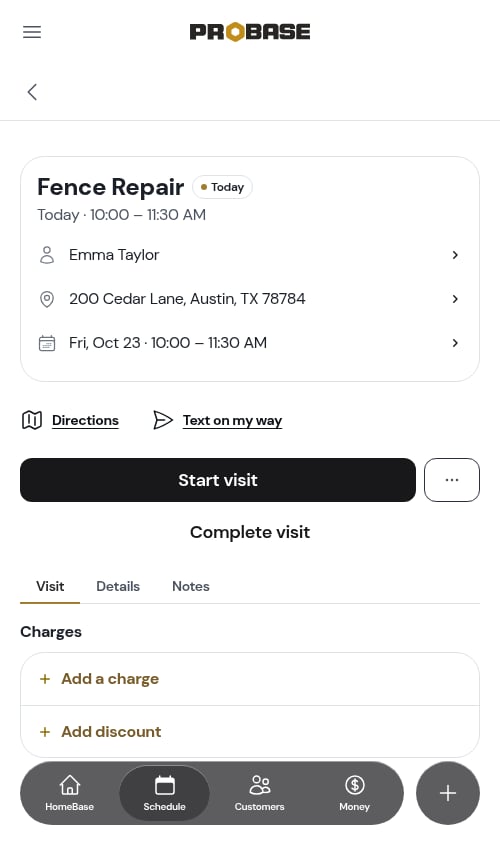
Tapping the back arrow on the appointment detail page returns you to the exact schedule view you came from — the same date, view mode, crew filter, and search. You can dip into a job and come straight back to where you left off without re-applying anything.
Texting the customer you’re on your way
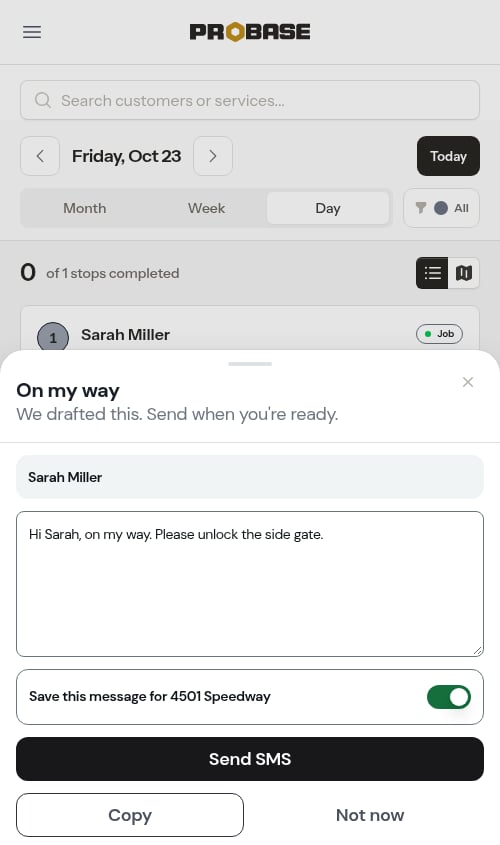
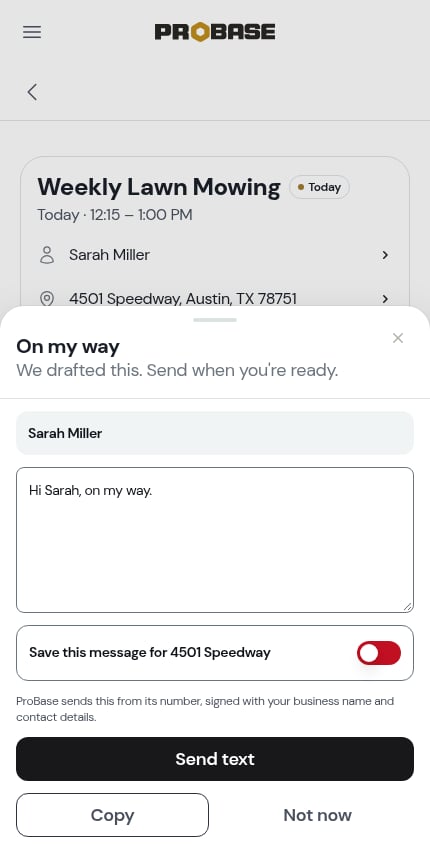
Every stop card carries a Text on my way button, and so does the top of a visit that hasn’t been started yet. It never sends anything by itself — it opens a sheet with the message already drafted so you can read it before it goes.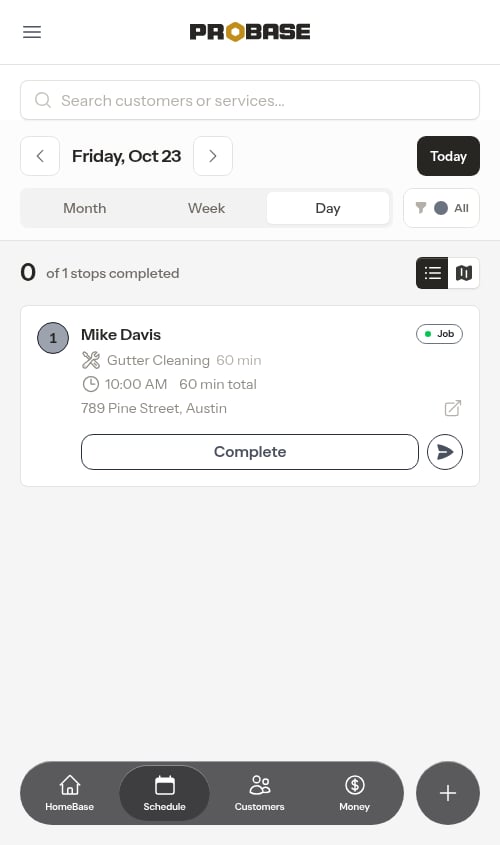
- The customer’s name, so you can see who it’s going to
- The message itself, in a box you can edit before sending. ProBase drafts “Hi [first name], on my way.” unless you’ve saved your own wording for this property
- Save this message for [address] — a switch that remembers what’s in the box for this property
- Send text or Send SMS, depending on your account. Send text sends the message from ProBase’s own number, led by your business name; Send SMS hands the text to your phone’s messaging app with the number and message filled in. See Texting your customers. Copy puts the message on your clipboard instead — handy on a computer, and it’s what you get if the customer has no phone number on file. Not now closes the sheet
Saving your own wording
Most crews say the same thing every time, so you can write it once. Edit the message, turn Save this message for [address] on, then tap Send text (or Send SMS) or Copy — the wording is saved against that property as you send. The next time anyone on your team taps Text on my way for that property, the box opens with your wording instead of the default.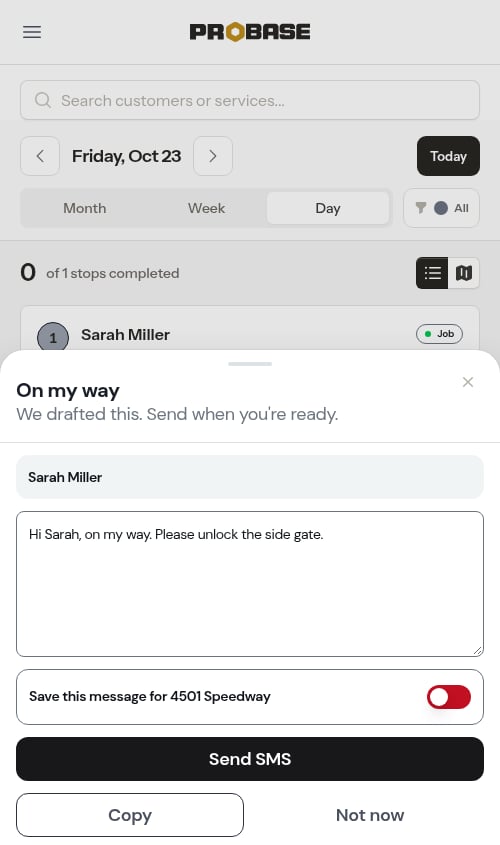
The switch is off every time the sheet opens — a one-off tweak for today’s visit (“running 20 minutes late”) doesn’t overwrite what you saved. To go back to the default wording, clear the box, turn the switch on, and send.
The message is saved per property, not per customer, so a customer with two addresses can have different wording on each.
Quick actions
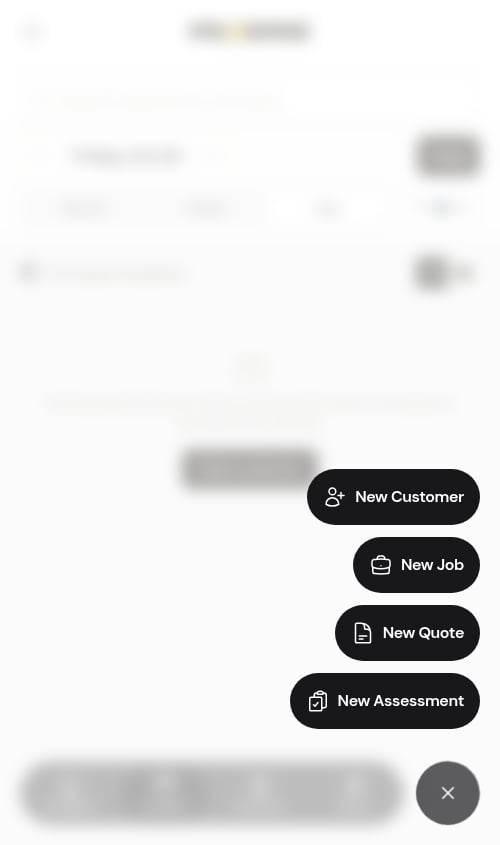
Floating Action Button (FAB)
The FAB in the bottom-right corner provides quick access to common creation tasks:- New Customer - Add a new customer to your account
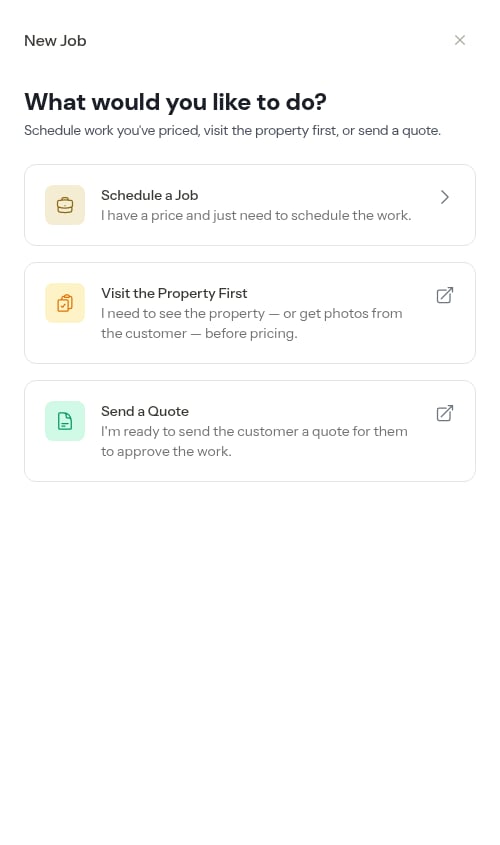
- New Job - Create a new job and optionally schedule the first appointment
- New Quote - Start a quote for a customer and property
- New Assessment - Start an assessment when you need a look at the property before you can price the work
Change the date
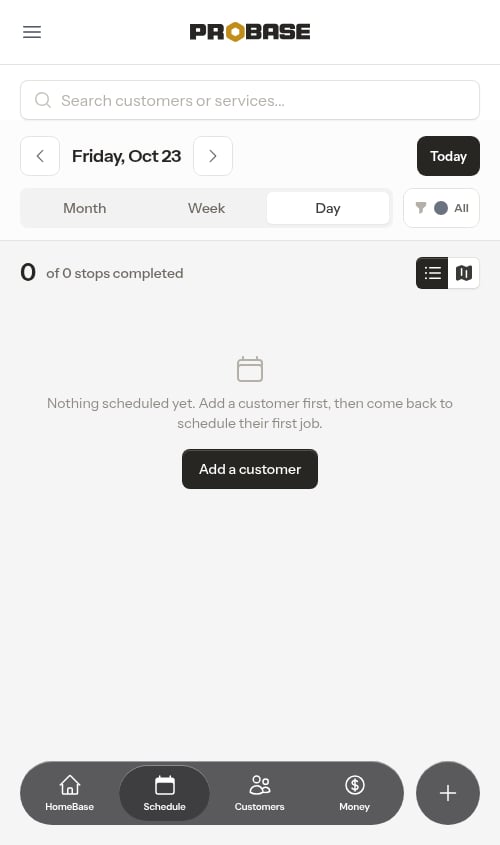
By default, the daily schedule shows today’s appointments. To view a different date, use the date picker at the top of the page to select another day. The view will update to show appointments for the selected date. If there are no appointments scheduled, you’ll see an empty state message.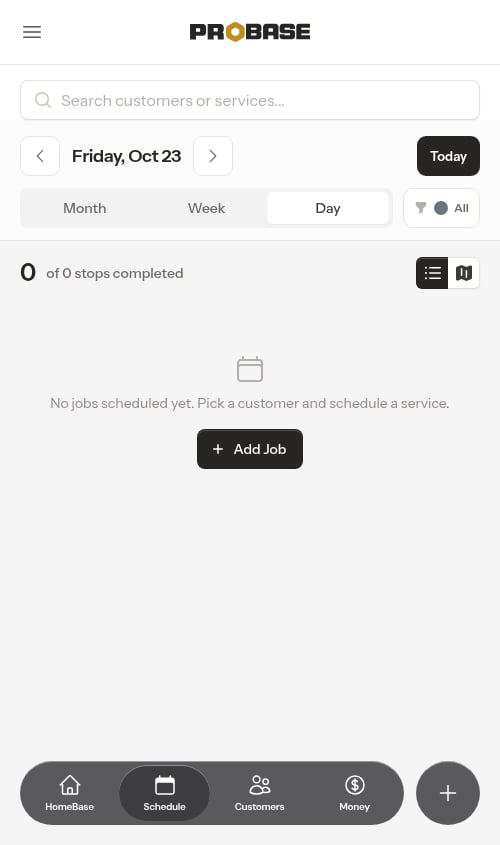
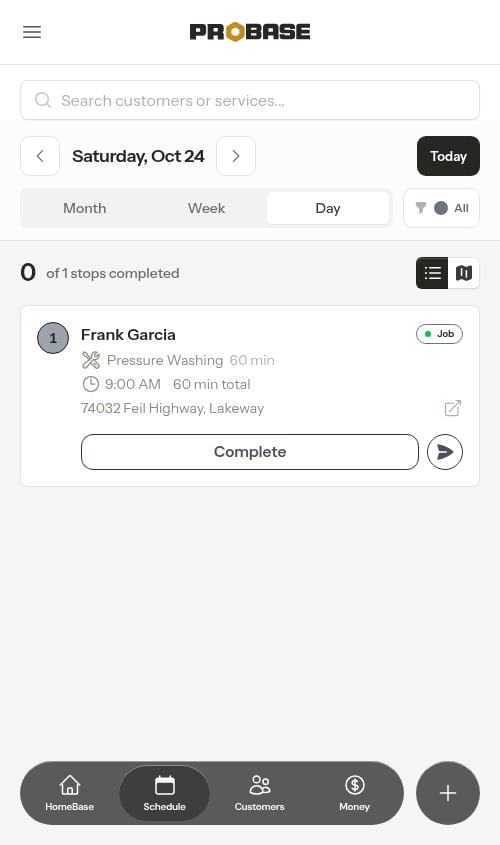
The Schedule page also remembers where you left off for the rest of the day. If you set a date, switch tabs, pick a crew, or run a search and then navigate away, returning to Schedule from the sidebar brings you right back to that same view. The next day, the page automatically resets to today with filters cleared, so you always start fresh on the current day’s work. Even if you leave the Schedule page open overnight, refreshing it the next morning snaps it back to today’s work automatically.
Progress tracking
At the top of the page, a progress counter shows how many stops have been completed out of the total scheduled for the day. This helps you track progress throughout the day and see at a glance how much work remains. The counter updates automatically as you complete appointments.What the day tells you before you start
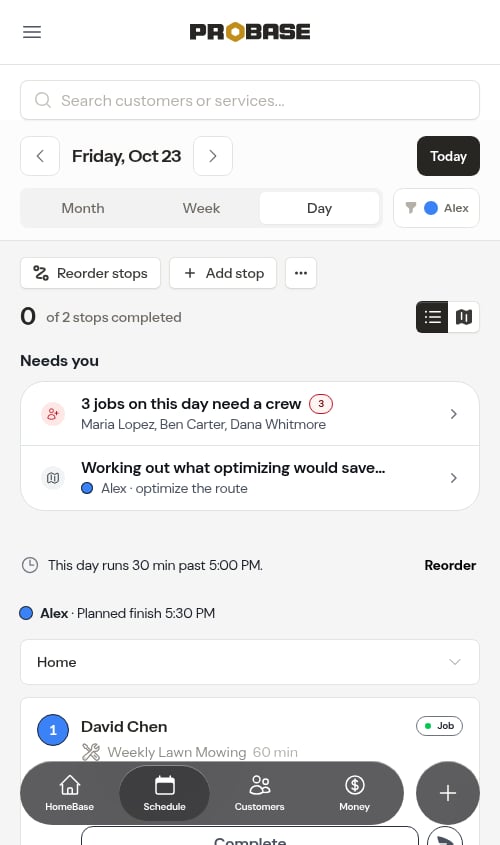
Above the stops, the Day view puts up to three things in front of you — only when they apply.Needs you
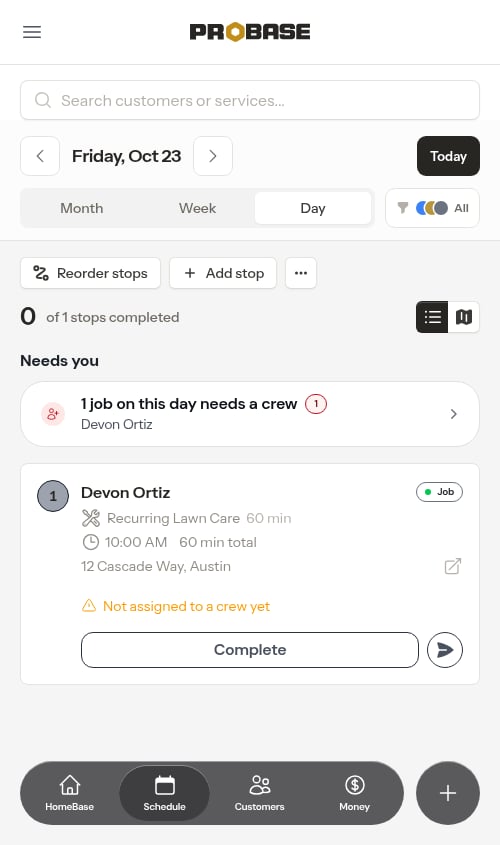
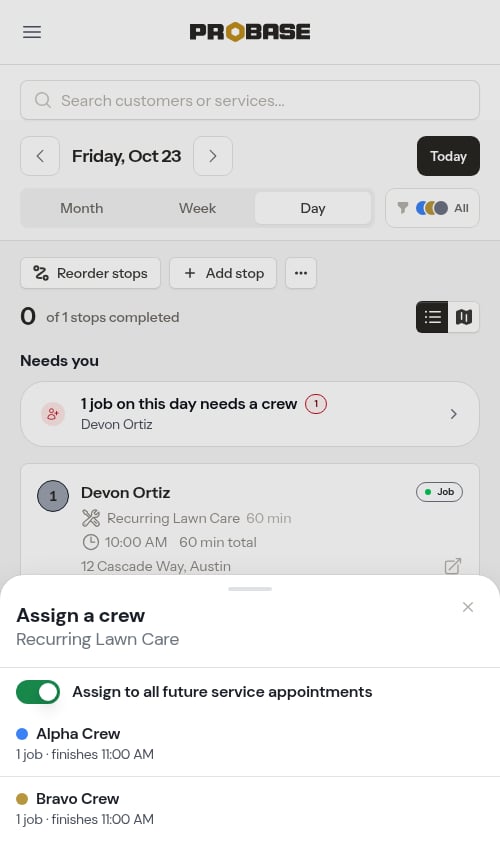
A card headed Needs you lists what’s worth fixing on the day:- Jobs with no crew — “2 jobs on this day need a crew”, with the customers named underneath and a count. Tap it to open Jobs that need a crew for this day; the back arrow returns you to the day and crew filter you left. Only on teams with more than one crew, and only for roles allowed to assign crews.
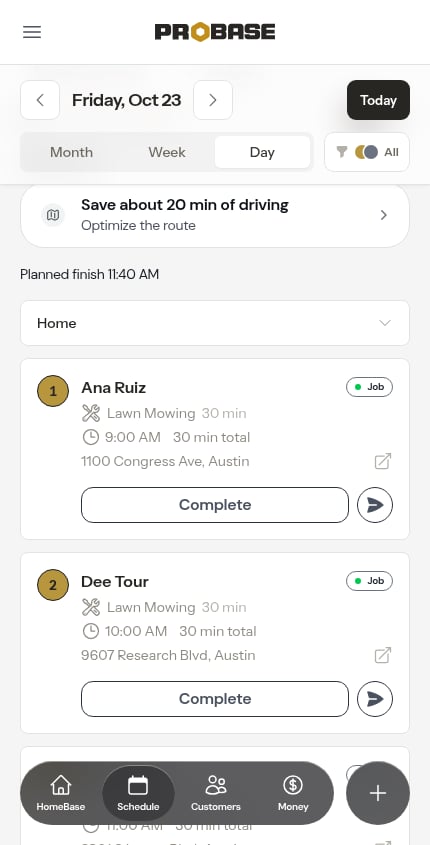
- Save about 20 min of driving — what optimizing a crew’s route would save, with Optimize the route underneath. Tap it to open the Optimize route preview for that crew on this day. While ProBase is still working the figure out the row reads “Working out what optimizing would save…”. These rows only appear before the day’s work starts, for crews with at least two stops and a starting address, and only for roles allowed to plan routes. See Plan your day.
How the day is going to go
Beneath that sits a single note about whether the crew’s day fits its hours:- Before any work starts — “This day runs 47 min past 5:00 PM.” with a verb beside it: Reorder (opens Reorder stops) or Rebalance (opens Rebalance this day) when no reordering would make the day fit.
- Once work has started — “Running about 35 min behind — last job would finish about 5:20 PM.”
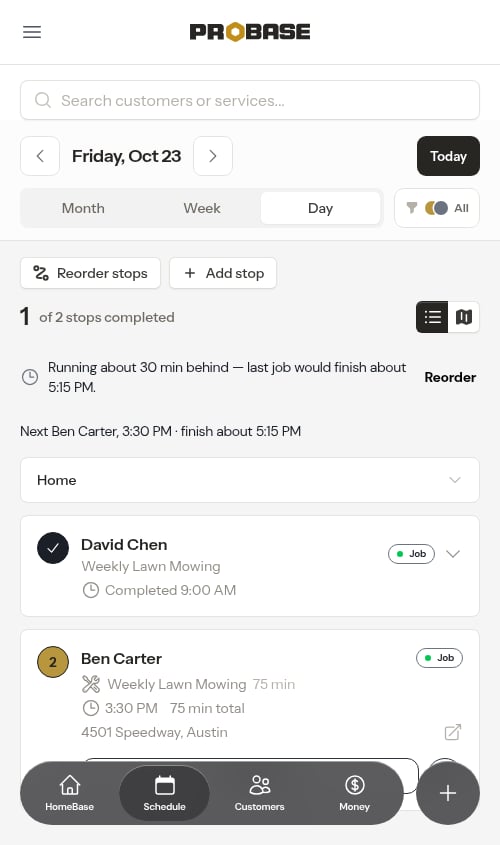
Both the note and the finish line below it are about one crew — the only crew on the team, or the crew you’ve filtered to. Looking at several crews at once, you get one finish line per crew instead, each with its colour dot and name.
The day’s finish line
Under the stop counter sits a plain line about where the day is heading: Planned finish 3:10 PM before anything is done, Next Maria Lopez, 11:20 AM · finish about 3:10 PM once work has started, and All 9 done — finished 2:47 PM. at the end. Only the header line moves — the stop cards keep their planned times.The day’s ⋯ More menu
Beside Reorder stops and Add stop sits a ⋯ button. It only appears when there’s something in it.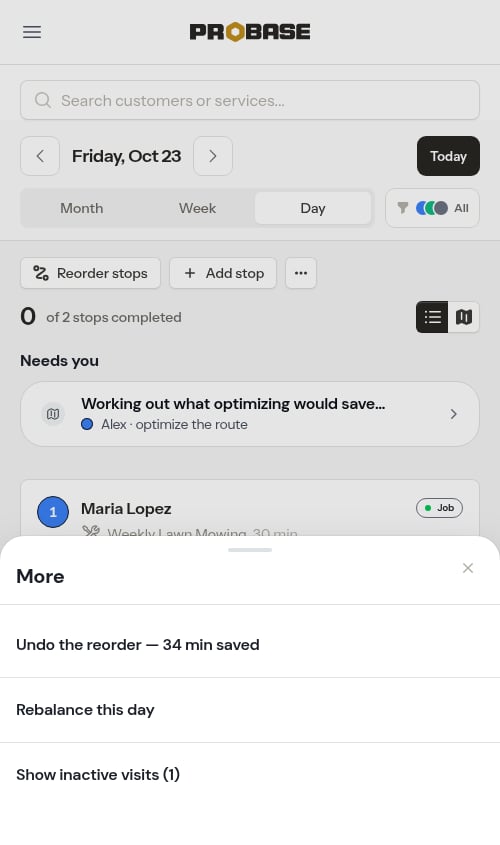
-
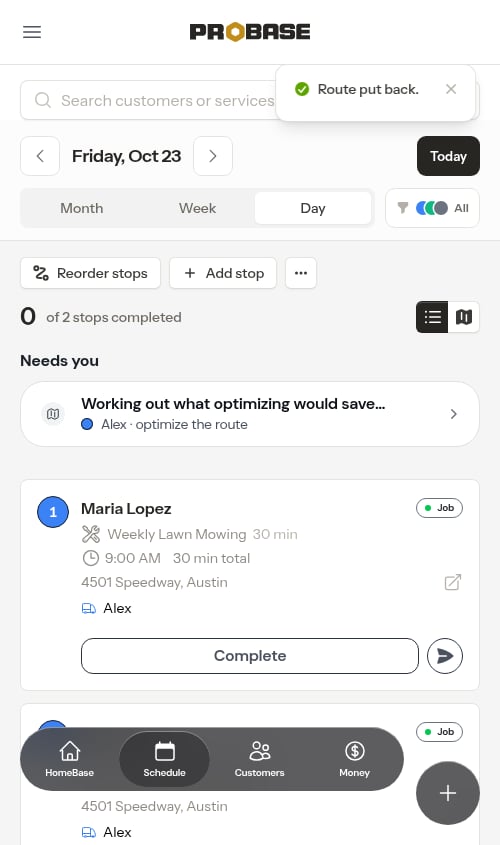
Undo the reorder — 34 min saved — puts the day back after an optimization, for as long as the undo is good (until the first stop on the day is completed, or the day passes).
- Rebalance this day — opens Rebalance this day. Multi-crew teams only.
- Show inactive visits (N) / Hide inactive visits — the same switch as the toggle at the end of the list, so it’s reachable from the map view too.
When ProBase reorders a day for you
With automatic optimization switched on, ProBase reorders days in the background — and tells you the next time you open one: “ProBase reordered this day — 22 min saved.”, or “ProBase reordered this day and moved 2 jobs to Alex — 41 min saved.” Undo sits beside the message, and stays in ⋯ More for as long as it’s good. A day is only reordered when the new order saves driving, and a time figure only appears when time was actually saved — see Background auto-optimization.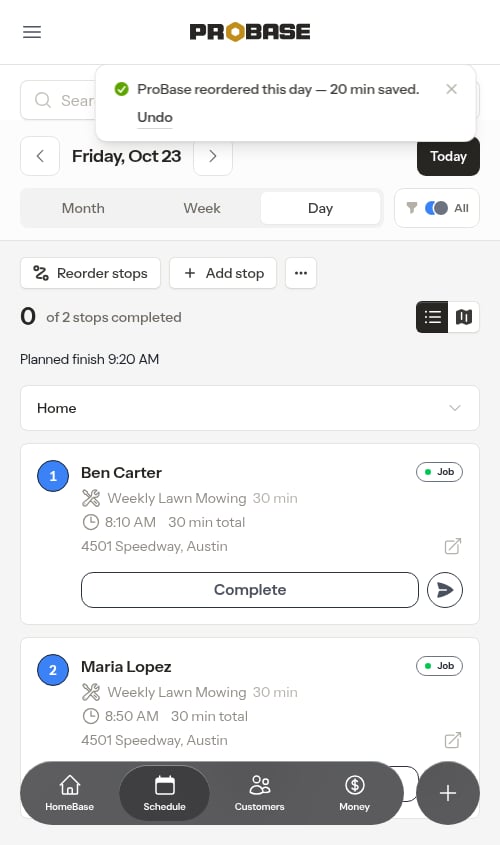
Inactive visits
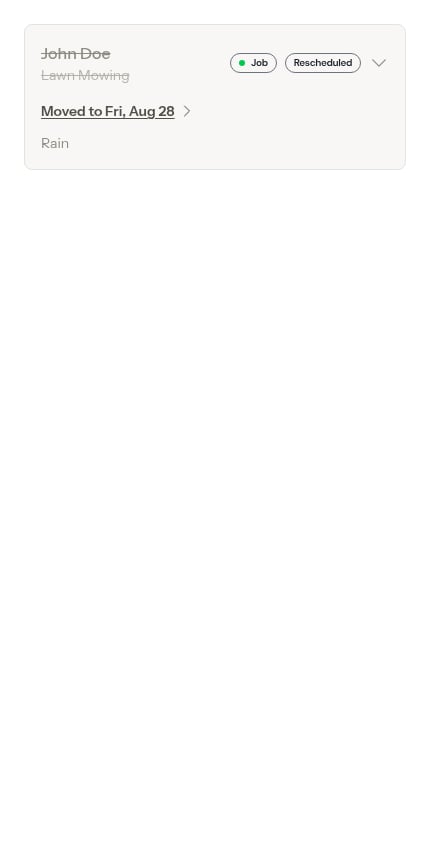
A visit that was cancelled, rescheduled, or (historically) skipped isn’t driven to, so it takes no stop number, doesn’t count toward the day’s total, and isn’t drawn on the route. The active stop after it is numbered as if it weren’t there. They aren’t hidden, just folded away: Show inactive visits (N) sits at the end of the stop list.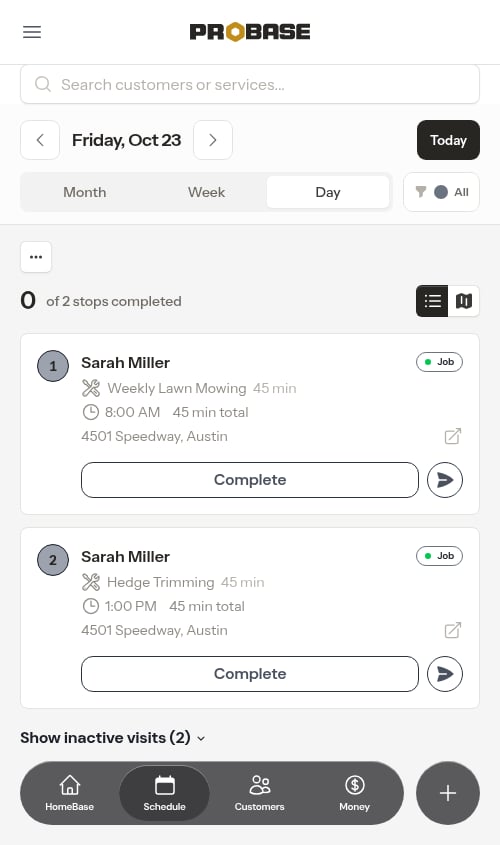
Assigning a crew without leaving the day
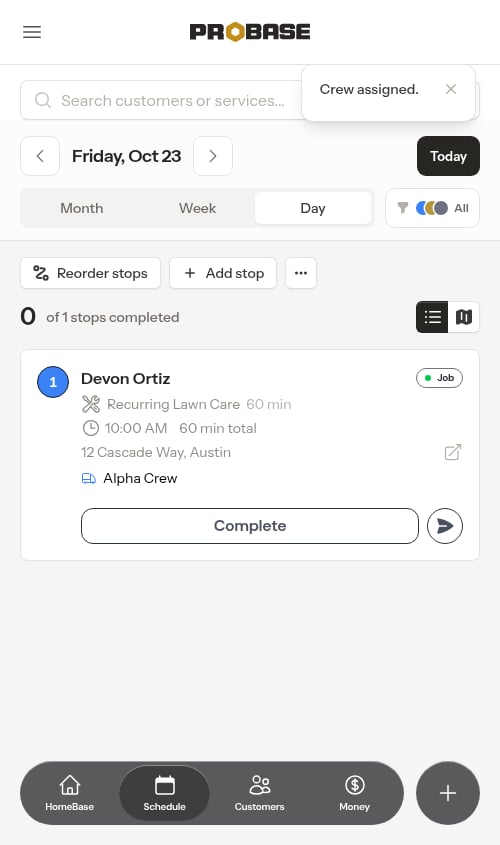
A stop with no crew carries an amber Not assigned to a crew yet line on its card, and its circle is grey rather than a crew colour. The line is the control: tap it and the Assign a crew sheet opens right there — each crew row showing what its day would look like with this visit on it, for example “6 jobs · finishes 4:40 PM”. Tap a crew and the card takes that crew’s colour immediately.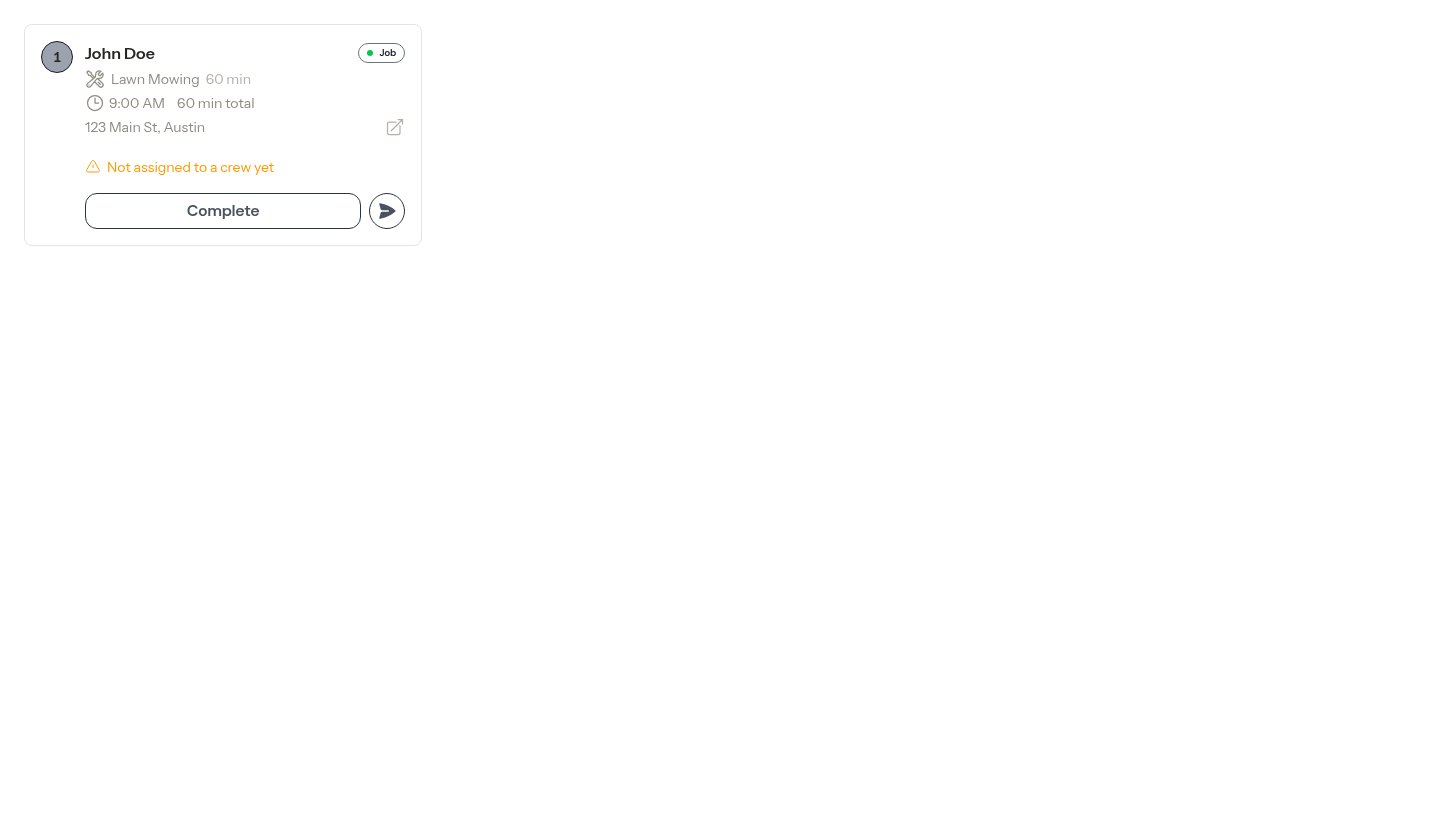
Crew depot locations
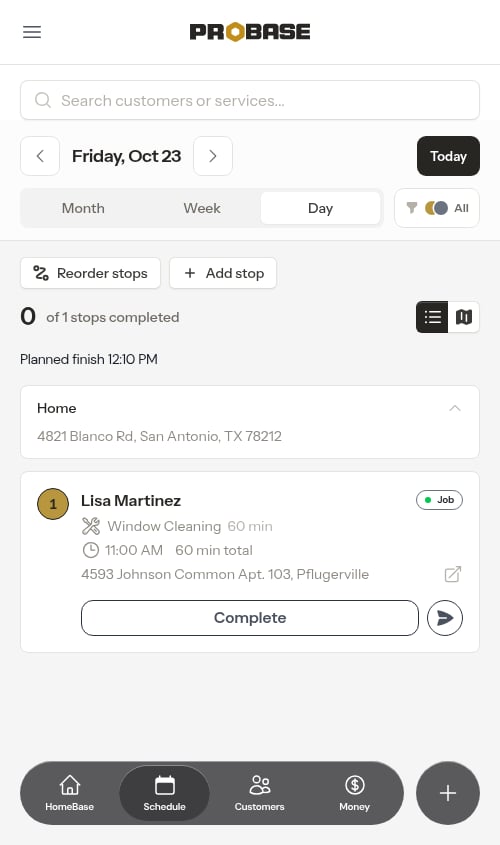
When you filter to a single crew that has a configured start location, ProBase shows where that crew begins their day so you can see the full route at a glance.Home card on the card view
In the card view, a Home card appears at the very top of the day’s stops with the crew’s start address. Tap the chevron to collapse or expand the card — the address is hidden by default to keep the day’s stops front and center.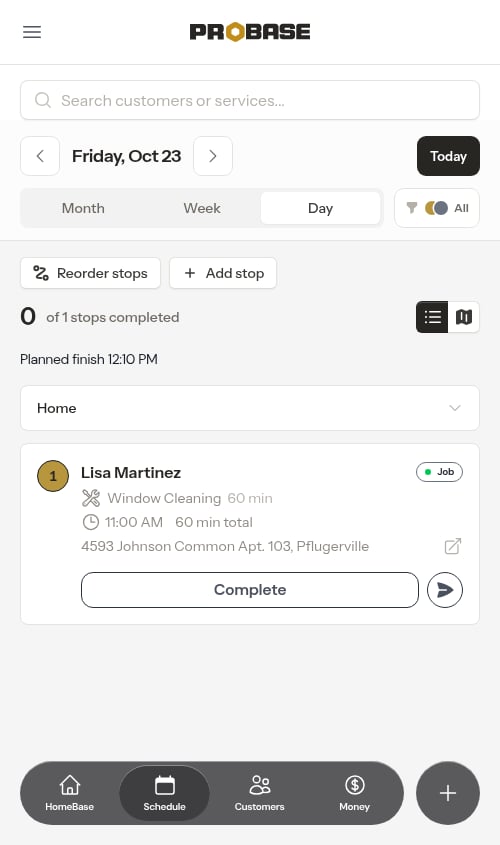
Start and end markers on the map view
In the map view, the crew’s endpoints appear for every crew currently in scope, drawn as themselves: a home pin where the day starts and a flag pin where it ends. If the crew ends where it starts, there’s a single home pin and the route line closes back on it; if the crew has no end address, the day simply finishes at the last job and no end pin is drawn. With no crew filter applied you’ll see the pins for each crew that has a start location — even on days when that crew has no appointments yet — so you always know where each crew begins and ends the day. When you filter to a specific crew, only that crew’s pins are shown. The crew’s colour is used for the route line so it’s easy to follow.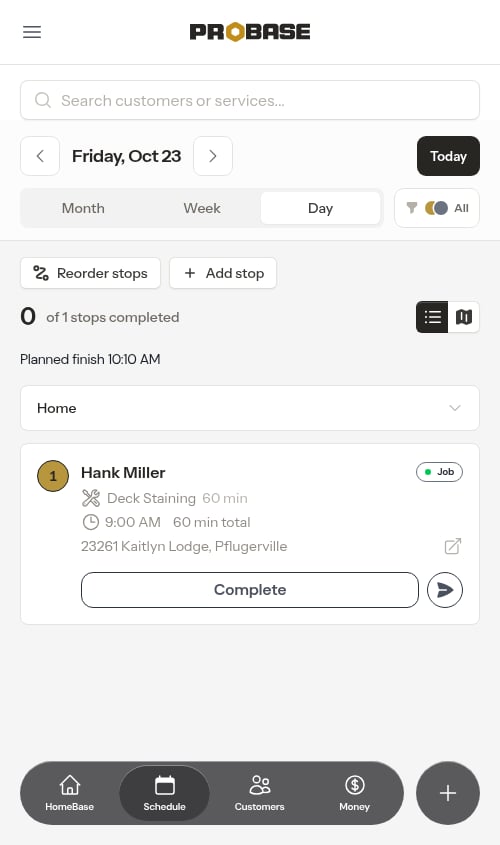
Appointment statuses
A visit’s state is always written out in words on a small pill with a coloured dot beside it — never a colour on its own:- Scheduled — booked for a future day, ready to work on
- Today — scheduled for today and still open
- Overdue — still scheduled after your overdue time (9:00 PM unless you’ve changed it in Scheduling settings) on its own date; this is the one pill filled red rather than outlined. See Overdue jobs
- Working / Paused — the crew has started the clock. See Timing a visit
- Completed — the work is done; on the day list the stop’s circle carries the check
- Cancelled — the visit isn’t happening; folded into Inactive visits
- Rescheduled — shows on the new scheduled date; the old day keeps a row under Inactive visits
- Skipped — an older status kept for history. Visits are no longer skipped — cancel the visit instead, where you’re offered the choice to move its charges and notes onto the next visit
Marketplace jobs on the schedule
If you get work through a connected marketplace, those jobs sit on the Day view alongside your own. They carry a small brand mark (the marketplace’s logo) next to the customer name so you can tell them apart at a glance.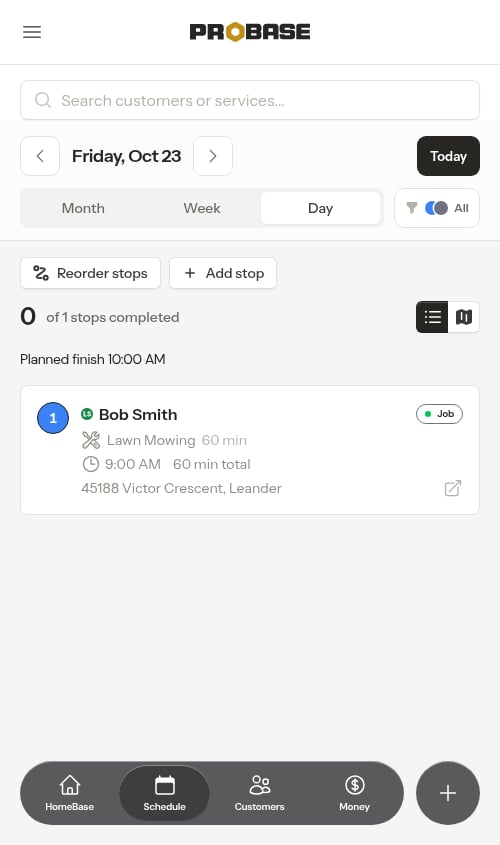
Reorder stops
The Reorder stops button sits at the top of the Day view and is always available — you no longer have to filter to a single crew before it shows up. Tap it to open a drag-and-drop panel where you can rearrange a crew’s stops for the day into any order you prefer. The panel includes both appointments and any non-service stops you’ve added. Because a route belongs to one crew, ProBase needs to know whose day you’re rearranging:- Looking at one crew — filtered to a single crew, or working on an account with only one crew you can act on — the reorder panel opens straight away for that crew.
- Looking at several crews at once — a short Pick a crew window opens first, listing the crews you can plan for with their color dots. Tap one and the reorder panel opens for that crew immediately — no confirm step. Cancel backs out without changing anything.
Reorder stops only appears for roles allowed to plan routes, and only once your business has at least one crew you can plan for. Field roles that work their own crews see only their own crews in the Pick a crew list, and the button is hidden entirely if you’ve filtered to a crew that isn’t yours. See Roles and permissions.
Add a stop
The Add stop button (next to Reorder stops) lets you insert a non-service stop into a crew’s route — for example, a lunch break, a supply pickup, or a quick detour. These stops appear in the calendar alongside regular appointments and are included in drive time calculations. Like Reorder stops, the Add stop button is always there — you don’t have to filter to a single crew first. It shows as soon as your business has at least one crew you’re allowed to plan routes for. To add a stop:- Tap Add stop.
- Tell ProBase whose route the stop belongs to. Every stop takes a slot in one crew’s day, so:
- Looking at one crew — filtered to a single crew, or working on an account with only one crew you can act on — the stop form opens straight away for that crew.
- Looking at several crews at once — a short Pick a crew window opens first, listing the crews you can plan for with their color dots. Tap one and the stop form opens for that crew immediately — there’s no confirm step. Cancel backs out without adding anything.
- Fill in the details:
- Name — A short label (e.g., “Lunch Break”, “Pick up supplies”)
- Address — The stop’s location. Start typing and pick from the suggested addresses that drop down over the window — see Address suggestions as you type. An address can be up to 191 characters.
- Duration — How long the stop will take (in minutes)
- Tap Save. The stop is added after the last scheduled appointment or stop for that crew on that day.
Add stop follows the same rules as Reorder stops: it only appears for roles allowed to plan routes, and only once your business has at least one crew you can plan for. Field roles that work their own crews see only their own crews in the Pick a crew list, and the button is hidden entirely if you’ve filtered to a crew that isn’t yours. See Roles and permissions.
Pull to refresh
On mobile, you can pull down from the top of the schedule to refresh the page and load the latest appointments. This is useful when multiple crew members are working simultaneously and you want to see updates without navigating away. A visual indicator appears at the top while the page is refreshing. Each pull refreshes the page exactly once, even after you’ve moved between several screens.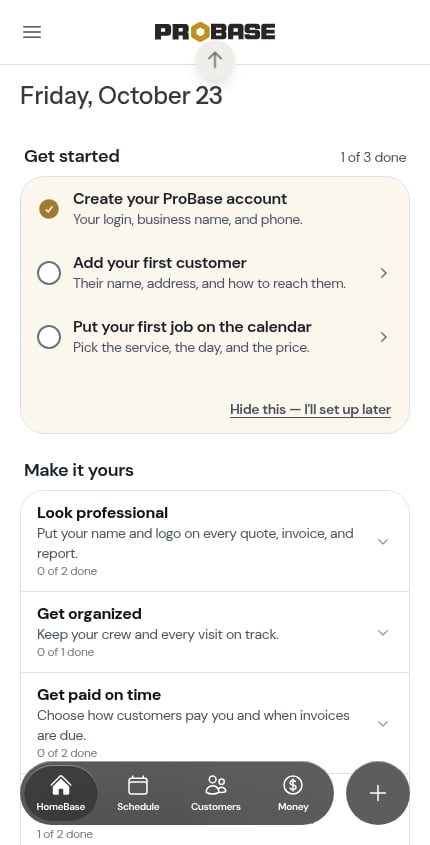
Pull to refresh only activates when you’re already scrolled to the very top of the page. It does not trigger while scrolling through the list of appointments, over a map, inside an open window, or in the slide-out menu — so scrolling those never reloads the page by accident.
Next steps
- Complete appointments when work is finished
- Reorder stops to manually adjust a crew’s route order
- Optimize routes to plan efficient driving routes
- Rebalance the day to move work between crews
- Pin a visit’s time so routing leaves it alone
- View the weekly calendar for a broader view across multiple days
- Marketplace jobs to work a visit that came from a connected marketplace