What is the customer import wizard?
If you’re switching to Probase from another app — or have an existing customer list in a spreadsheet, PDF, or other document — you can import all of it at once using the customer import wizard. Probase uses AI to read your files and extract customer names, contact details, property addresses, services, and upcoming appointments automatically.The import wizard can read almost any format: spreadsheets (CSV), text files, PDFs, word-processor exports, and even photos of handwritten lists or printed documents (JPG, PNG, GIF, WEBP).
How to import customers
1
Open the imports page
There are several ways to reach the import wizard:
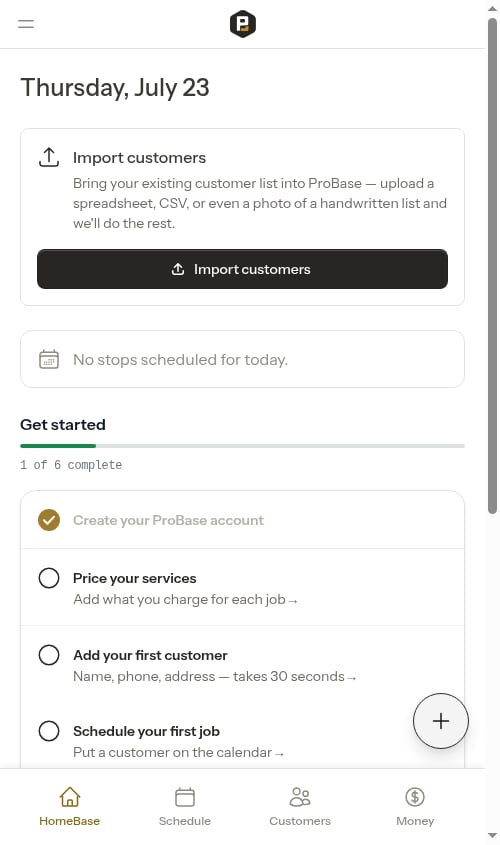
- From the Customers page — tap the Import customers button in the page header, next to Add customer.
- From your HomeBase dashboard — use the Import customers card near the top of the dashboard. This card is aimed at getting you set up, so it disappears once you have four or more customers — after that, use the Customers page button or Account Settings instead.
-
From Account Settings — open the Bulk data card in your settings and tap Import customers.
The Import customers button, dashboard card, and Bulk data card are rolling out gradually. If you don’t see them yet, you can still open the imports page directly at /customers/imports.
2
Upload your files
Drag and drop your files onto the upload area, or click to browse and select them. You can add several files to one import — select or drop them one at a time and they’ll stack up in the list before you process them (for example, a CSV with customer names plus a PDF with their addresses).Supported formats:
- Spreadsheets: CSV
- Documents: TXT, PDF, XML
- Images: JPG, PNG, GIF, WEBP (useful for photos of printed lists)
A note on the upload screen sets expectations for big lists: large files are read by AI in batches of about 100 rows, taking roughly 3 minutes per batch, so a large list can take several minutes. You can leave the page and come back — Probase keeps working in the background.
3
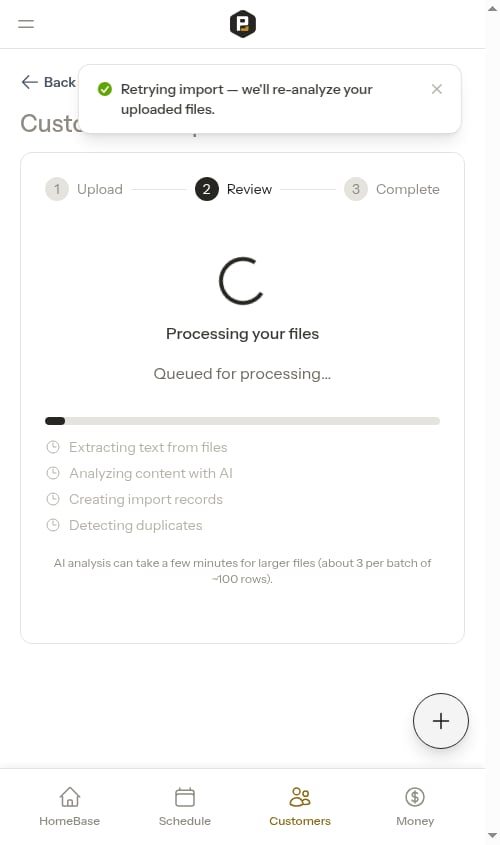
Start processing
Click Process Files to send your files to Probase’s AI. The wizard submits the job for processing and immediately shows a live progress screen — no need to do anything else.Processing moves through four stages automatically:
- Extracting — Reading the contents of your uploaded files
- Analyzing — AI identifies customers, addresses, services, and appointments. For larger lists, this stage shows a running percentage (e.g. “Analyzing content with AI (75%)”) so you can see it working through your data rather than sitting on a single spinner
- Creating — Organizing the extracted data into records
- Detecting duplicates — Comparing against your existing customers to avoid creating duplicates
Large lists are handled automatically. If you’re importing a long customer list, Probase splits it into smaller pieces and reads several of them at the same time. This keeps big imports both fast and reliable — even lists with hundreds of customers come through without the import failing. Very large lists simply take a little longer to finish. If one piece of a large list can’t be read, the rest still comes through — you’ll get everything that could be processed, ready to review.
If you close the page while processing is running, you can come back to it at any time. Open the Imports page and tap the import card to pick up where you left off. While processing is active, your HomeBase dashboard also shows a “Add your first customer — We’re processing your file” reminder that links straight back to it.
4
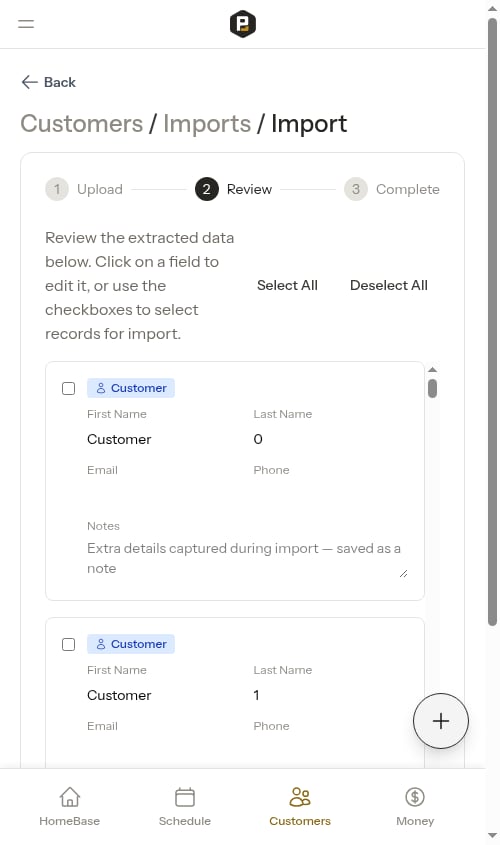
Review the extracted records
Once processing is complete, the wizard shows you everything it found.Heads-up warnings. If the AI noticed anything worth a second look while reading your files — a missing email address, two customers that seem to share a phone number, an address it wasn’t sure about — it lists these at the top of the review screen in a yellow “Heads up — review these before importing” box. The number in the heading tells you how many notes there are, and you can collapse the box by tapping its heading once you’ve read through them. Nothing here blocks the import; it’s just a checklist of things to confirm or fix before you create the records.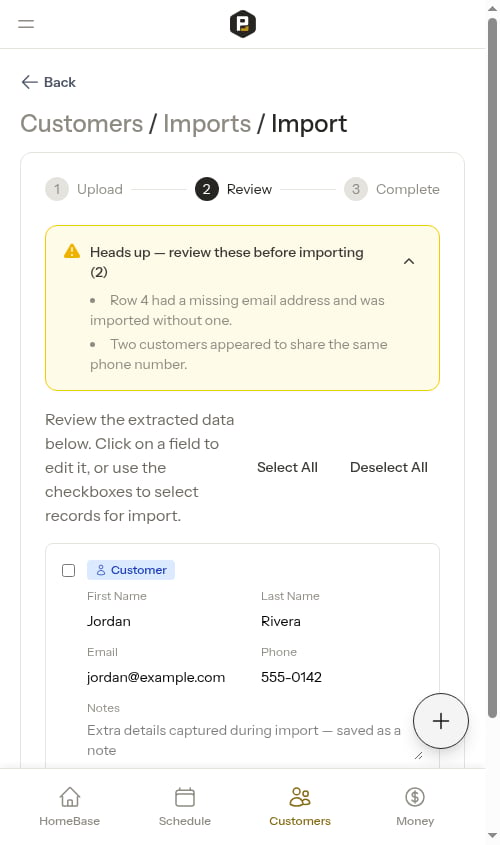
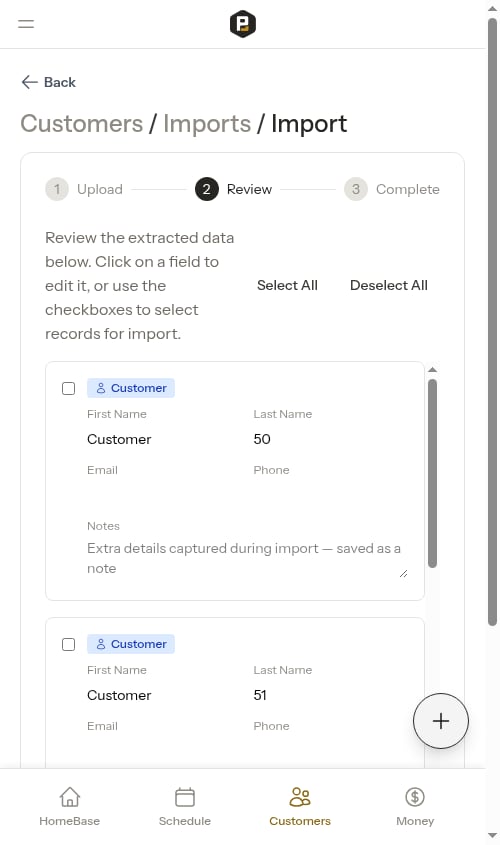
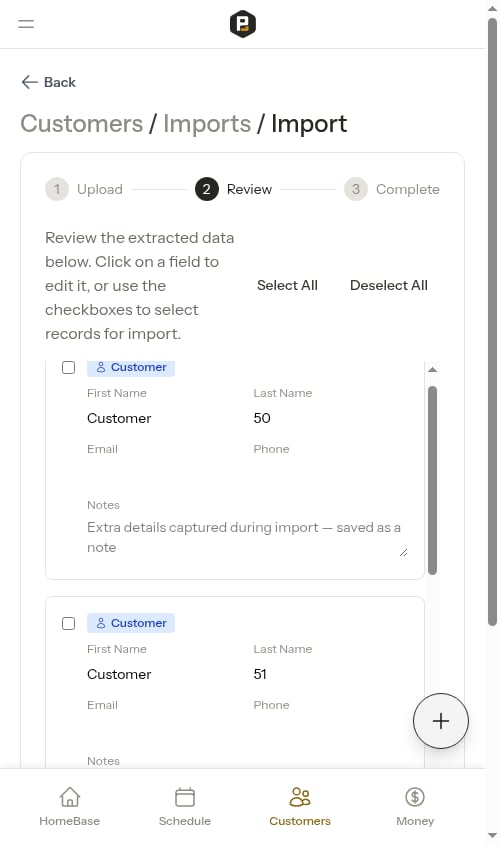
- Customer (top level)
- Property (the customer’s address)
- Service (a service at that property)
- Appointment (a scheduled visit for that service)
- Service (a service at that property)
- Property (the customer’s address)
- Check or uncheck individual records to include or exclude them
- Select All — selects all records except those flagged as potential duplicates. If any duplicates were skipped, a warning appears showing the count. To import a duplicate anyway, check it individually.
- Deselect All — unchecks every record, including duplicates
- Edit a record’s details inline — click on any field to correct a name, address, or other detail before importing
Approving or skipping a parent record affects its children. If you uncheck a customer, all their properties, services, and appointments are also skipped. If you check a customer back in, their children are re-checked too.
5
Import
When you’re happy with the selections, click Import Selected. Probase creates all the approved records in your account.While the records are being created, the wizard shows a “Creating records…” progress screen that updates on its own — no need to do anything. For a large import this creation happens in the background, so even very long lists finish reliably without you having to keep the page open. When it’s done, the wizard moves to the summary automatically.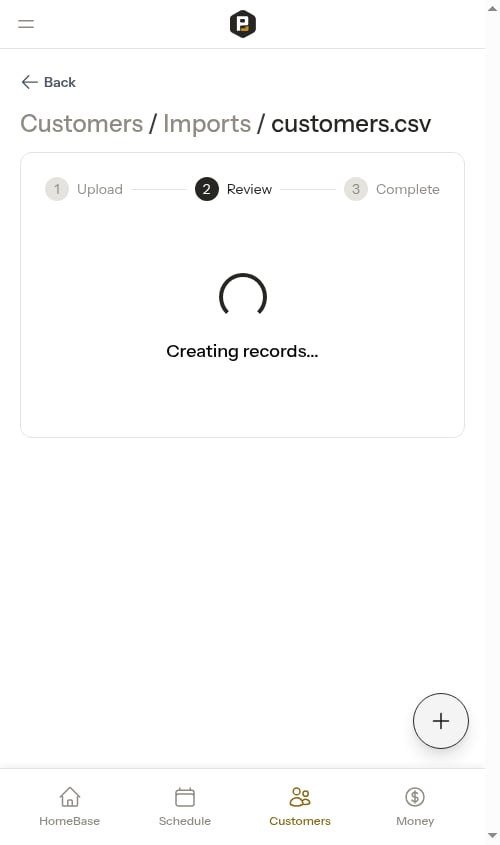
Interruptions heal themselves. Records are created in small batches, and each batch is saved as it finishes. If the process is briefly interrupted while your records are being created — for example a temporary hiccup on our servers — Probase automatically picks up right where it left off and finishes the job. Records that were already created are never duplicated, and the progress screen continues on its own through to the summary. You don’t need to do anything.
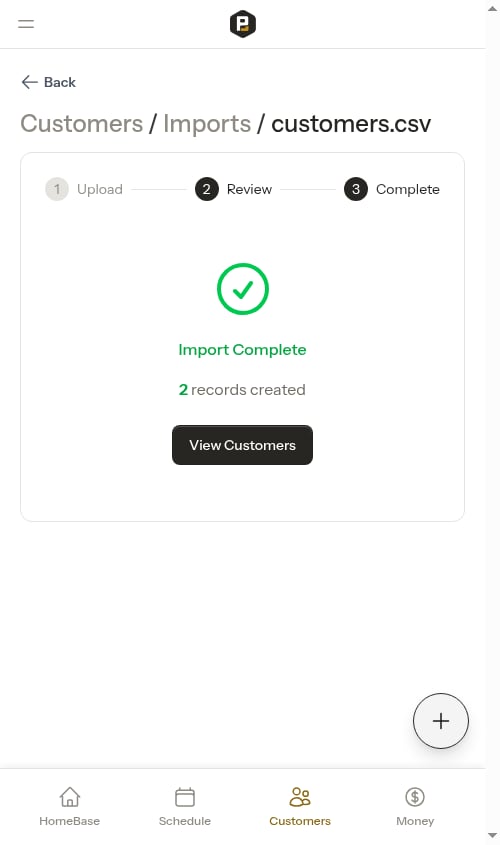
- Created — how many records were added
- Skipped — how many you chose not to import
- Errors — any records that couldn’t be created (rare)
Viewing past imports
The Imports page keeps a record of every import you’ve run. Each card shows:- The file name (and how many files were uploaded if more than one)
- When the import was started
- The current status and a summary (e.g. “12 records imported” or “5 records awaiting review”)
- Completed — the import finished successfully
- Reviewing — processing is done and records are waiting for your review; tap the card to continue
- Processing — files are still being analyzed by AI
- Failed — something went wrong; the card shows the error message
Tips for best results
Clean up your file first. The AI works well with messy data, but the cleaner your file, the more accurate the results. If your spreadsheet has a header row, keep it — it helps the AI understand what each column means. Include column headers in spreadsheets. A CSV with headers likeFirst Name, Last Name, Email, Phone, Address will extract more accurately than one with unnamed columns.
Upload multiple files together. If your customer data is spread across several files, upload them all in one batch. The AI reads them together and can match information across files.
Review duplicates carefully. The wizard automatically flags records that look like existing customers or properties in your account. Double-check these before importing to avoid creating duplicate records.
You can always edit after importing. If something is extracted incorrectly, you can edit the customer, property, or service after the import completes. No need to get everything perfect in the review step.
What gets imported
The import wizard can extract and create the following:Any extra details the AI captures for a customer or property — gate codes, access instructions, a secondary contact — are saved as a note on that record, which you can review and edit on the import review screen first.
Not every file will contain all record types. If your spreadsheet only has customer names and addresses, only customers and properties will be created — that’s fine.
If the import fails
Failures are rare. Probase reports one only in two cases: when it can’t read any customer data at all — for example, an empty file or one it can’t open — or when the record-creation step was interrupted so many times it couldn’t finish (in that case your reviewed records are safe and a retry resumes where it left off). When either happens, the wizard shows an Import Failed message with details about what went wrong.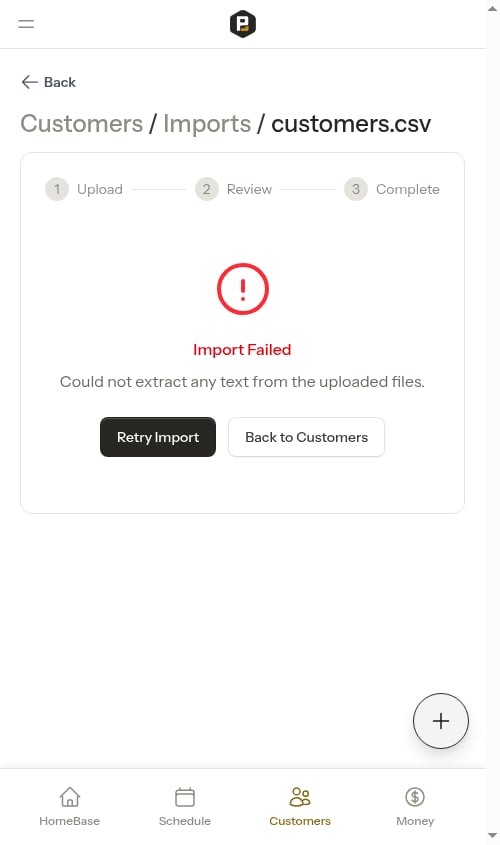
When something goes wrong that a retry can’t fix on its own, the import stops promptly and shows you the Import Failed message right away — you won’t be left watching a spinner wondering whether it’s still working. The message tells you what happened (for example, that no customer data could be read from the file), so you know whether to fix the file or simply try again.
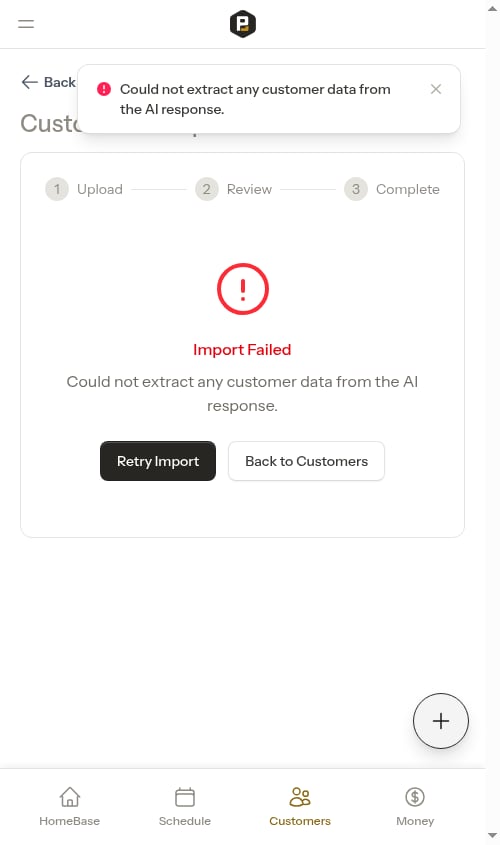
- Retry Import — try the same import again without re-uploading anything. Probase keeps the files you originally uploaded, so a single tap re-runs the import from your stored files. This is the quickest fix for a hiccup like a temporary interruption while your files were being read.
- Back to Customers — return to your customer list. From there you can start a fresh import from the Imports page (tap New Import) if you’d rather try a different file or format.
- If the import got as far as building your records before it stopped, your earlier review choices are kept — you’ll see a message that your reviewed records were restored, and you can run the import again.
- If it stopped earlier than that, Probase re-analyzes your uploaded files from scratch and returns you to the live progress screen.