What is onboarding?
When you first create your Probase account, you’ll go through a quick onboarding process to set up your business. This guided wizard helps you get started faster by collecting essential information and setting up your account properly.The onboarding wizard
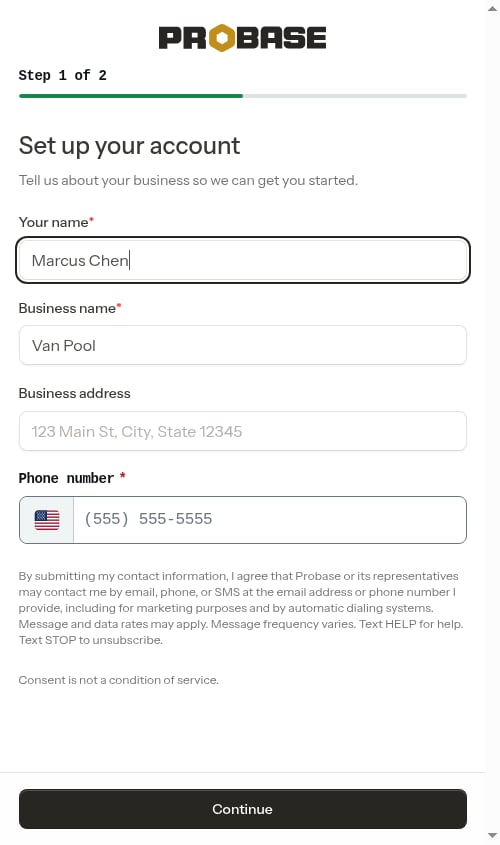
The wizard has two short information-gathering steps — Set up your account and a few quick questions about your work — followed by a personalized “You’re all set” confirmation and an optional step to install the app on your phone. A progress bar at the top shows where you are on the first two steps (Step 1 of 2, Step 2 of 2). The progress bar is hidden on the “You’re all set” and install screens, since those aren’t data-collection steps.Step 1: Set up your account (Step 1 of 2)
The first screen reads Set up your account with the subheading “Tell us about your business so we can get you started.” Enter your essential business information:- Your name (required) — Your full name as the account owner. This is captured here (not on the signup form) so the signup screen can stay short.
- Business name (required) — Your company or business name.
- Business address (optional) — Your business or home address. Start typing and pick your address from the autocomplete suggestions. Adding it sets your timezone and your starting point for route optimization, but you can skip it for now and add it later.
- Phone number (required) — Business phone number, automatically formatted as you type: (555) 555-5555.
The address field offers autocomplete suggestions as you type — choose your address from the list so Probase can detect your timezone and use it as the starting point for crew routing.
Text message consent
Below the form you’ll see a short disclosure explaining that, by submitting your contact information, you agree that Probase or its representatives may contact you by email, phone, or SMS — including for marketing purposes and by automatic dialing systems. The disclosure also notes that consent is not a condition of service. When you tap Continue, your account is opted in to SMS notifications automatically. You can turn SMS off at any time from your Profile page — see Notification preferences.

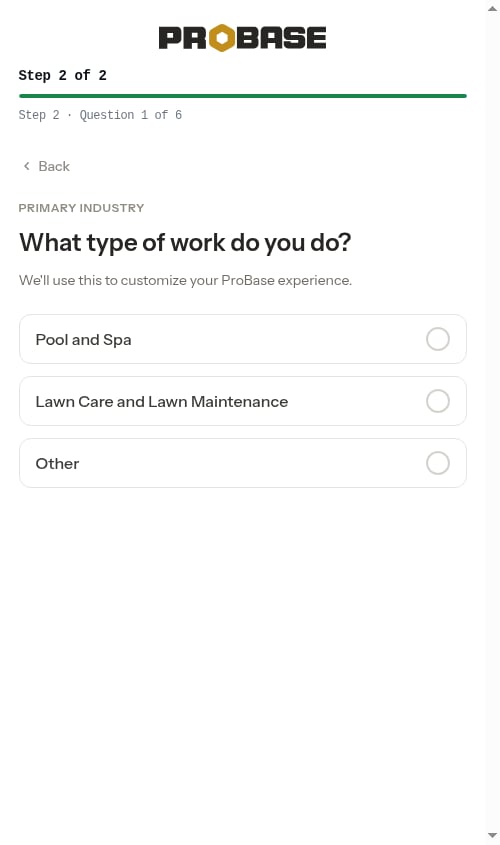
Step 2: A few quick questions (Step 2 of 2)
The second step asks you a short series of questions, one at a time. A counter beneath the progress bar shows where you are — Step 2 · Question X of 6. Each question has a Back button so you can return to an earlier question (or back to Step 1) at any time. For every question, simply tapping your answer moves you straight to the next question — there’s no extra Continue button to press. Your choice is checked off instantly the moment you tap it, so the step feels responsive even before your answer finishes saving. The first four questions are required; the last two are optional and can be skipped.If your answer can’t be saved — for example, if your connection drops mid-tap — the checkmark clears itself and a short “Something went wrong. Please try again.” message appears below the options. Just tap your answer again to retry; you stay on the same question until it saves.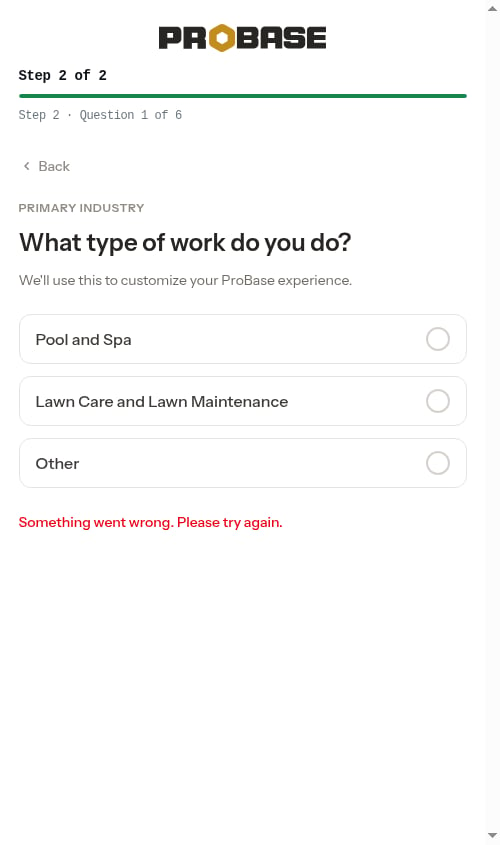
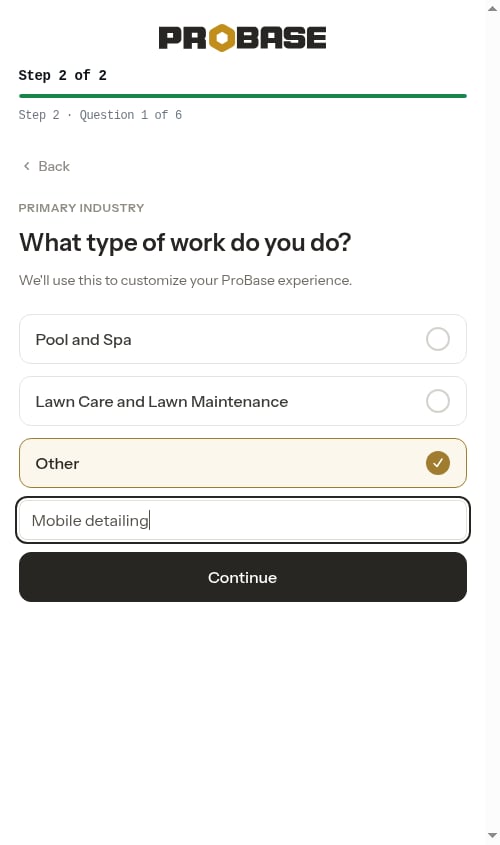
- Pool and Spa
- Lawn Care and Lawn Maintenance
- Other
If trades (industries) are enabled for your account, this first question changes to “What services do you offer?” (under a YOUR SERVICES heading, with the note “Choose all that apply. We’ll use this to set up your standard line items and schedule formats.”) — a multi-select where you pick all the trades that apply instead of a single option. To keep onboarding quick, this step only offers the two most common trades — Pool and Lawn — plus an Other card for businesses that don’t do either; you can add any of ProBase’s other trades later from your Business Profile. Your Pool/Lawn selections seed a starter catalog for those trades, while picking Other declares no trade and seeds nothing (you’ll build your own catalog). This question is optional; tap Skip to move on without declaring any. See Industries (trades) for the full walkthrough.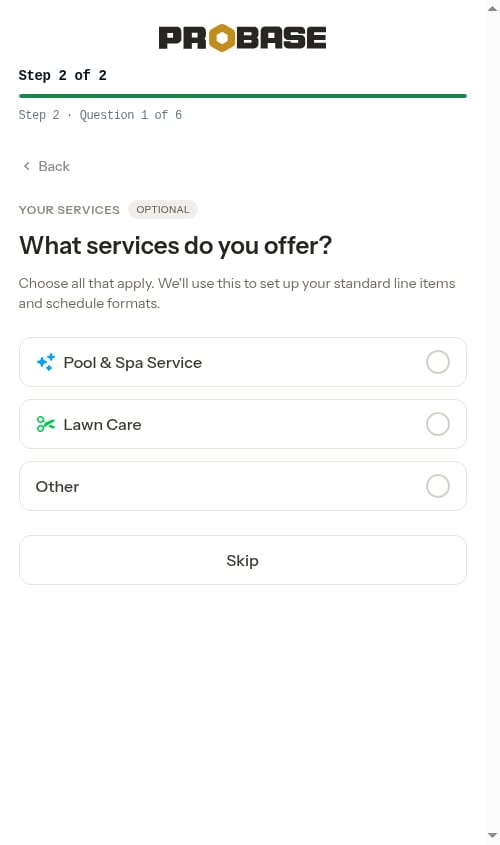
- Just me
- 2-5 crews
- 6-10 crews
- 10+ crews

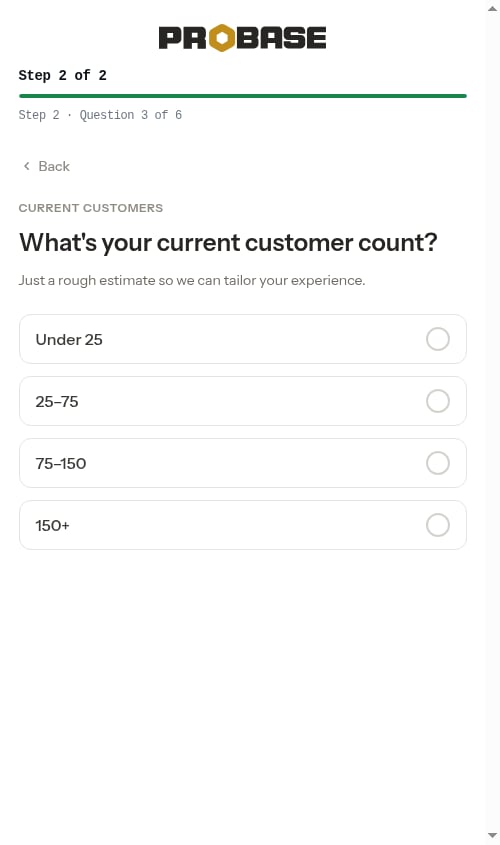
- Under 25
- 25–75
- 75–150
- 150+
- Pool businesses also see Skimmer and PoolBrain.
- Lawn businesses also see Yardbook and LawnPro.
- Businesses that picked more than one trade, chose Other, or skipped the trade question see just the common options.
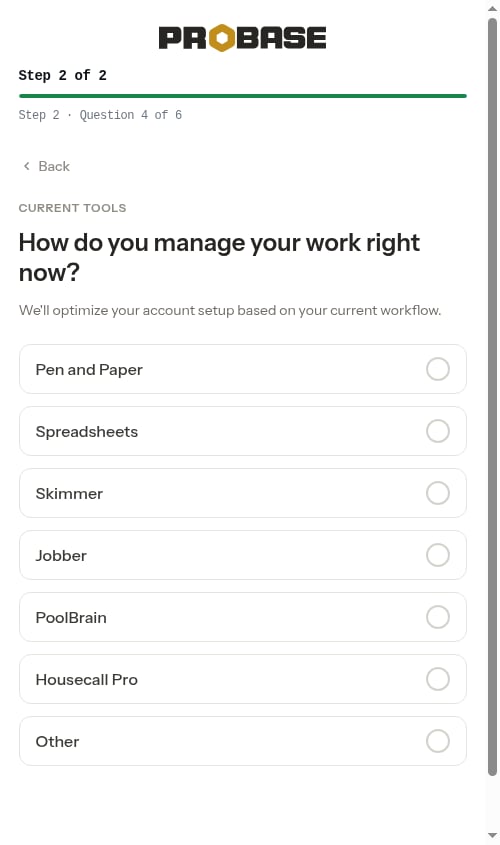
If you go Back and change your trade after answering this question, and the tool you’d picked isn’t offered for your new trade (for example, you’d chosen Skimmer as a Pool business and then switched to Lawn), your answer clears itself so you can pick again from the updated list.
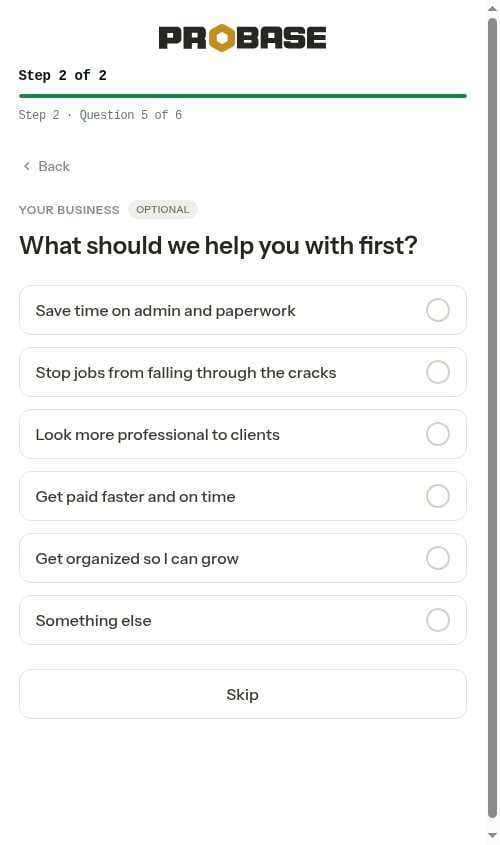
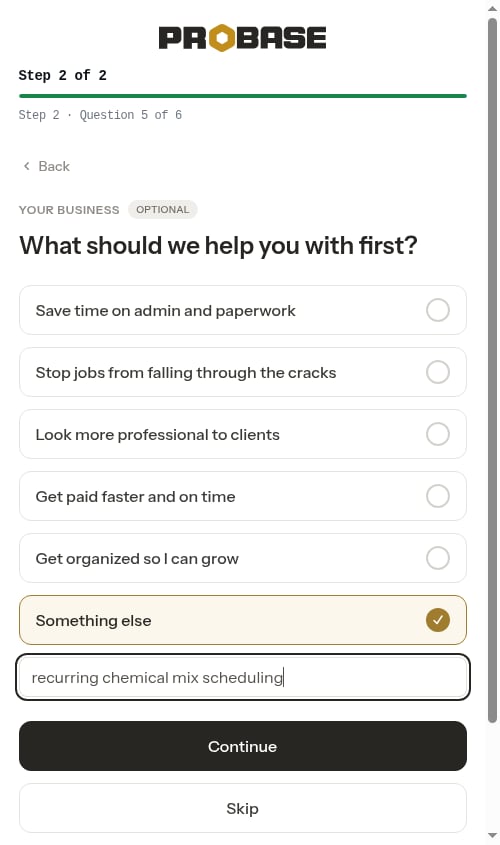
- Save time on admin and paperwork
- Stop jobs from falling through the cracks
- Look more professional to clients
- Get paid faster and on time
- Get organized so I can grow
- Something else (with a text box)
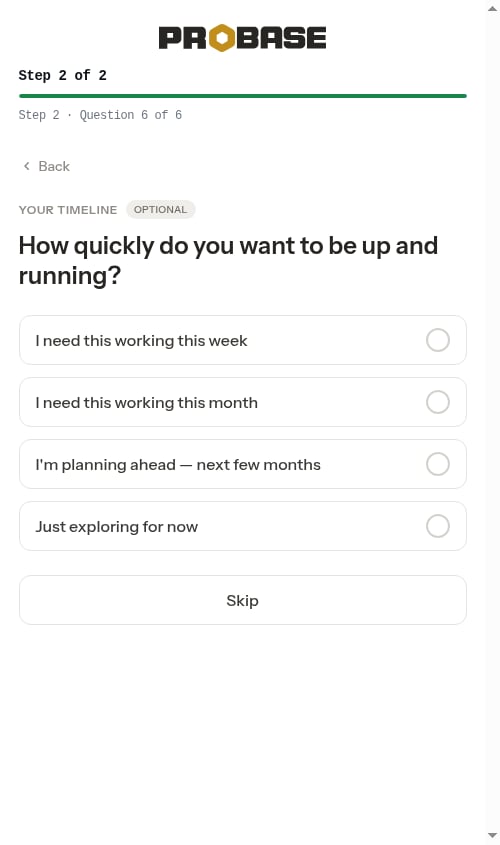
- I need this working this week
- I need this working this month
- I’m planning ahead — next few months
- Just exploring for now
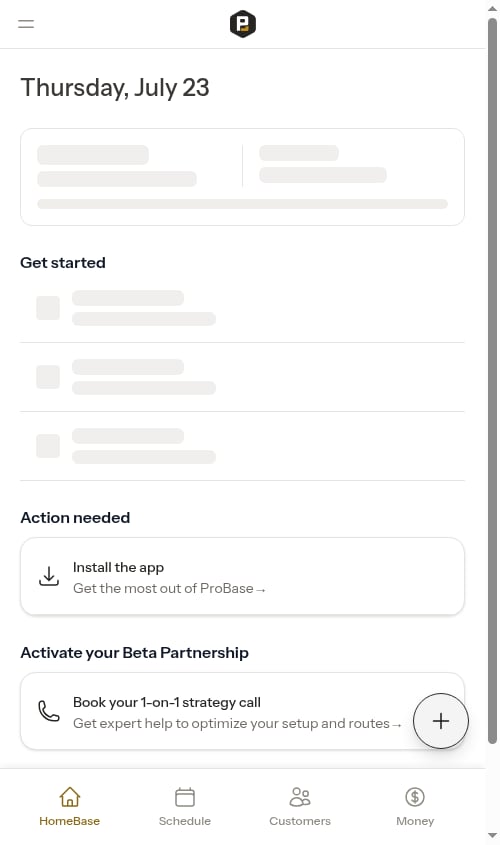
You’re all set
Once your questions are answered, you’ll land on a personalized confirmation screen: “You’re all set, [First name].” with a note that your business “is ready to create estimates and jobs.” This is a celebration screen rather than a numbered step, so the progress bar is hidden here. If your industry was Pool and Spa or Lawn Care, this screen also summarizes how many services were pre-configured in your catalog, shows a preview of those services, and a “~30 minutes of setup, done for you” badge.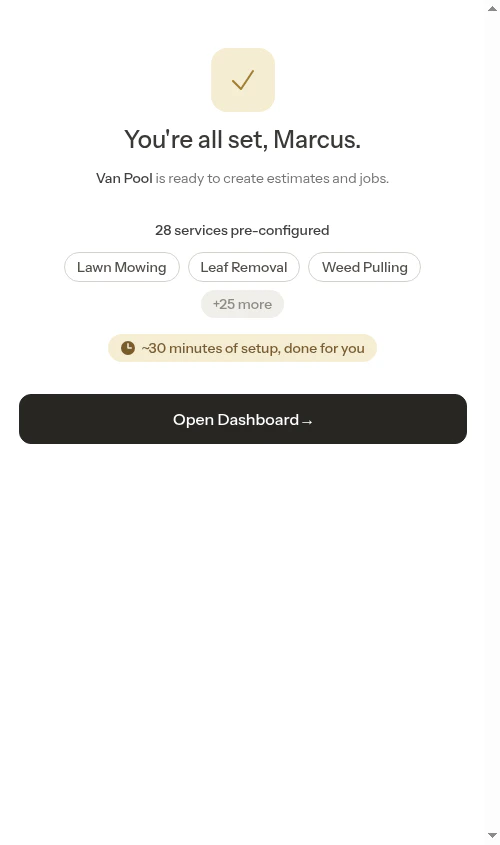

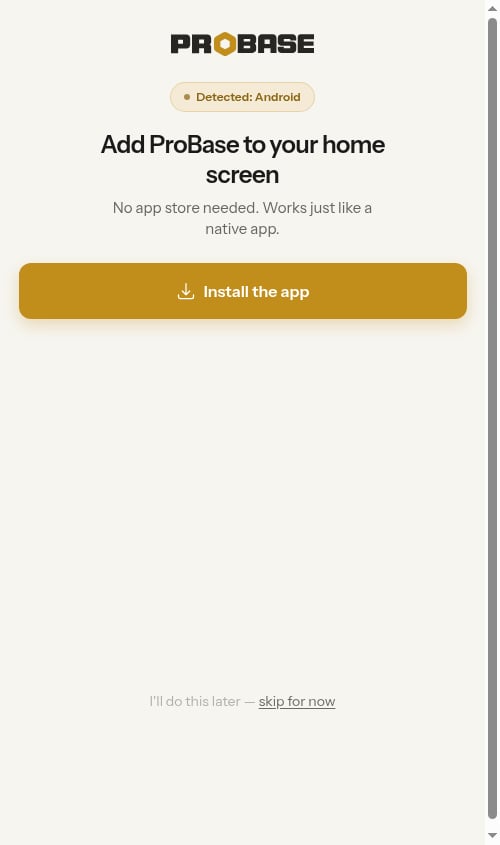
Add the app to your home screen (final step)
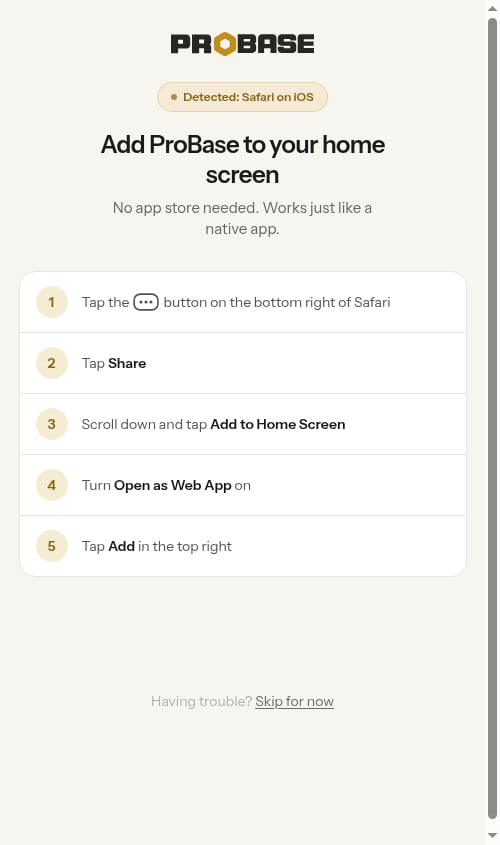
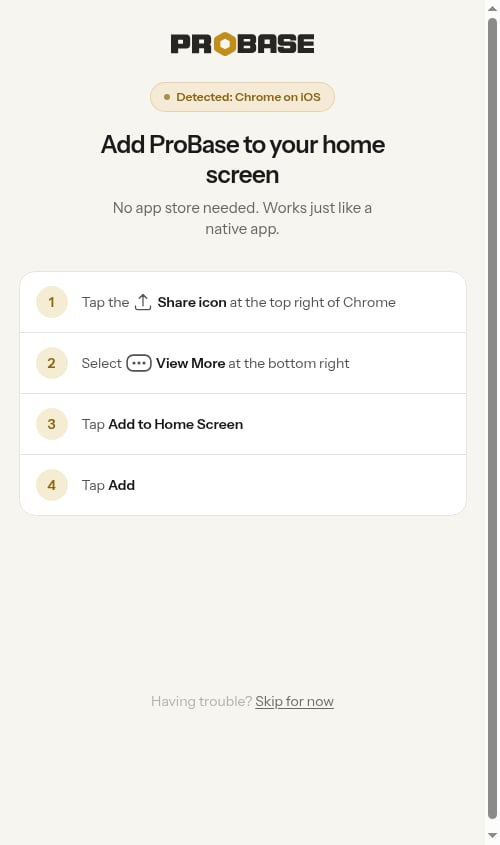
Probase works best when installed as an app on your phone. After the “You’re all set” screen, this step walks you through adding it to your home screen so you can access it quickly without opening a browser. The screen is headed Add ProBase to your home screen with the reassurance “No app store needed. Works just like a native app.” Probase automatically detects which phone and browser you’re using and shows a small Detected: badge along with the exact steps for your device.
-
Safari — five steps: tap the ••• button at the bottom right of Safari, tap Share, scroll down and tap Add to Home Screen, turn Open as Web App on, then tap Add in the top right.
-
Chrome on iOS — four steps: tap the Share icon at the top right of Chrome, select View More at the bottom right, tap Add to Home Screen, then tap Add.
Turn on notifications
Once Probase is added to your home screen, you’ll see a Turn on notifications screen marked with an App installed badge. Tap Enable notifications so you get alerted when customers pay, accept quotes, or need follow-up — or tap I’ll do this later — not now to skip.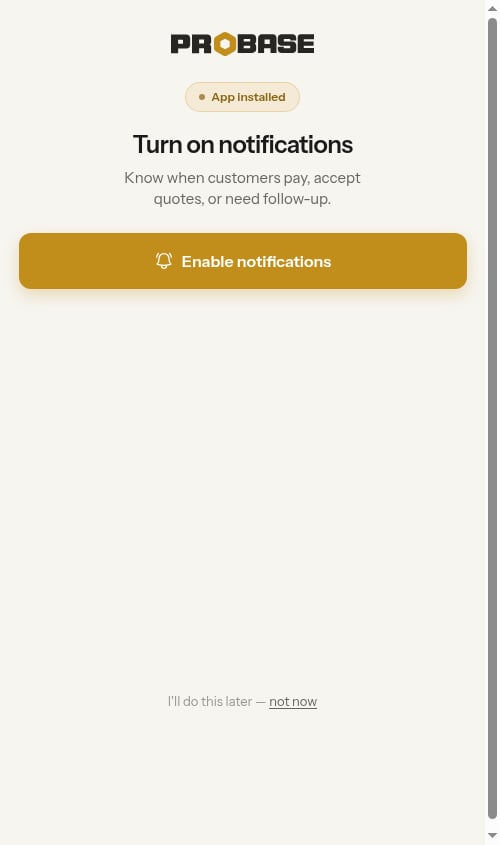
If notifications are turned off for Probase — either because you tapped Don’t Allow when your phone asked, or because you’d blocked them before — a message appears letting you know: “Notifications are blocked. Enable them for ProBase in your device’s Settings app, then come back here.” Open your phone’s Settings app, find Probase, and switch notifications on, then return to this screen. You can also tap I’ll do this later — not now to move on and turn them on later.
These steps only appear on mobile devices. On a desktop or laptop — or if Probase is already installed, including when you’re using the Probase app from your phone’s app store — they’re automatically skipped and you go straight to the dashboard.
Installing is optional. Tap the skip for now link to continue without installing. Tapping it once reveals a short troubleshooting tip plus a Continue without installing link, so you’re never stuck — you can always install the app later from the Action needed section on your dashboard.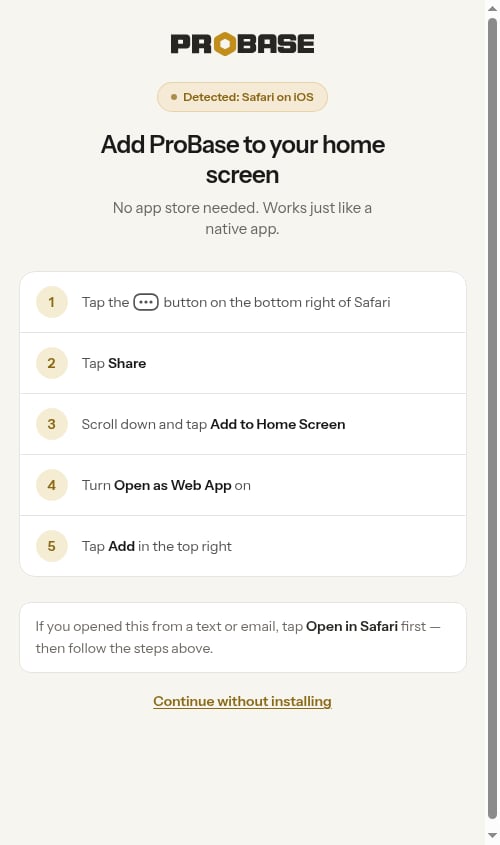
What happens after onboarding?
Once you complete the onboarding wizard:- Your account is fully activated
- You’re taken to the dashboard
- Industry-specific service templates are automatically created in your service catalog — lawn care pros get a full catalog of mowing, trimming, cleanup, and treatment services; pool cleaning pros get pool cleaning, filter service, repairs, and related work
- The business address you entered is saved as your starting point for route optimization
- You can start adding customers, creating jobs, and scheduling work
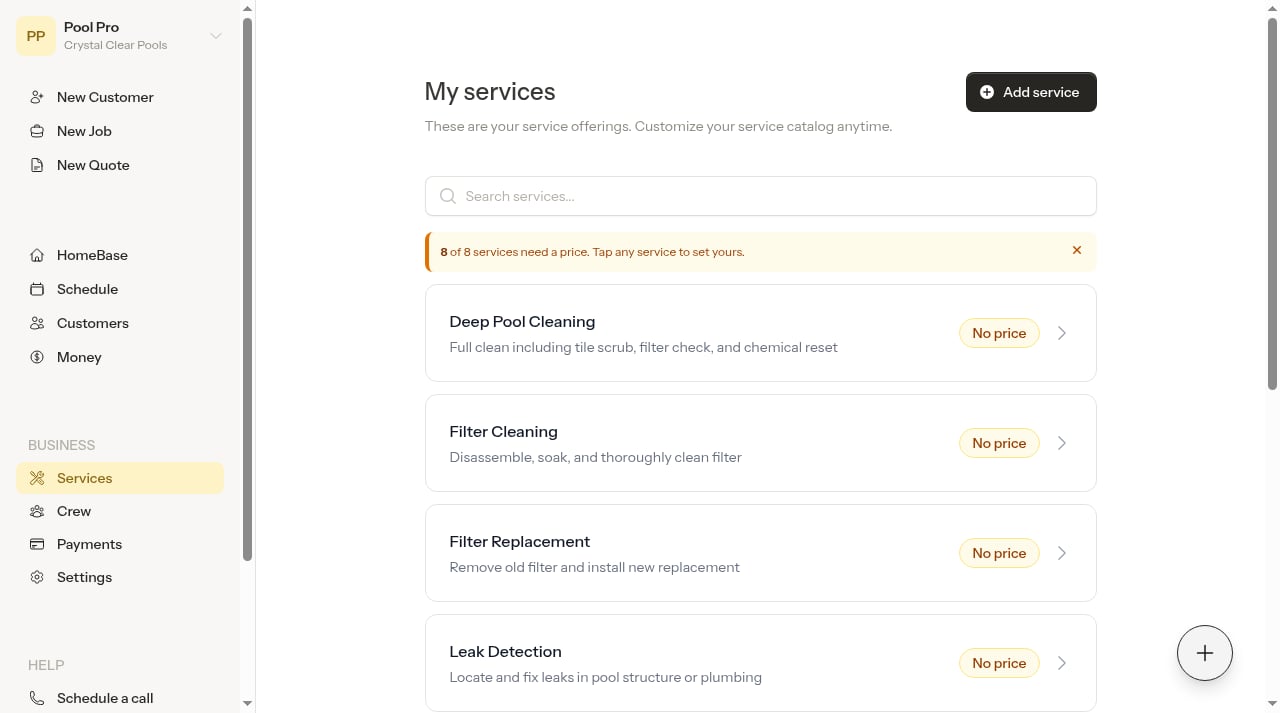
What gets set up automatically
Based on your industry selection, Probase creates a starter service catalog so you can begin booking jobs immediately:- Lawn Care and Lawn Maintenance — 28 service templates (Lawn Mowing, Leaf Removal, Weed Pulling, Yard Cleanup, Bush Trimming, Tree Trimming, Mulching, Landscaping, Pressure Washing, Gutter Cleaning, Lawn Treatment, Fertilization, Aeration, and more).
- Pool and Spa — 8 service templates (Pool Cleaning, Deep Pool Cleaning, Pool Open/Close, Filter Cleaning, Filter Replacement, Pump Repair, Leak Detection, Pressure Washing).
- Other — no templates are pre-built; you create your own catalog from the Service Catalog page.
If you’re invited to join a team
If another business invited you to join their team, you’ll see a simplified onboarding flow where you provide your phone number and are immediately added to the team. The same SMS disclosure appears below the phone field — submitting the form opts you in to text messages so you can receive appointment updates from the team. You can turn SMS off later from your Profile page. Team members don’t need to complete the full business setup since they’re joining an existing account.Resuming onboarding
If you close the browser before finishing, your progress is saved automatically. When you return, the wizard resumes at the step where you left off.
Accessing onboarding again
You can only complete onboarding once. After finishing, you won’t see the wizard again. If you need to update your business information later, go to your account settings.Navigating between steps
Every question on the quick questions step has a Back button. Tapping Back on the first question returns you to Set up your account with your earlier answers still filled in.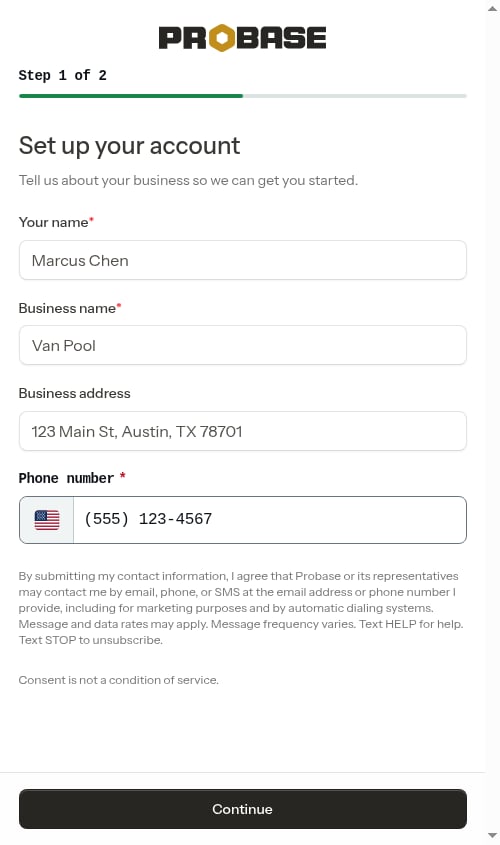
Getting help during onboarding
If you have questions or run into issues while completing onboarding:- Required fields are marked and will show errors if left blank
- Use the Back button on any question to review or change an earlier answer
- Contact our support team if you need assistance
Next steps
After completing onboarding:- Set up your service catalog - Review and customize your service templates
- Add crews - Create teams for field work
- Add your first customer - Start building your customer base
- Create jobs - Schedule your first appointments