What is an invoice?
An invoice is a summary of charges for a customer that you can send to them so they can view and pay online. Invoices are created automatically — whenever a charge is added to a customer’s account, Probase creates or updates a draft invoice for that customer.Invoice lifecycle
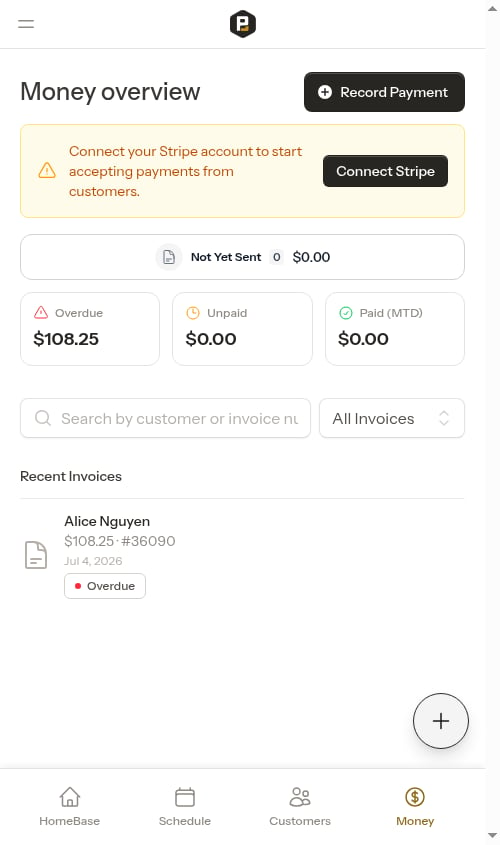
Invoices move through four stages:View all invoices
The Money page (click Money in the sidebar) lists all your invoices in one place. The invoice list shows each invoice’s customer name, amount, invoice number, date, and status. Use the status filter to narrow the list:- Not Yet Sent — Draft invoices ready to send
- Overdue — Sent invoices past the payment due date
- Unpaid — Sent invoices not yet paid
- Paid — Completed invoices
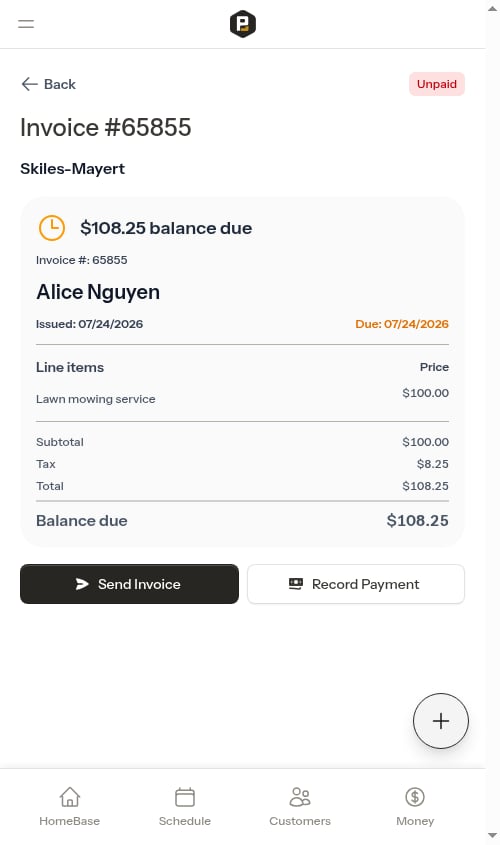
View an invoice
Click any invoice row to open the invoice detail page. The detail page shows:- Invoice status badge (Not Yet Sent, Unpaid, Partially Paid, or Paid)
- Your business information (logo, name, address, phone, email, and website — whatever you’ve configured in Business Profile settings)
- Customer name and billing address
- Invoice number and issued/due/paid dates
- All line items with titles, quantity, and amounts
- Any carried-forward charges from previous unpaid invoices
- Subtotal, tax, payments & credits, total, and balance due
(QTY:2, $25.00 each)), with the line total shown to the right — giving customers a clear breakdown of every charge.
Send an invoice
Sending an invoice transitions it from Not Yet Sent to Unpaid and makes it visible on the customer’s payment portal. You’ll also get the option to share the payment link via SMS.1
Open the invoice
From the Money page, click on the invoice row to open the invoice detail page.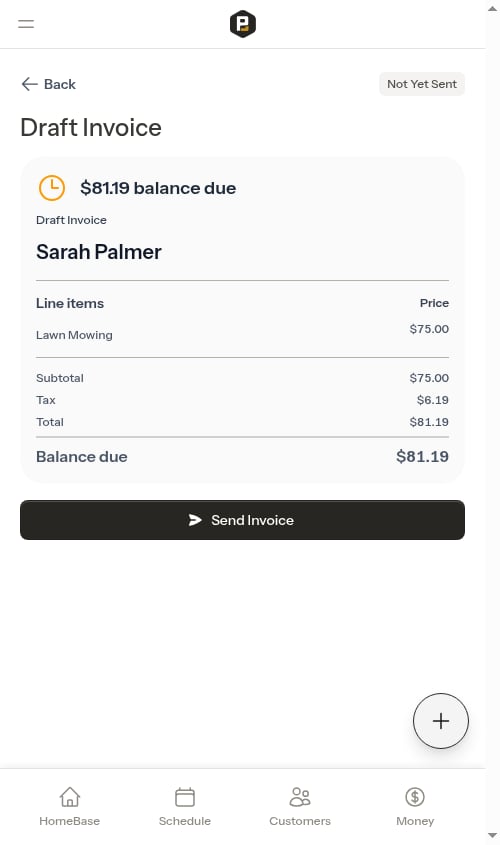
2
Click Send Invoice
Tap the Send Invoice button. The invoice is marked as sent and an invoice number is assigned.
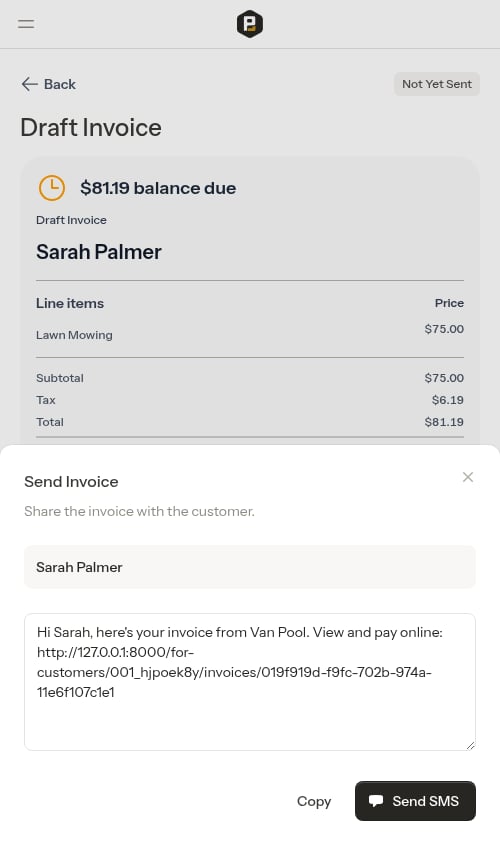
3
Share the payment link
The SMS sharing modal opens with a pre-filled message containing the customer’s unique payment link.
- Send SMS — Opens your device’s messaging app with the message ready to send (shown when a phone number is on file)
- Copy Message — Copies the full message to your clipboard (shown when no phone number is on file)
-
Copy — Copies the full message (link included) to your clipboard
Once sent, an invoice cannot be reverted to draft. You can still add credits or record payments against it.
When sending from a completed appointment, you’ll first see an invoice preview that shows the full invoice before it’s sent. Review it and tap Send to Customer to proceed to the SMS compose step. See Completing appointments for that flow.
Re-share an invoice
For invoices that have already been sent, use the Send Invoice button on the invoice detail page to re-share the payment link at any time. This is useful for following up on outstanding balances. When you tap Send Invoice from a completed appointment that has already been invoiced, Probase reuses the original invoice instead of creating a new one. The same invoice number stays attached to the job, and you’ll skip the preview step and go straight to the SMS sharing screen — handy for following up without giving the customer a second invoice for the same visit.Copy a receipt link
For paid invoices, a Copy Receipt Link button appears on the invoice detail page. Share this link with the customer so they can view their paid receipt.Record a payment
To record a cash, check, or other offline payment against an invoice:1
Open the invoice
From the Money page, click on the invoice row.
2
Tap Record Payment
Click the Record Payment button on the invoice detail page.
3
Fill in payment details
The customer and invoice are pre-selected. Choose the payment method and enter the amount.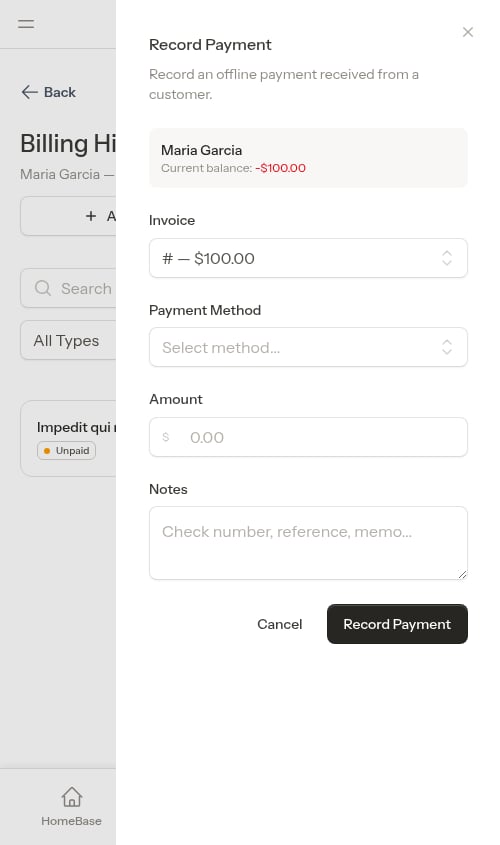
4
Save
Tap Record Payment. The invoice balance updates immediately.
Invoices from the billing history page
Each customer has a dedicated Billing History page. To get there, click on the customer’s name, then tap the Billing History link or click the balance amount at the top. From the billing history page you can record payments, add charges and credits, and view all line items. To send an invoice to a specific customer, go to the Money page, find their invoice, and click Send Invoice.Customer billing address
When a customer has a billing address on file, it appears on their invoices. To add or update a billing address:- Go to Customers and click on the customer’s name
- Click Edit
- Scroll to the Billing Address section
- Enter the address — start typing and address suggestions will appear to help you fill in city, state, and ZIP automatically
- Click Save