Overview
Probase uses Stripe to process credit card payments from your customers. Once connected, customers can pay their balance online through secure payment links.Connect your Stripe account
1
Access settings
Click Payments in the sidebar under BUSINESS. The Payment Processing section appears at the top of the page.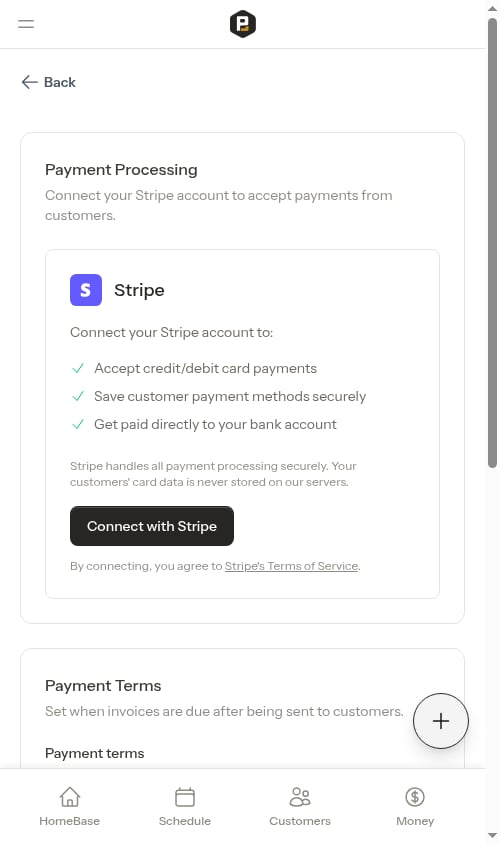
2
Click Connect with Stripe
Click the Connect with Stripe button. This opens Stripe’s secure onboarding flow where you’ll provide your business information and bank account details.
3
Complete the Stripe onboarding
Follow Stripe’s prompts to:
- Verify your business information
- Provide tax details
- Connect your bank account for payouts
- Verify your identity
4
Return to Probase
Once complete, you’ll be redirected back to Probase with Stripe connected.
Account status
Your Stripe connection status appears in the Payment Processing section:Pending setup
Your account is created but needs additional information from Stripe.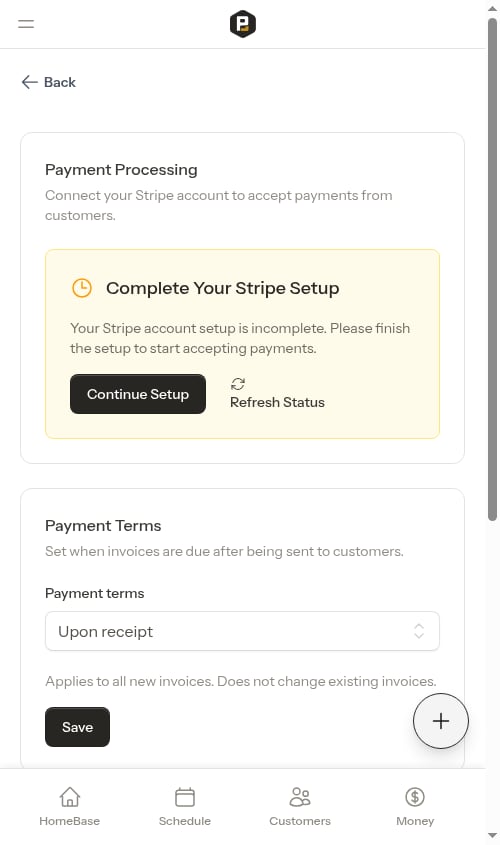
Restricted
Stripe needs additional information or verification to enable payments.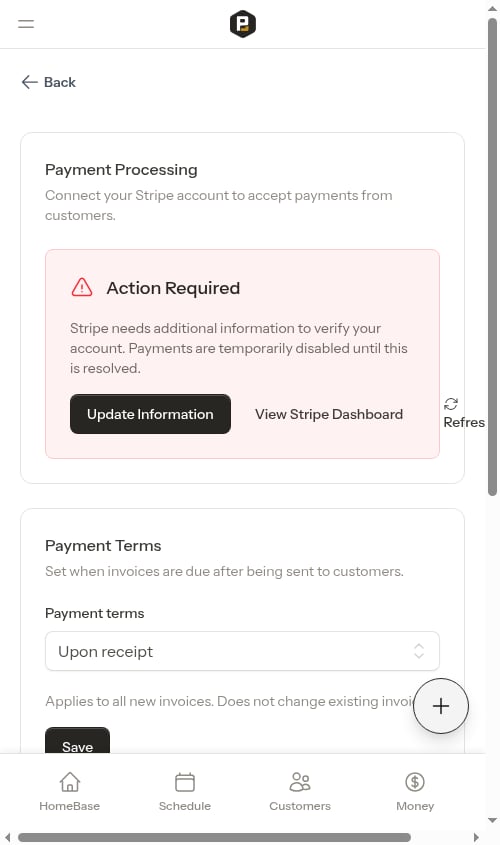
Active
Your account is fully connected and can accept payments.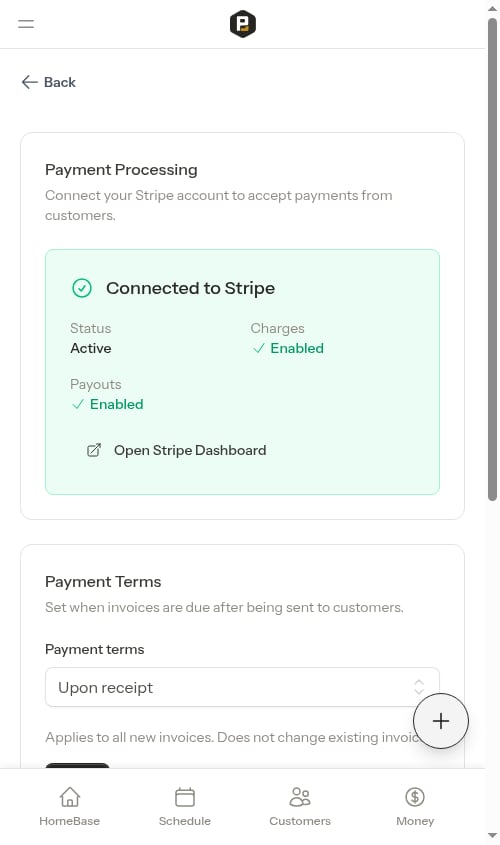
- Charges: Enabled - You can accept payments from customers
- Payouts: Enabled - Stripe can send money to your bank account
Limited
Charges are enabled but payouts are on hold pending additional verification.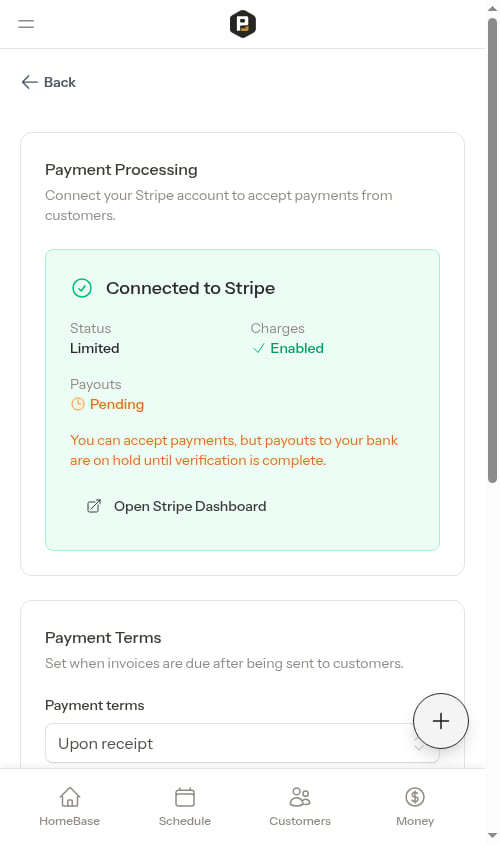
Refresh account status
If you’ve made changes in Stripe or completed required steps, click Refresh Status to sync the latest information from Stripe to Probase.View Stripe Dashboard
Click Open Stripe Dashboard to access your Stripe account where you can:- View transaction history
- Manage payouts
- Update bank account information
- View detailed reports
- Configure Stripe settings
What happens after connecting
Once Stripe is connected:- Payment links become active - Customers can complete payments online through the links you share
- Cards are saved securely - Customers can save payment methods for future use (stored by Stripe, not Probase)
- Funds go to your bank - Stripe deposits payments directly to your connected bank account (typically within 2 business days)
Stripe charges a processing fee for each transaction. Check Stripe’s pricing for current rates.
Payment terms
The payment settings page also includes a Payment Terms section where you can configure when invoices are due.
- Upon receipt — Payment is due immediately when the invoice is sent (default for new accounts)
- Net 15 — Payment is due 15 days after the invoice is sent
- Net 30 — Payment is due 30 days after the invoice is sent
Troubleshooting
The “Connect with Stripe” button isn’t working
Tapping Connect with Stripe takes you to Stripe’s secure onboarding in the same window; when you finish, Stripe returns you to Probase. If Probase can’t reach Stripe at that moment, you’re returned to the Payments page with the message “We couldn’t connect to Stripe right now. Please try again.” — this is usually a temporary hiccup, so wait a moment and tap Connect with Stripe again. If it keeps happening, contact support.My status shows as “Pending” or “Restricted”
Click the Continue Setup or Update Information button to see what Stripe needs. Common requirements include:- Additional business verification documents
- Bank account verification
- Tax ID confirmation
- Identity verification