Overview
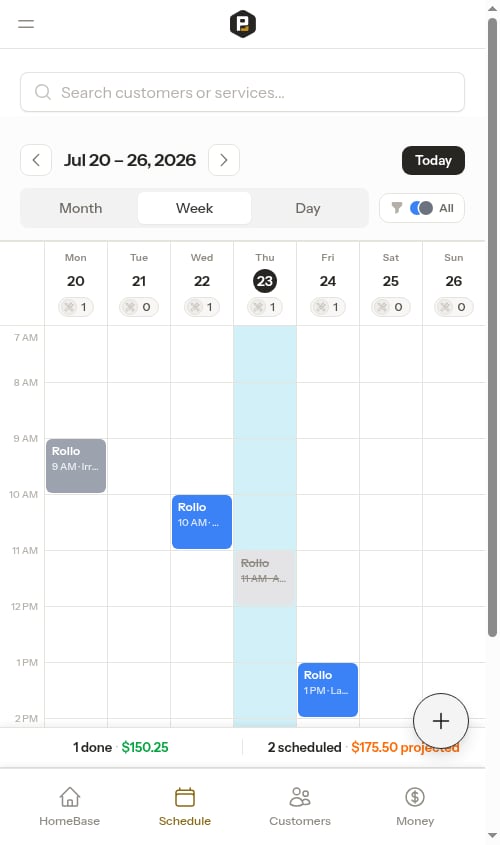
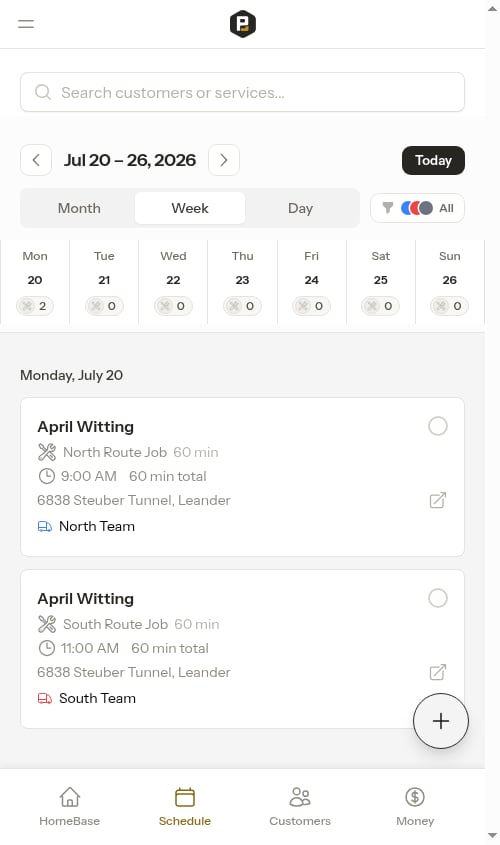
The Week view lays out a whole week — Monday through Sunday — on a time grid, like a calendar app. Each appointment sits in its column at the time it’s scheduled, so you can see how your days stack up, spot gaps and clashes, and balance work across crews at a glance. It’s the best view for planning ahead and office work.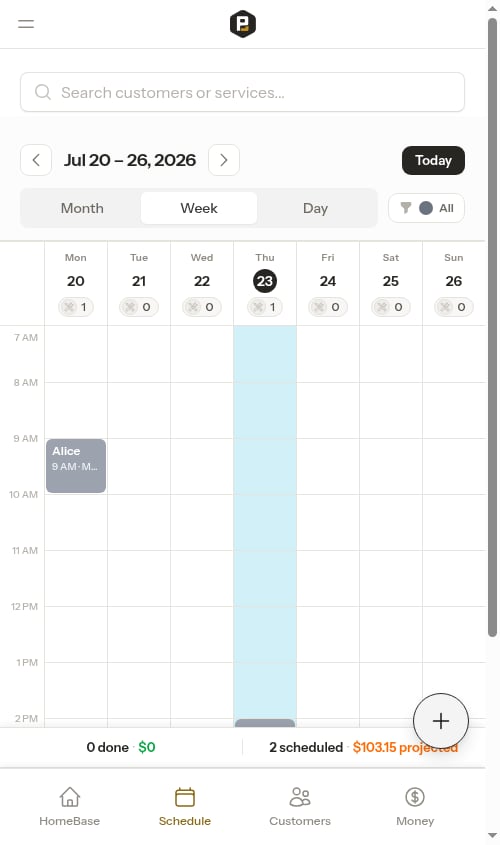
Open the Week view
Click Schedule in the sidebar, then tap Week in the Month / Week / Day view picker at the top of the page.
Reading the week grid
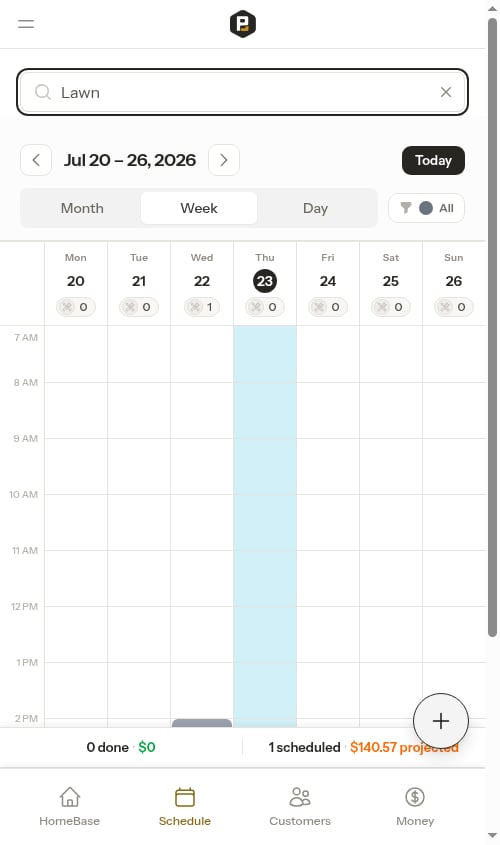
The grid has one column per day and a time axis down the left side (running from early morning to evening, and stretching automatically if you have work outside those hours).- Day headers across the top show each day’s date and a small pill with the number of stops scheduled that day. Today’s date is marked with a filled circle.
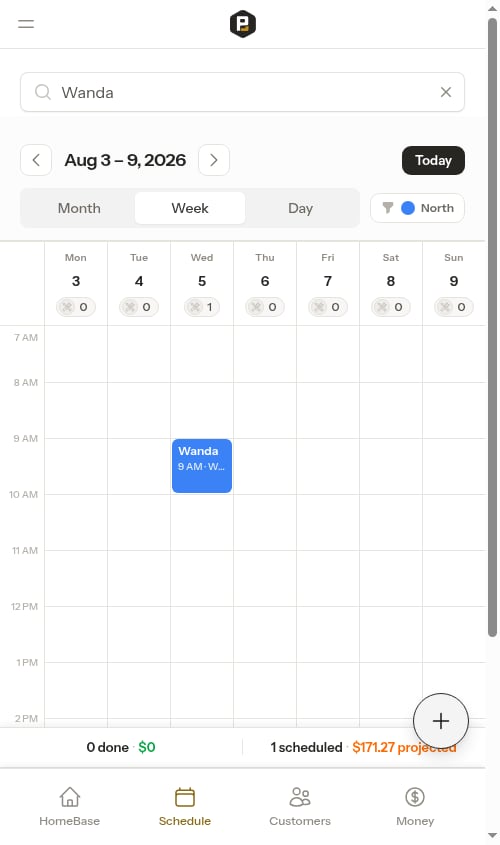
- Appointments appear as colored boxes positioned at their start time. The color matches the assigned crew, so you can read who’s working when. Each box shows the customer’s first name, the time, and the service.
- Non-service stops (lunch breaks, supply runs, drive time) appear as their own boxes, labelled with the stop name and duration.
- A red line runs across the grid at the current time, so you can see at a glance how the day is progressing against what’s booked.
Busy days collapse into a cluster
When several appointments crowd into the same part of a day, they collapse into a single cluster box showing a count (e.g. “3 items”). Tap the cluster to open a panel listing just those jobs in time order — see Day overview below.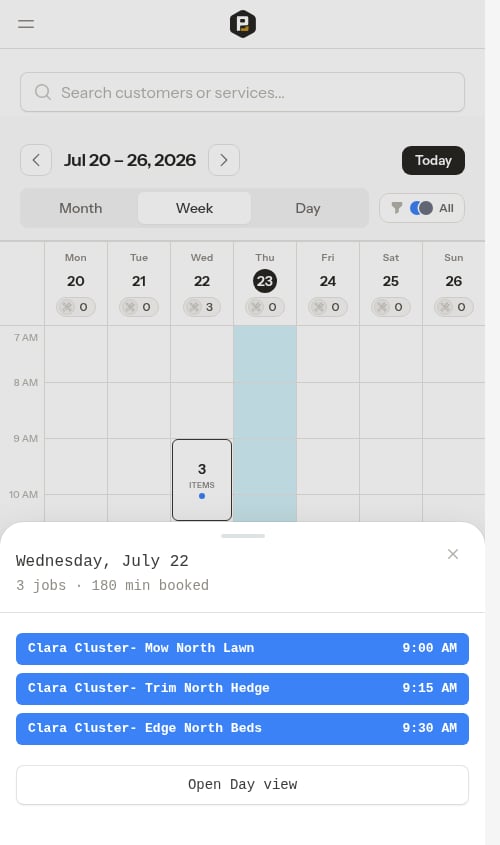
Revenue rollup strip
A summary strip pinned below the grid totals the week’s revenue at a glance:- Done — how many appointments are already completed, and the revenue they earned (in green).
- Scheduled — how many are still on the books, and the revenue they’re projected to bring in (in orange).
Day overview panel
Tap any day header (or a cluster box) to open the day overview — a bottom drawer on your phone, or a side panel on a wider screen. It lists that day’s jobs and stops in start-time order, with the job count and total time booked, so you can scan the day without leaving the week.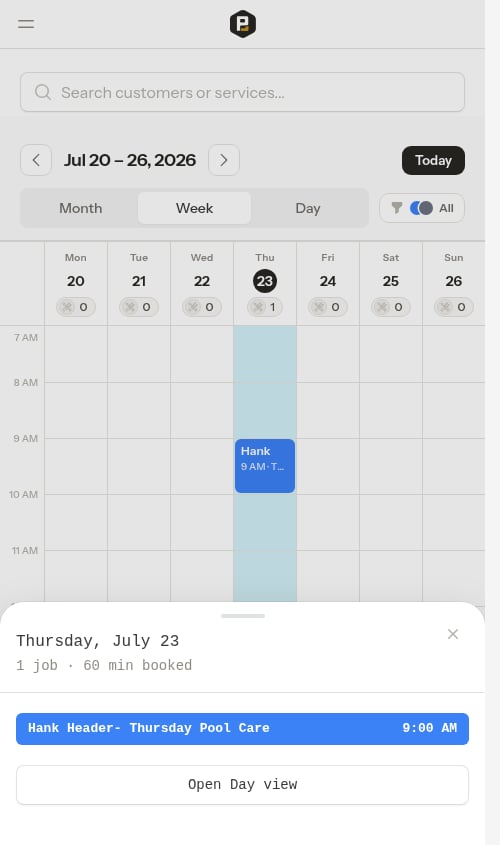
- Tap any job in the list to jump to its appointment detail page.
- Tap Open Day view to drill into that day’s full Day view, where you can complete or reschedule jobs and reorder stops.
- Tap the ✕, tap outside the panel, or press Esc to close it — the week stays exactly where it was. On a phone you can also drag the drawer down by its grab handle to flick it closed.
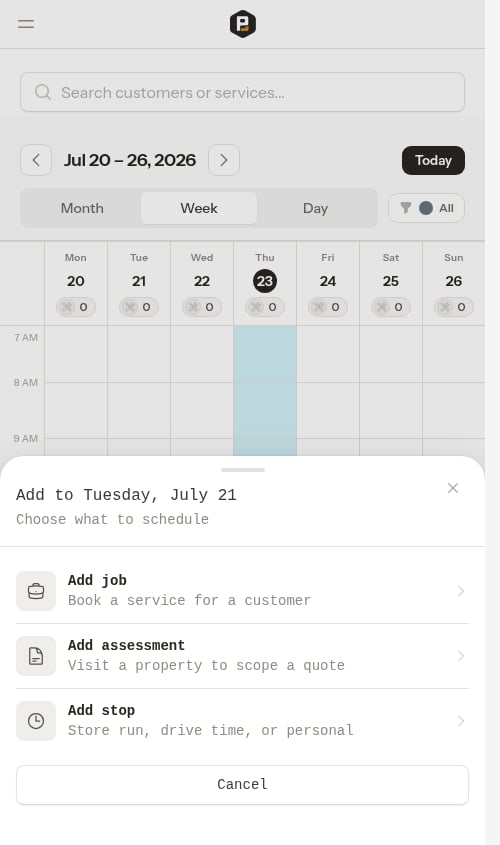
Add work from an empty slot
Tap any empty cell on the grid to open a quick menu for scheduling something new at that day and time:- Add job — book a service for a customer.
- Add assessment — visit a property to scope a quote.
- Add stop — a store run, drive time, or personal block.
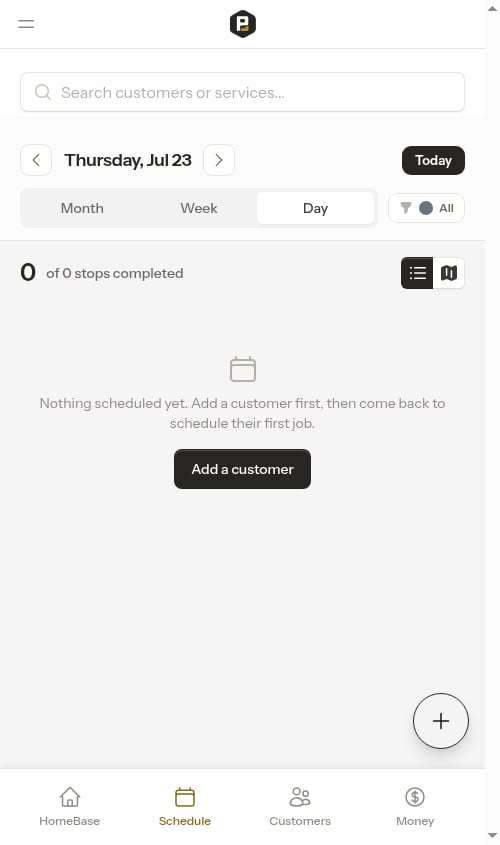
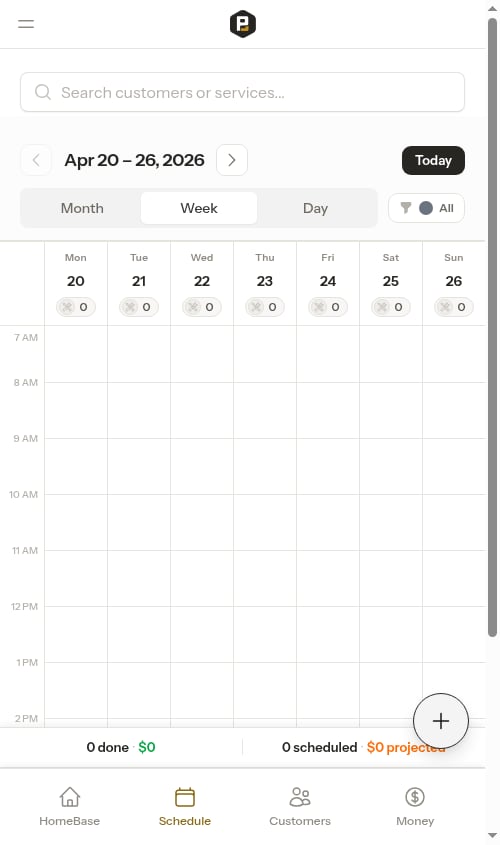
When your week is empty
A week with nothing on the books still shows the full grid with a zeroed-out rollup strip, so you always know exactly what’s scheduled — there’s no separate empty message on the Week view. You can tap any empty cell to add work straight into that day and time.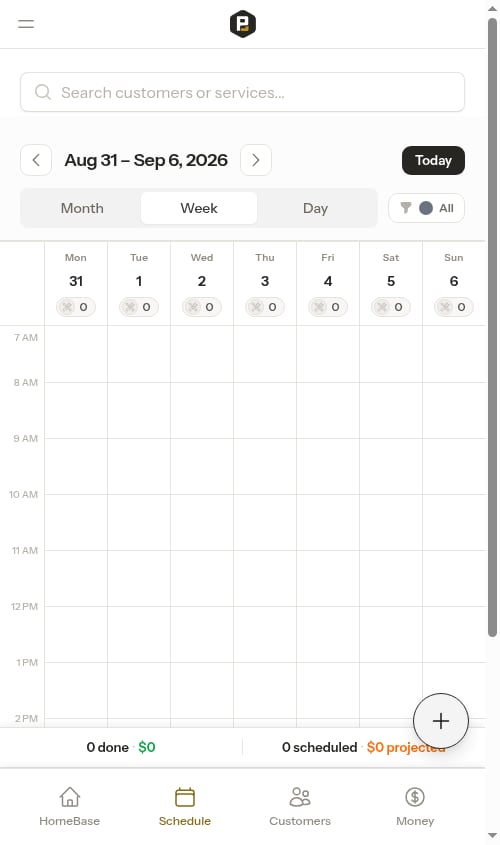
-
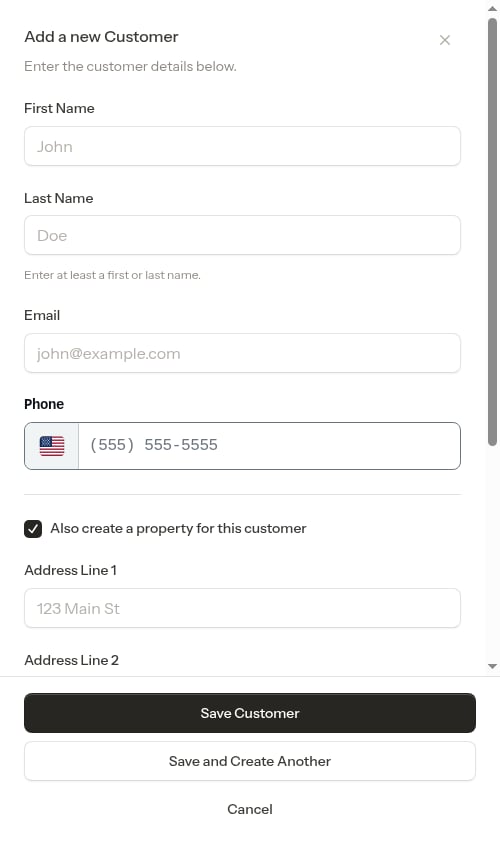
You haven’t added any customers yet — the prompt reads “Nothing scheduled yet. Add a customer first, then come back to schedule their first job.” and shows an Add a customer button. Tapping it opens the customer creation form right on the schedule, so you can add your first customer without leaving the page.
-
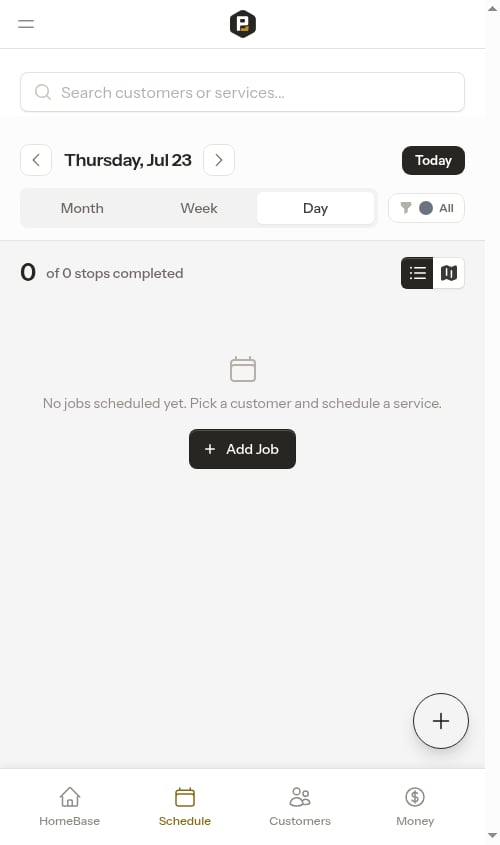
You have customers but nothing booked — the prompt reads “No jobs scheduled yet. Pick a customer and schedule a service.” and shows an Add Job button that takes you straight into the job creation wizard.
Filter appointments
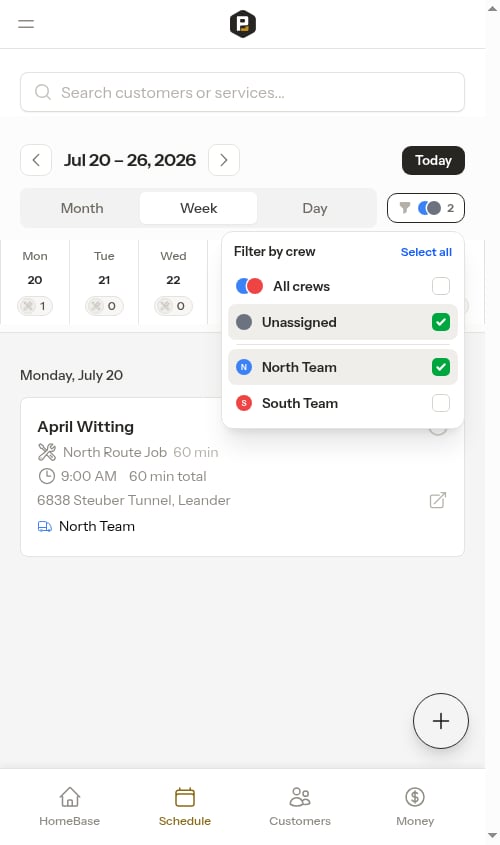
Filter by crew
Tap the crew filter (the funnel icon with colored circles) to choose which crews appear on the calendar. It’s a multi-select list, so you can show one crew, a handful, or all of them at once:- Tap any crew to toggle it on or off. The calendar updates immediately and the dropdown stays open, so you can fine-tune your selection in one go.
- Tap All crews (or Select all / Clear in the top corner) to show or hide everything at once.
- An Unassigned option lets you isolate jobs that don’t have a crew assigned yet.

Search
Type in the search box to filter appointments by customer name or service name. Results update as you type, making it easy to find specific appointments.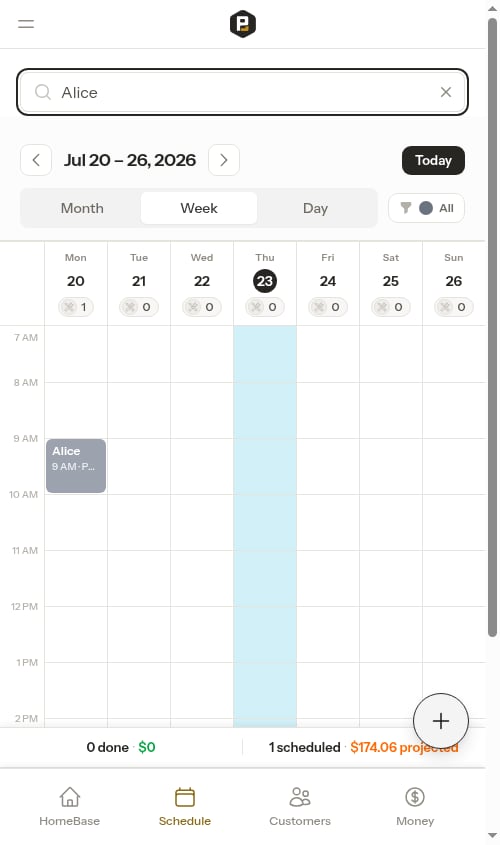
Move between weeks
The date controls at the top of the page work the same across all three views:- Tap the left and right arrows to step back and forward one week at a time.
- Tap the date label in the middle to open a calendar and jump to any week.
- Tap Today to snap back to the week containing today.

How far you can browse
The calendar covers a fixed window: up to one year ahead and three months back. When you reach either edge, the arrow in that direction dims and stops — there’s no scheduling data beyond those points to show.
Switching views keeps your place
Switching between Month, Week, and Day keeps whatever date you’re currently looking at — only the layout changes. If you’ve browsed ahead to a future week and switch to Day view, you stay on that date.
When you open a job from the week and then tap the back arrow on the appointment detail page, Probase returns you to the exact view you came from — the same week, crew filter, and search. You won’t lose your place or have to re-apply filters after checking a job.
Day, Week, and Month views
Probase offers three calendar views to fit different workflows. Switch between them with the Month / Week / Day picker at the top of the Schedule page.Day view
Best for field crews and daily operations:- Shows a single day’s work at a glance
- Progress tracking (e.g., “1 of 3 stops completed”)
- Card and map views — toggle between them on a phone, or see the stop list and route map side by side on desktop
- Filter by crew or search for specific appointments
- Reorder stops and add non-service stops
Week view
Best for planning and office work:- See a whole week on a time grid
- Read crew workload by color across the days
- Revenue rollup — done vs. projected
- Add work from any empty slot
- Search and filter by crew
Month view
Best for the big picture:- See a whole month of appointments on one grid
- Crew-colored bars make busy and quiet days obvious at a glance
- Tap any day to open its day overview, then drill into the Day view
Reorder stops and add stops
Reordering a crew’s stops is done from the Day view: switch to Day view, navigate to the day you want, then use the Reorder stops button. See Reordering stops for full instructions. You can add a non-service stop straight from the week grid using the Add menu on any empty slot, or from the Day view — see Daily crew schedules for details.Next steps
- View daily schedules for today’s work
- Month view for the big picture
- Optimize routes to plan efficient driving routes
- Complete appointments when work is done
- Create appointments to add new work to the schedule