What are quotes?
Quotes are formal pricing proposals that you send to customers for review and approval. They include all service details, pricing, and scheduling information. Quotes have their own workflow with statuses (Draft, Sent, Accepted, Declined) that help you track the sales process. When a quote is accepted, it automatically converts to an active Job service. If a start date was included, the first appointment is scheduled automatically as well. Use quotes for:- New customer inquiries where you know the pricing
- Standard services where you can quote without a site visit
- Formal quotes that need customer approval before starting work
- Creating a paper trail of customer acceptance
Two ways to create quotes
Method 1: Create a quote directly
Use this when you can provide accurate pricing without visiting the property:- Click New Quote from the Quick Actions menu (FAB) or the sidebar — or start from a customer’s Schedule → Visit the Property First flow to carry their details in (see Skip steps when you start from a customer)
- Select Create a Quote as what you want to create
- Choose or create the customer (skip if you started from a customer)
- Choose or create the property (skip if you started from a property)
- Fill in quote details (pricing, service information, scheduling)
- Click Create Quote
Method 2: Create a quote after an assessment
Use this when you need to visit the property before providing accurate pricing:- Create an Assessment service for the customer (see Creating quotes and assessments)
- Schedule and complete the assessment appointment
- When completing, a single-screen form lets you enter your assessment notes, optionally run AI Assist to draft quote line items from your notes, review and adjust those items, and upload photos
- Click Complete & Draft Quote
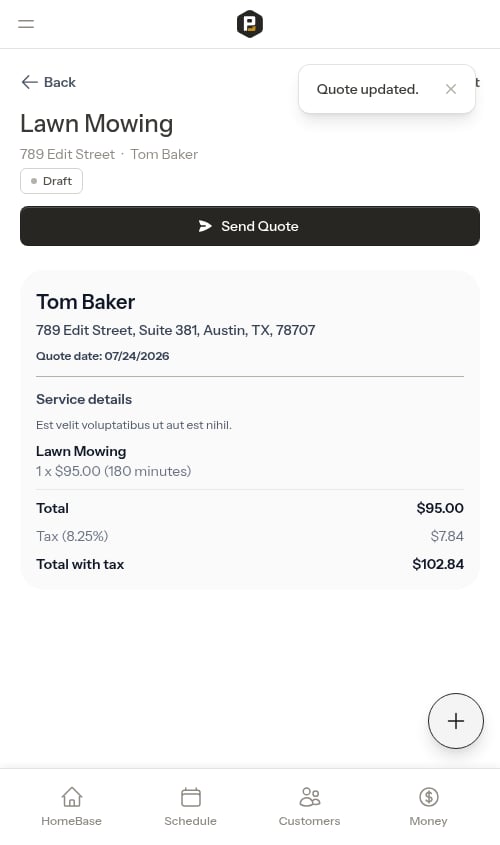
Reviewing and sending quotes
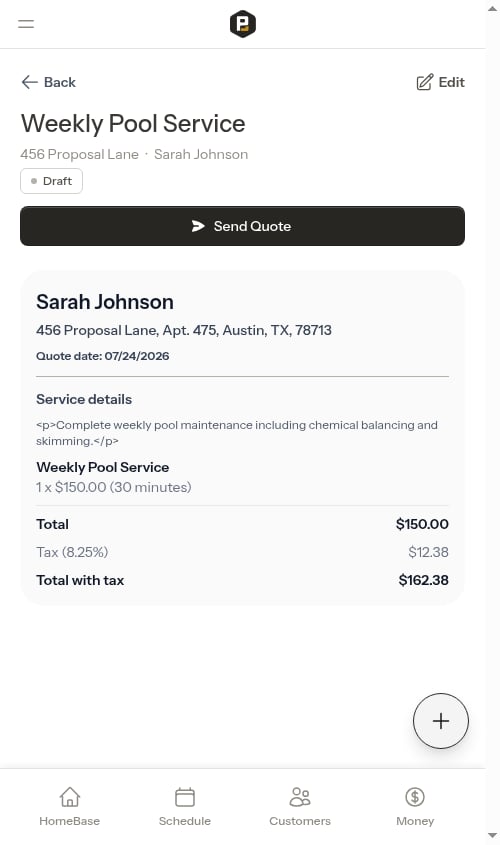
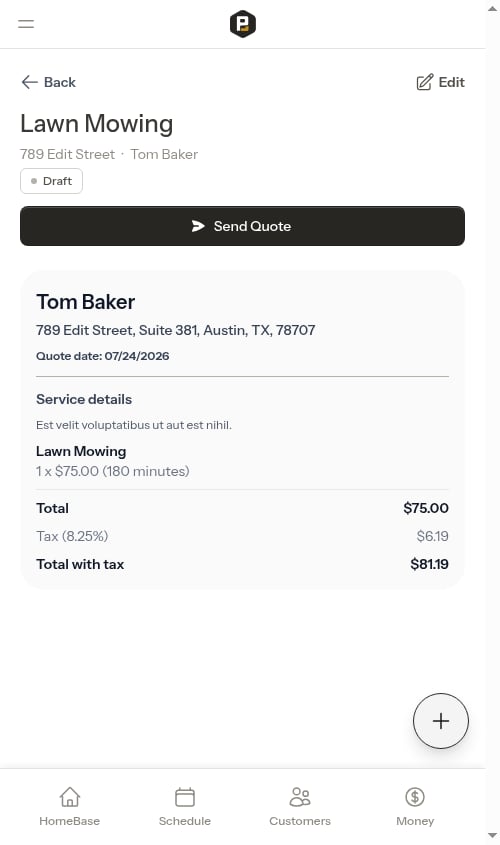
When a quote is created, it starts in “Draft” status. The quote won’t be visible to customers yet.View open quotes
To see all quotes in Draft or Sent status that need your attention:- Go to HomeBase (the main dashboard)
- In the Action needed section, tap the Open quotes action item
- The Open Quotes page lists all Draft and Sent quotes
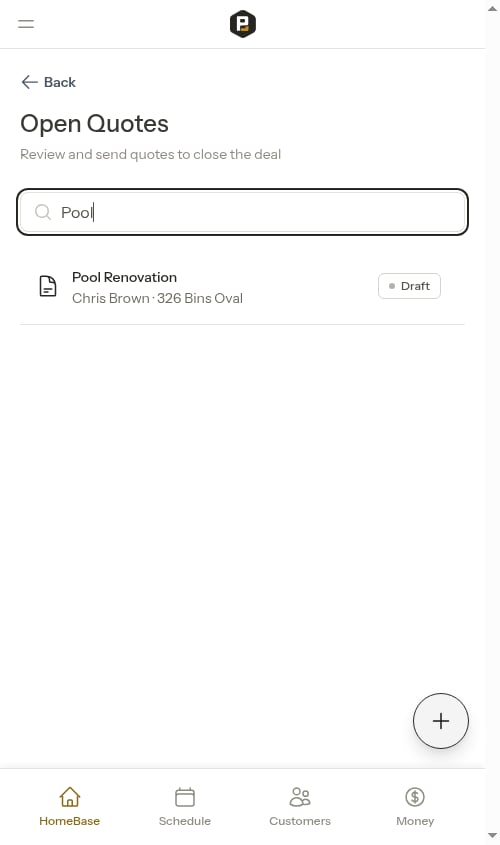
- Search by name, customer name, or address using the search bar
- Tap any quote to open its detail page
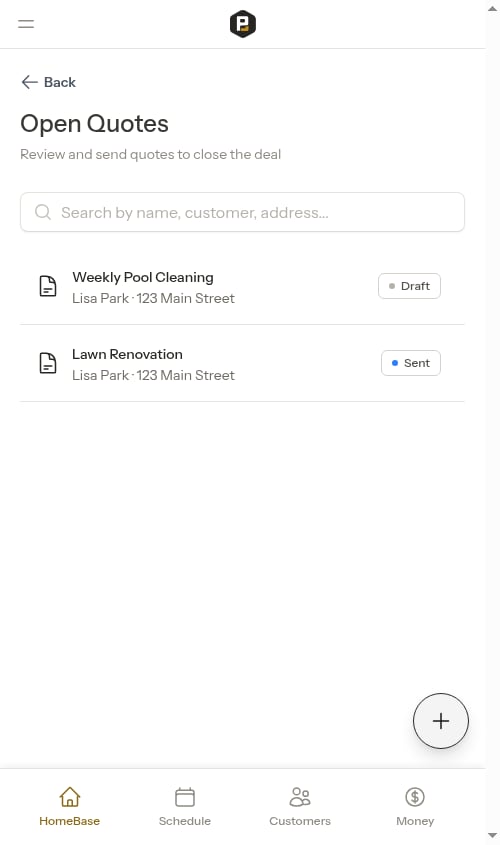

The Open Quotes page shows only Draft and Sent quotes — the ones actively needing follow-up. Accepted and declined quotes are accessible from the service detail page of the linked assessment or job.
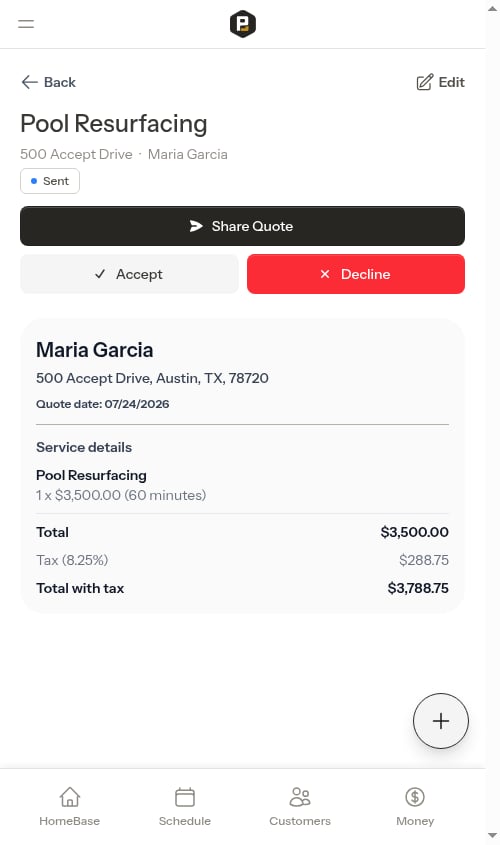
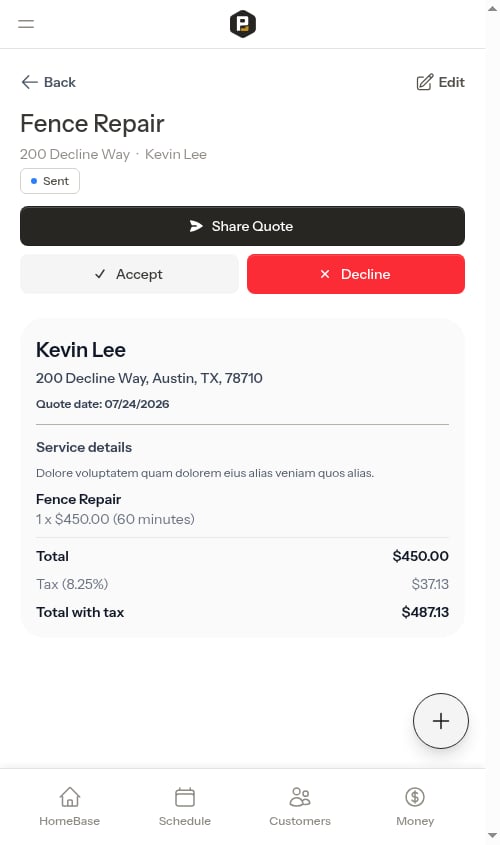
Send a quote
To send a quote to a customer:- Click on the quote to open the details page
- Review all information for accuracy:
- Service details and description
- Pricing and billing configuration
- Proposed start date and duration
- Valid until date (expiration)
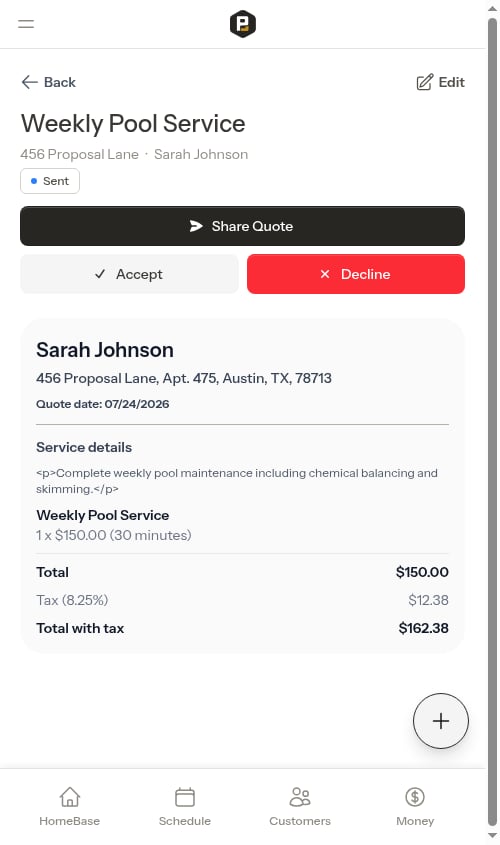
- Click Send Quote to change the status to “Sent”
- Send SMS — Opens your device’s messaging app with the message ready to send (shown when a phone number is on file)
- Copy Message — Copies the message to your clipboard (shown when no phone number is on file)
- Copy — Copies the message, including the quote link, to your clipboard

- Share Quote — Re-opens the SMS modal to share the link again at any time
- Accept the quote on behalf of the customer
- Decline the quote if the customer rejects it
- Edit the quote to make changes (status stays “Sent”)
Sharing the quote link with your customer
When you click Send Quote, the SMS compose modal opens automatically with a pre-filled message and the customer’s unique quote link. Share this link with your customer — no login required — so they can review the quote and respond on their own time. For quotes that have already been sent, click the Share Quote button on the quote detail page to re-open the SMS compose modal.The customer quote link is only available after you send the quote. It is not available for drafts.
What customers see
When a customer opens the link, they see:- Your business name and contact information
- Their name and property address
- Quote date and valid-until date
- Service details and full pricing breakdown:
- The base service with quantity and price
- Any additional line items (services or materials) with quantities and prices
- Total — the combined subtotal of all items
- Tax and Total with tax — shown when a tax rate is set
- Assessment notes and photos (if the quote came from a completed assessment)
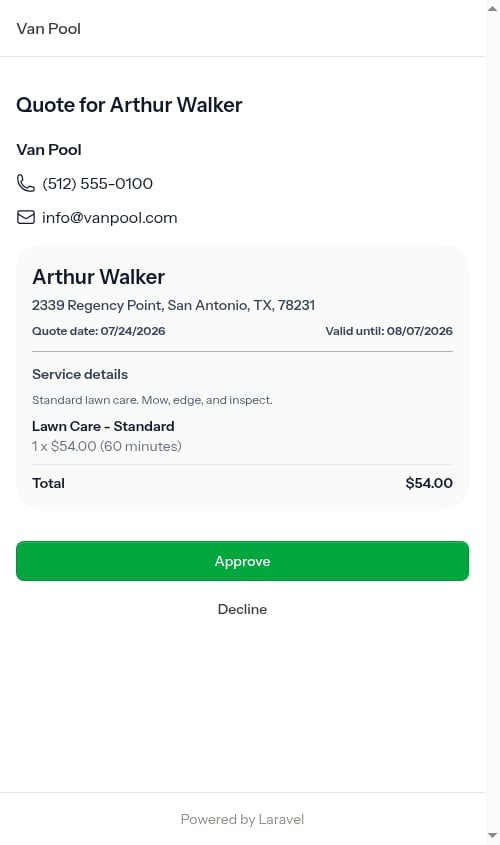
Customer can approve the quote
The customer taps Approve, then confirms the total price (including all line items and tax) in a confirmation prompt.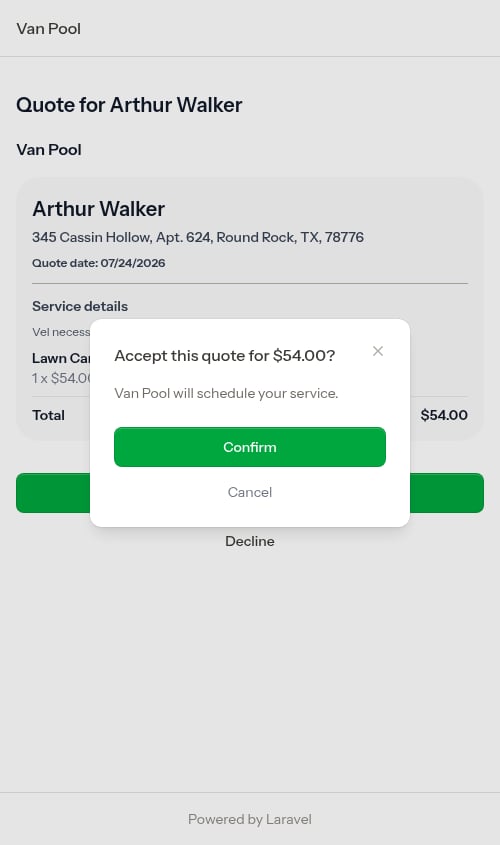
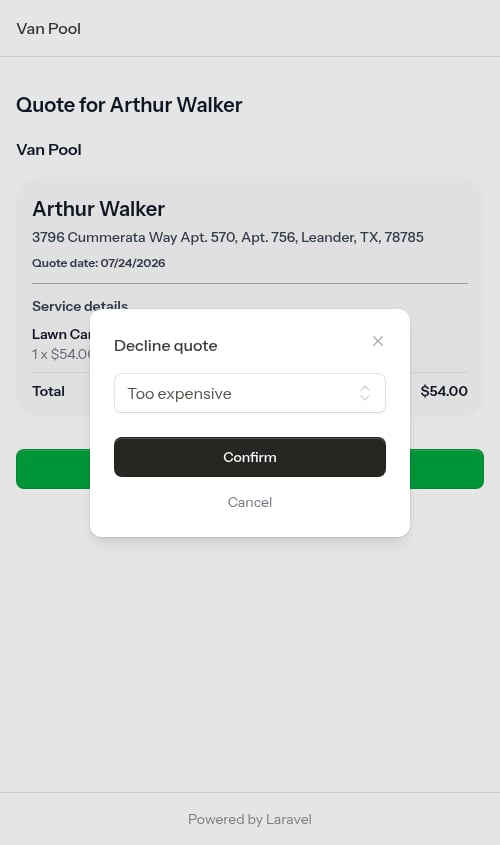
Customer can decline the quote
The customer taps Decline, selects a reason, then confirms. Available reasons:- Too expensive
- Found another provider
- No longer need the service
- Timing does not work
- Other
Expired quotes
If the quote’s Valid Until date has passed, customers see an expiration notice instead of the approve/decline buttons. The page prompts them to contact you for an updated quote.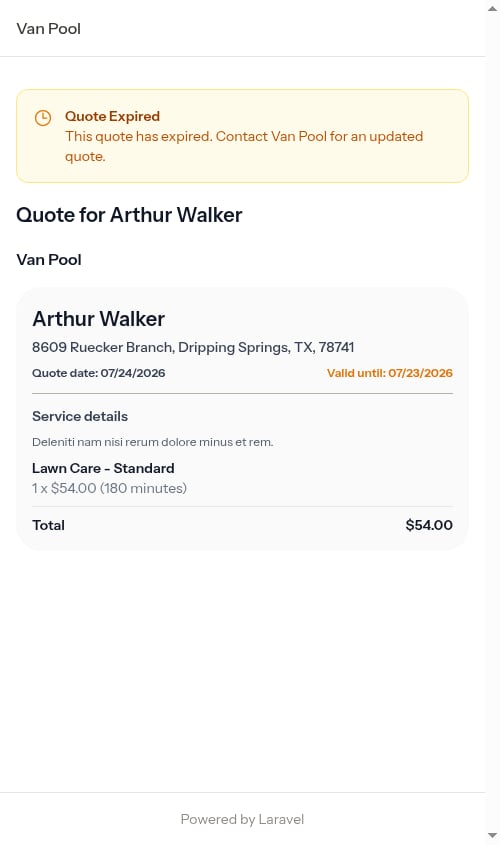
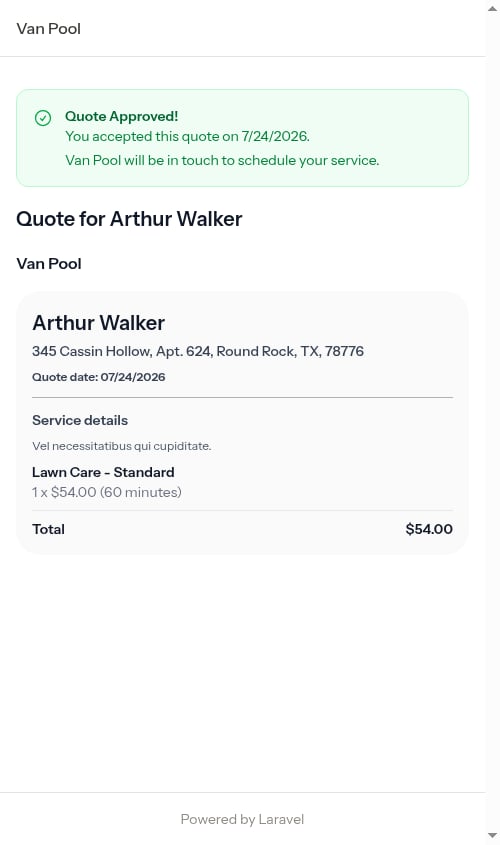
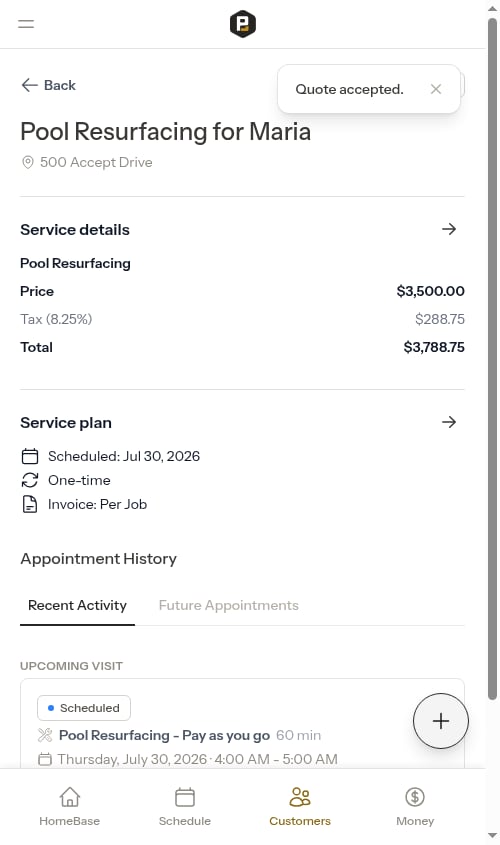
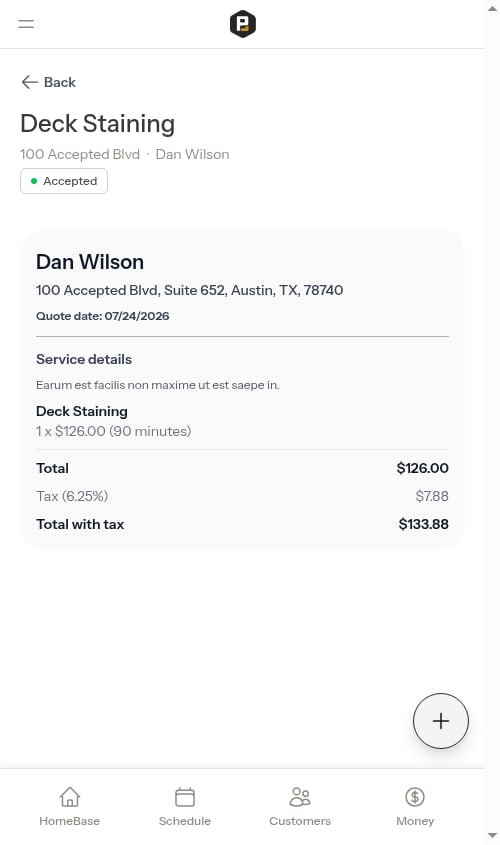
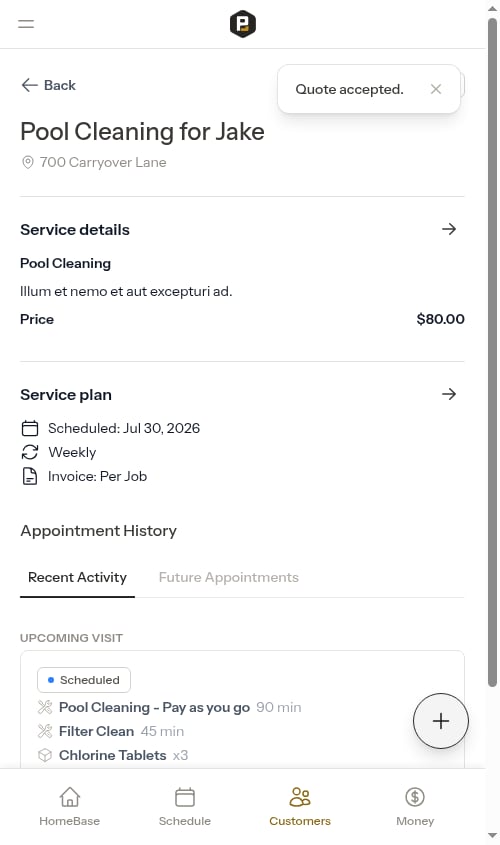
Accepting quotes
When a customer agrees to your quote (either verbally, via email, or through another method):- Open the quote details page
- Click Accept
- Fill in scheduling information:
- Start date for the first appointment (required)
- Estimated duration — choose from preset options (30 minutes up to a full day)

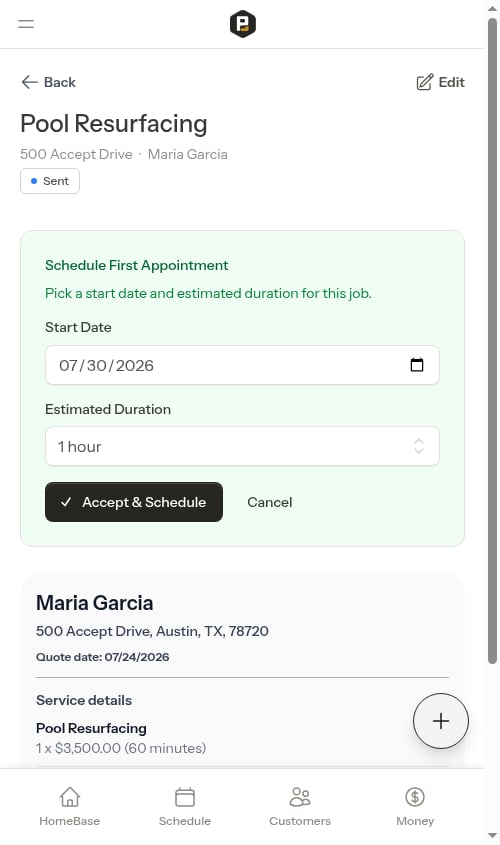
- Click Accept & Schedule
- The quote status changes to “Accepted” with a timestamp
- A new Job service is created with all the quote details (pricing, billing, frequency)
- The first appointment is automatically scheduled for the date you selected
- You’re redirected to the new job’s service details page
- The quote remains linked to the job for reference
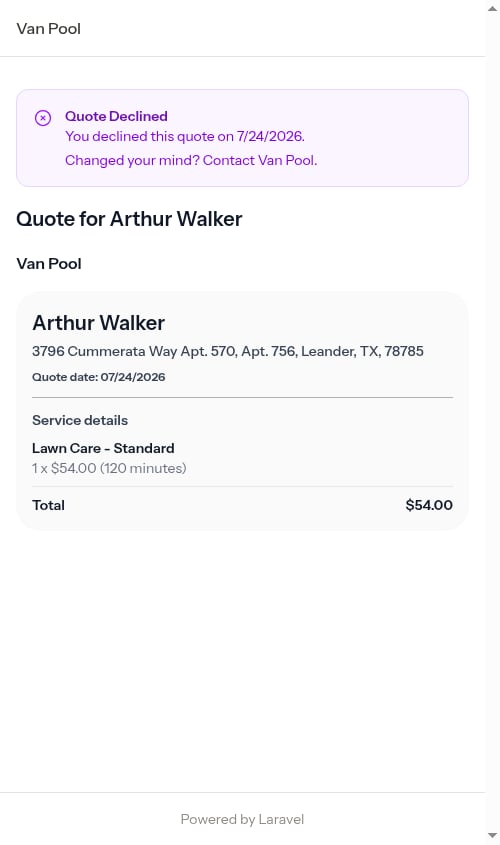
Declining quotes
If a customer declines your quote or decides not to move forward:- Open the quote details page
- Click Decline
- The quote status changes to “Declined” with a timestamp
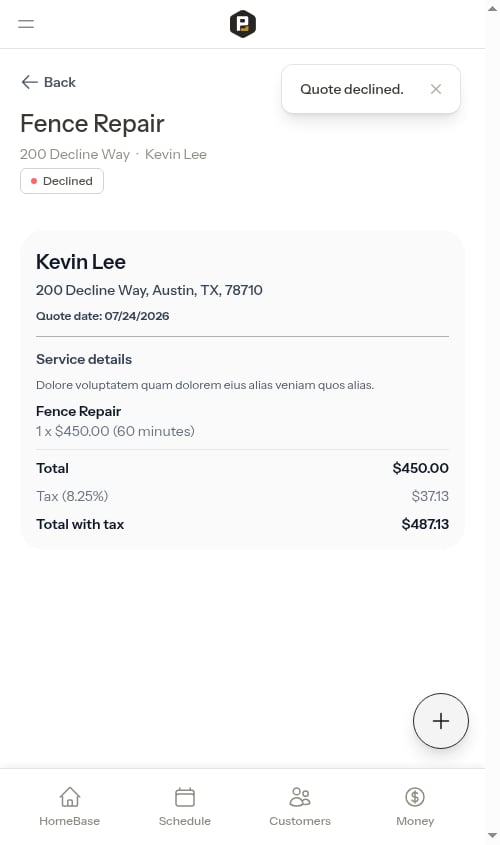
- Remain viewable in your quotes list for historical reference
- Cannot be edited or sent again
- Do not create any job services
- Help you track your quote-to-close ratio
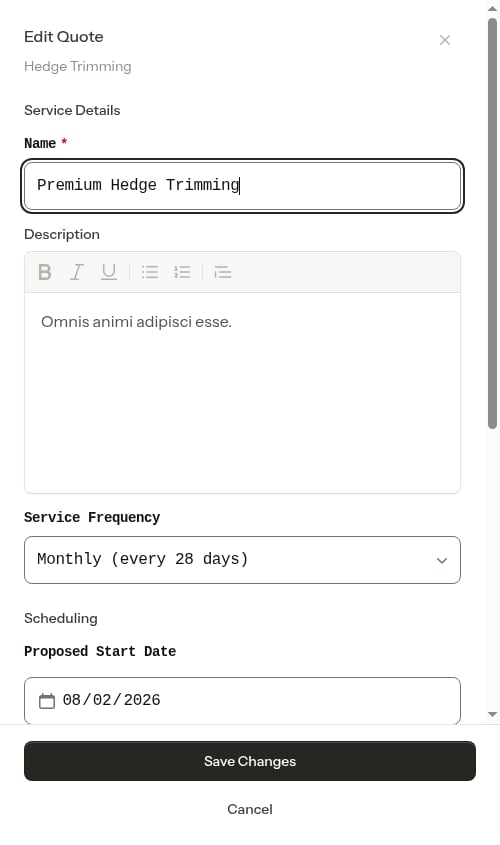
Editing quotes
You can edit quotes that are in “Draft” or “Sent” status:- Open the quote details page
- Click the Edit button in the page header
- A full-screen edit modal opens with several sections:

- Billing Type (Per Service or Subscription)
- Billing Interval (subscription only) — the recurring billing day is set automatically from the day the quote is accepted, so there’s no separate input
- Price and Tax Rate
- Estimated Duration
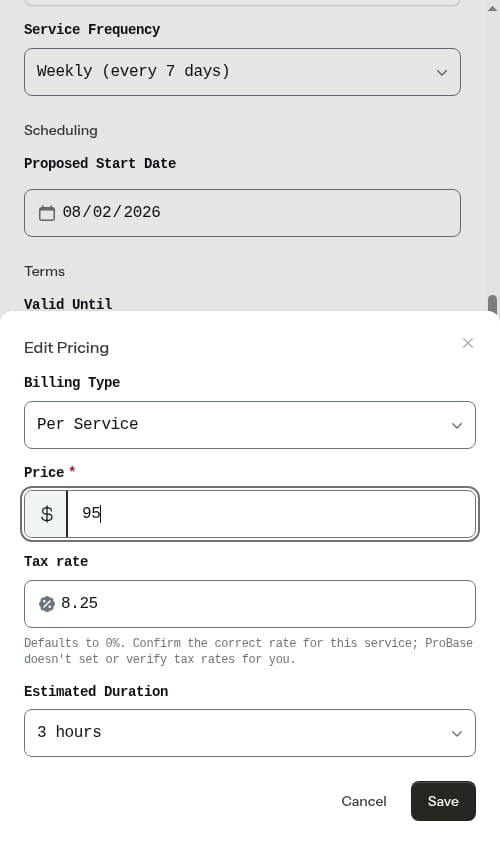

- Click Save Changes to save your edits.
Once a quote is accepted or declined, it cannot be edited. The quote becomes a historical record of what was agreed upon or rejected.

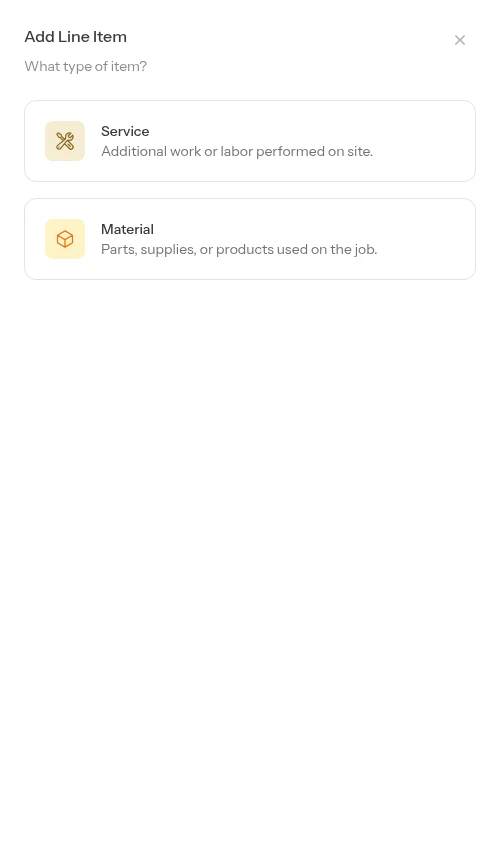
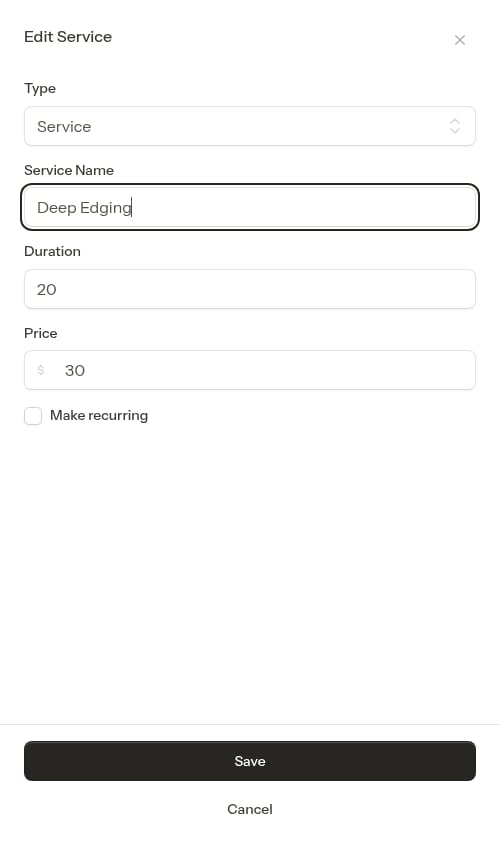
Adding line items to a quote
Line items let you add extra charges to a quote beyond the base service price. Use them when you need to include specific additional services or materials — for example, “Algae Treatment” or “Filter Cartridge.” Line items appear on the quote card when you send it to the customer, giving them a clear breakdown of everything included. Two types of line items:- Service — Additional labor or work included in the quote (e.g., “Filter Clean”, “Algae Treatment”). You can optionally set a duration in minutes.
- Material — Parts, supplies, or products included (e.g., “Chlorine Tablets”, “Filter Cartridge”). You set a quantity for materials.
Line items can only be added, edited, or deleted while the quote is in Draft or Sent status. Once the quote is accepted or declined, all items become read-only.
Add a line item
1
Open the quote edit modal
From the quote detail page, click the Edit button. Scroll to the Pricing section to see any existing line items and the Add line item button.
2
Tap Add line item and choose a type
Tap Add line item. A modal opens asking what type of item you’re adding.
- Service — For additional work or labor
-
Material — For parts, supplies, or products
3
Fill in the details
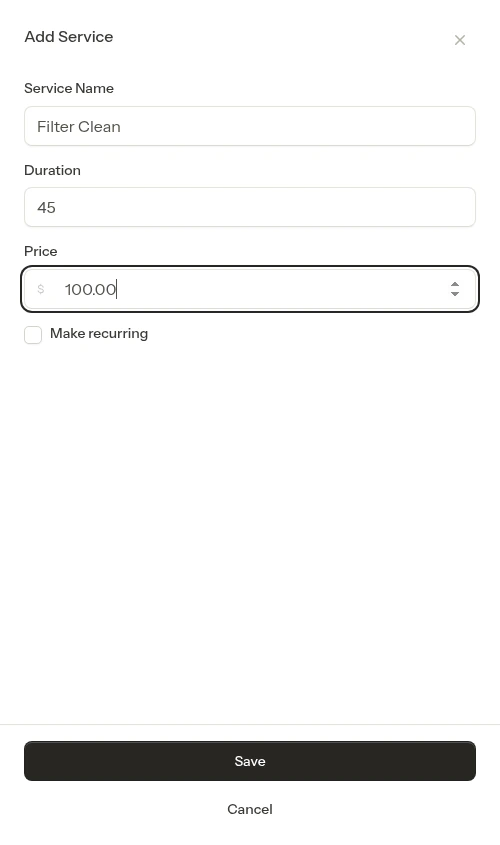
Fill in the item details specific to the type you selected.For Service items:
- Service Name — What the additional service is (e.g., “Filter Clean”)
- Duration — How many minutes this takes (optional)
- Price — What you charge for it
- Make recurring — Check this to carry the item forward to future appointments automatically. Only has an effect for recurring services (weekly, bi-weekly, or monthly) — items marked recurring will continue appearing on future appointments.
- Material — Name of the product or part (e.g., “Chlorine Tablets”)
- Quantity — How many units
- Price — Price per unit
-
Make recurring — Check this to carry the item forward to future appointments automatically. Only has an effect for recurring services (weekly, bi-weekly, or monthly) — items marked recurring will continue appearing on future appointments.
4
Save
Tap Save. The item appears in the list immediately.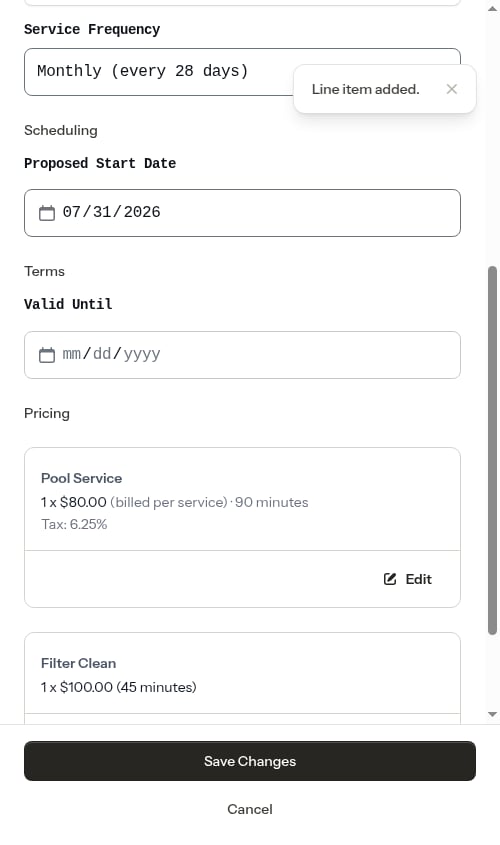
Edit a line item
Tap Edit on any line item card to update its details. When editing, you can also switch the item type between Service and Material using the Type dropdown.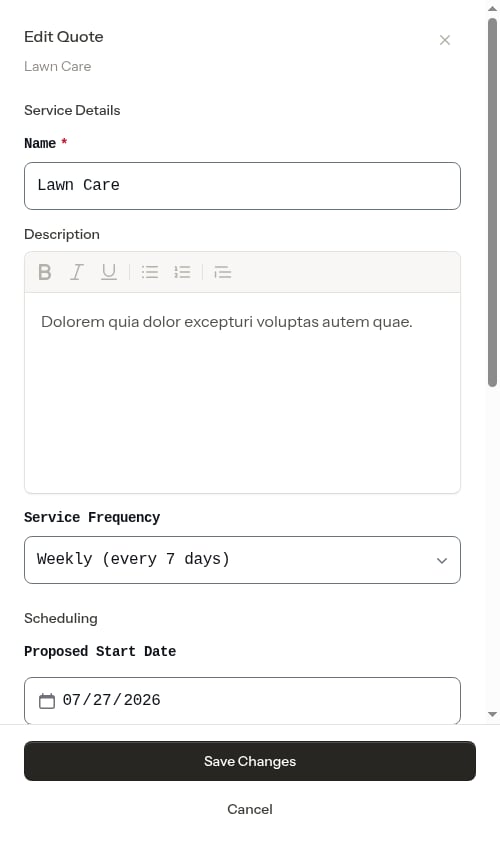

Delete a line item
Tap Delete on any line item card to remove it. Confirm the deletion when prompted.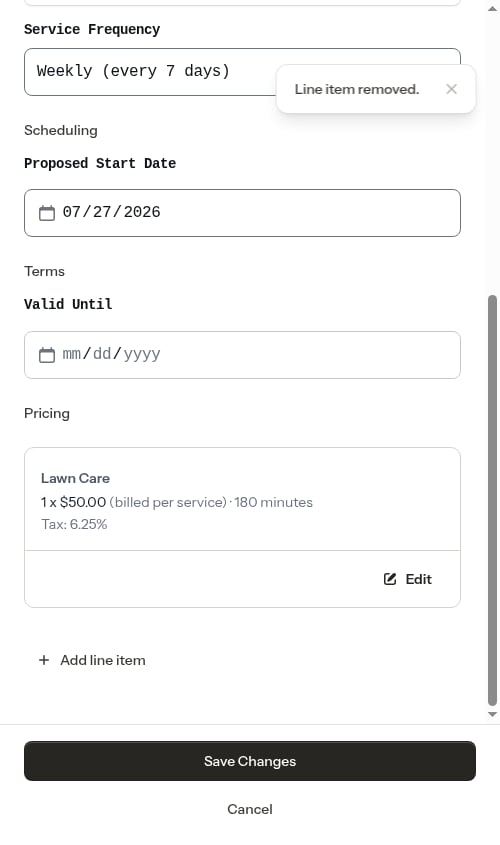
How line items carry over when a quote is accepted
When you accept a quote (or a customer accepts it), all line items automatically carry over to the first appointment on the new job. If no start date was set at the time of acceptance, line items are still copied automatically when you schedule the first appointment from the service page. Items marked Make recurring will continue to appear on future appointments as well. This means you don’t need to re-enter standard add-ons for every visit.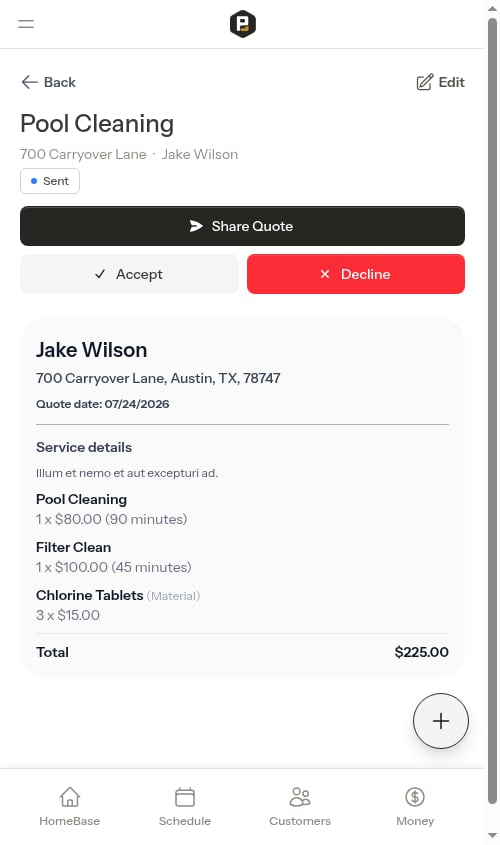
Quote statuses
Quotes move through these statuses:Understanding quote workflow
Quotes move through a clear workflow to help you track the sales process:Quote lifecycle
- Initial status when created
- Quote is being prepared and reviewed
- Not visible to customers
- Can be edited or deleted
- Can be sent to customer
- Quote has been shared with the customer
- Awaiting customer decision
- Can still be edited (useful for negotiation)
- Can be accepted or declined
- Customer agreed to the quote
- Creates a Job service; first appointment is scheduled if a start date was set
- Cannot be edited (historical record)
- Linked to the created job for reference
- Customer rejected the quote
- No job service is created
- Cannot be edited (historical record)
- Helps track quote-to-close metrics
Best practices
Be detailed in descriptions - Include what’s included in the service, frequency, and any important details customers need to know. Set valid until dates - Add an expiration date for time-sensitive quotes to create urgency. Use proposed start dates - Suggest when work can begin to help customers plan. Track reasons for declines - Note why customers decline to improve future quotes. Review before sending - Double-check all details while the quote is in “Draft” status.Next steps
- Creating quotes and assessments - Detailed guide to the quote creation wizard
- Managing services - Understand jobs and assessments
- Creating appointments - Schedule work
- Customer status - How quotes affect customer status