What payment terms do
Payment terms set the due date on every invoice you send. When you send an invoice, ProBase counts forward from the send date by the number of days you’ve chosen and stamps that as the due date. The due date is what decides when an invoice counts as Overdue on your Money page. You choose one default for the whole business, and you can give any customer their own terms — a commercial account on Net 30, say, while everyone else stays on Net 7. See Terms for one customer.Where to find the setting
Click Payments in the sidebar under Business. The Invoice Settings card sits in the Invoice settings group at the bottom of the page, below the Stripe and Venmo cards. It holds everything about what an invoice looks like to your customer — your payment terms, your next invoice number, the past-due wording switch, the star-rating requirement, and your tipping options — all saved together with one Save button.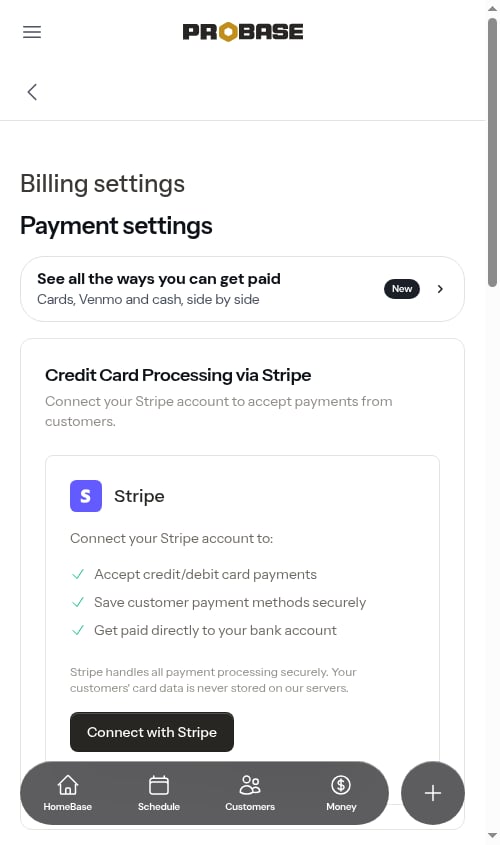
The same Invoice Settings card also appears on the Business Profile settings page, so you can change it from either place.Payments only appears in the sidebar for the Admin role and the business Owner — payment settings are one of the admin-level powers. See Roles and permissions.
Choosing your terms
Pick an option from the Payment terms dropdown:
Click Save when you’re done. An Invoice settings updated. confirmation appears.
New accounts start on Net 7. A freshly sent invoice gets a week before it’s considered late, so a customer who opens their invoice the same day never lands on something that’s already past due. If your account was created before this change, your existing choice is untouched — switch it here whenever you like.
Setting a custom due period
If none of the presets match how you bill, pick Custom from the dropdown. A Custom due days field appears underneath — type the number of days after sending that the invoice should be due (for example45), then click Save.
Custom terms must be between 1 and 180 days. Leave the field blank or enter a number outside that range and ProBase shows an error under the field instead of saving.
Once saved, a custom period shows up as Custom in the dropdown with your number still filled in, so you can adjust it later without re-picking the option.
Terms for one customer
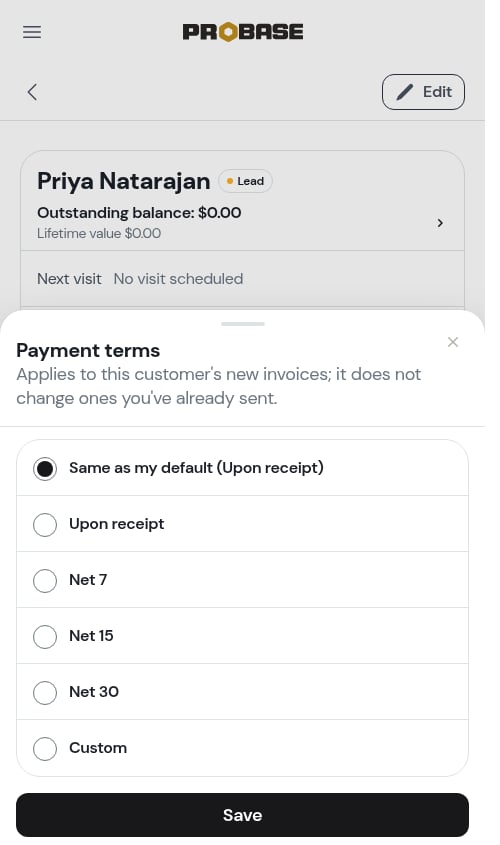
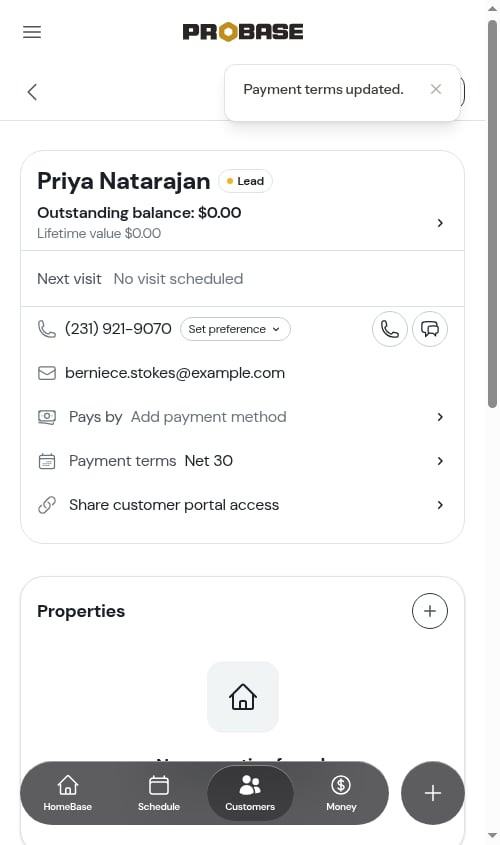
Open the customer’s page. The top card has a Payment terms row, reading Same as my default until you change it.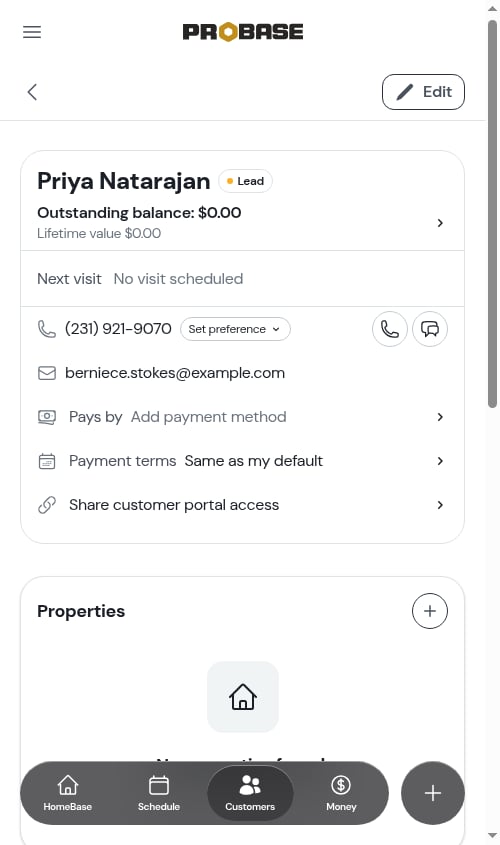
Next invoice number
Switching to ProBase from another invoicing tool? You can pick up where your old numbering left off, so your first ProBase invoice doesn’t start over at #00001.1
Find the Next invoice number row
Click Payments in the sidebar under Business. In the Invoice Settings card, the Next invoice number row sits just below your payment terms. Its caption tells you the number your next invoice will take — for example Your next invoice will be #00319. Set this to continue from another system’s numbering.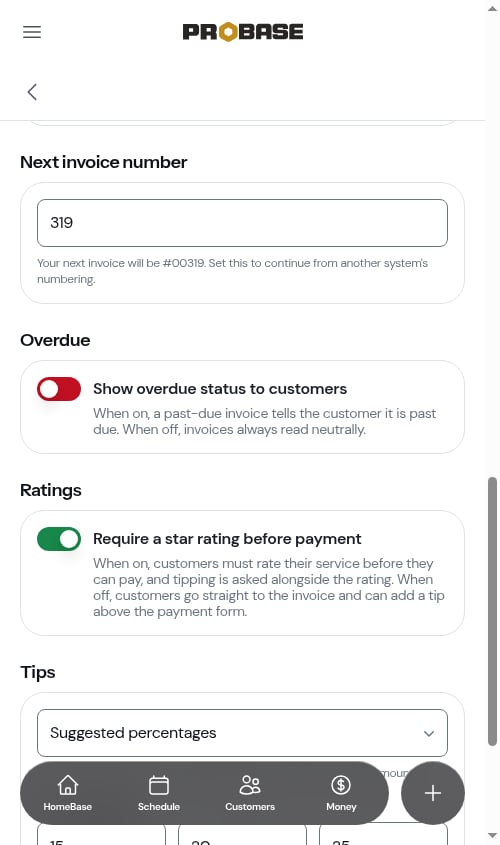
2
Enter the number you want next
Type the number your next invoice should have — for example, if your last invoice in your old system was #00499, enter 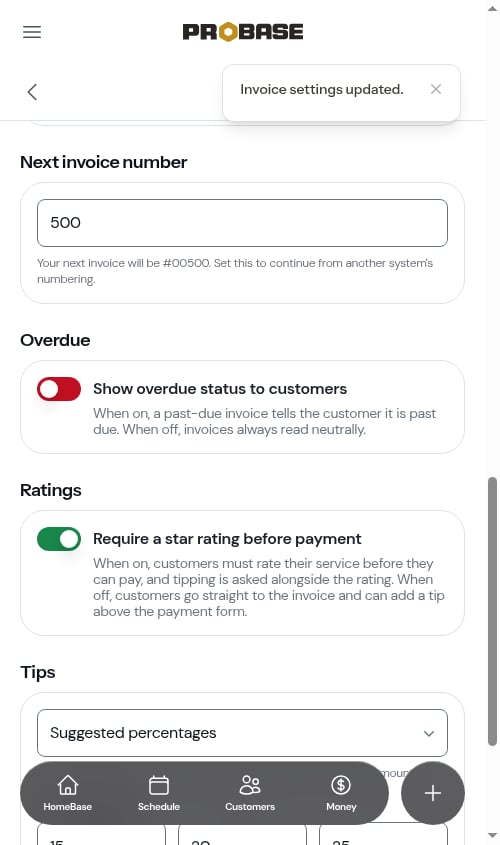
500. Then click Save. The caption updates to the new number.3
Send as usual
The next invoice you send takes that number, and the ones after it count up from there. When you send, the What sending locks section of the Send invoice screen names the number the invoice is about to get — for example assigns Invoice #00500.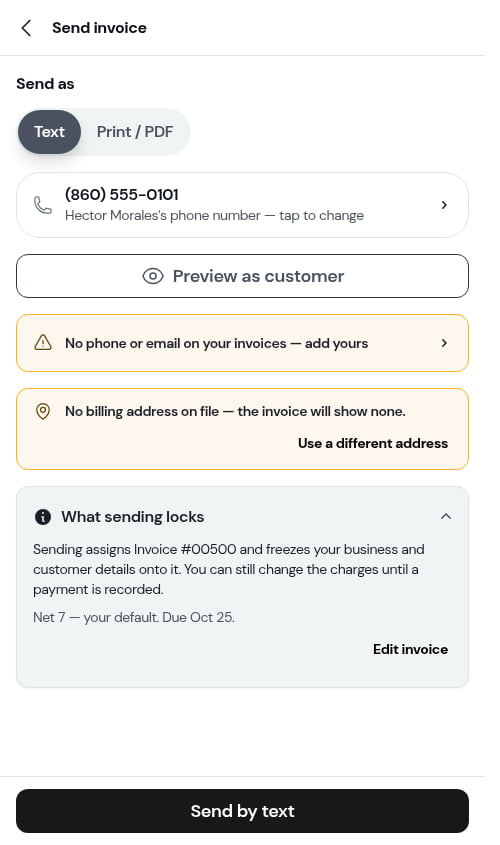
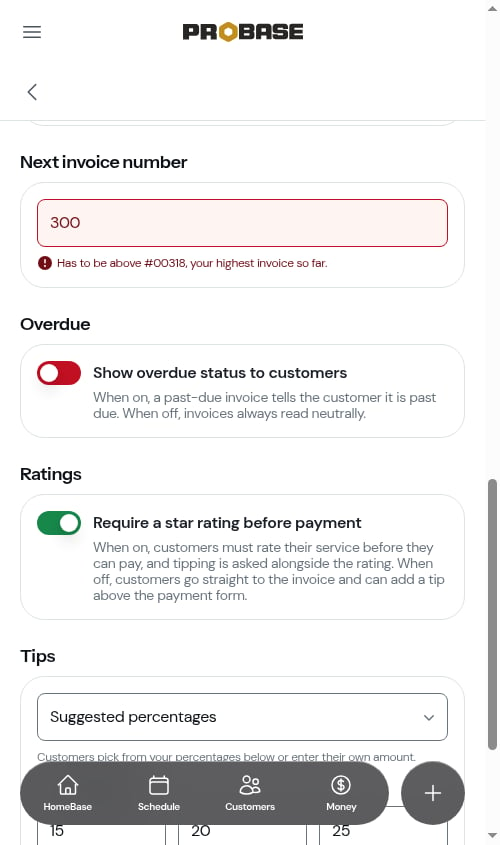
Changing the number never renumbers an invoice you’ve already sent — the number on your customer’s copy stays the same. Drafts don’t have a number yet; they take the next number at the moment you send them.
Automatic late fee
ProBase can add a late fee to an invoice that’s still unpaid after its due date. You choose the percentage and how many days of grace to give. ProBase adds the fee once, and the customer is told ahead of time on the invoice itself.Automatic late fees are being turned on for businesses gradually. If you don’t see the Charge a late fee automatically switch under your payment terms, it isn’t on for your account yet.
Setting up your late fee
1
Turn on the switch
Click Payments in the sidebar under Business. In the Payment terms card, below the terms dropdown, turn on Charge a late fee automatically.
2
Enter the percentage and the grace days
Two fields appear: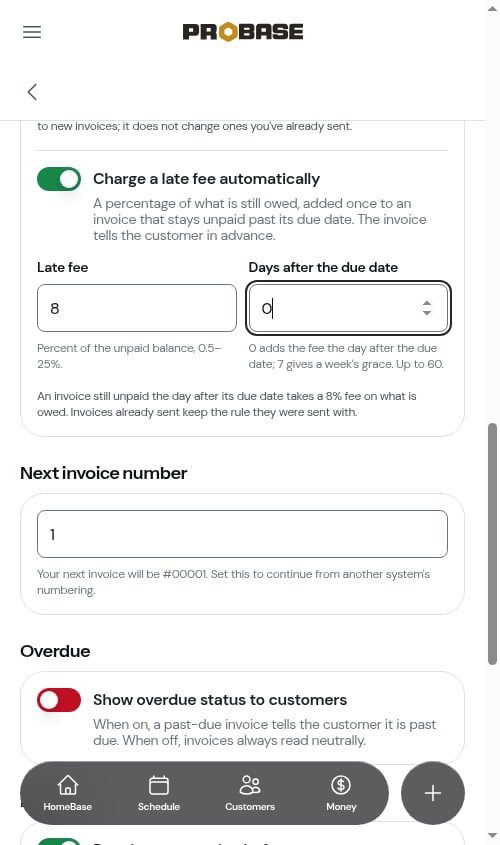
- Late fee: the percentage of the unpaid balance to charge, from 0.5% to 25%.
- Days after the due date: how long to wait. 0 adds the fee the day after the due date, and 7 gives a week’s grace. The most you can enter is 60.
3
Save
Click Save. The Invoice settings updated. confirmation appears. To stop charging late fees, turn the switch off and save.
What your customer sees before the fee
An unpaid invoice that was sent under a late-fee rule shows a notice under its totals, on your copy and on the customer’s copy (online, printed and emailed). For example: A late fee of 8% applies after Oct 14. The date is the last day the customer can pay without the fee.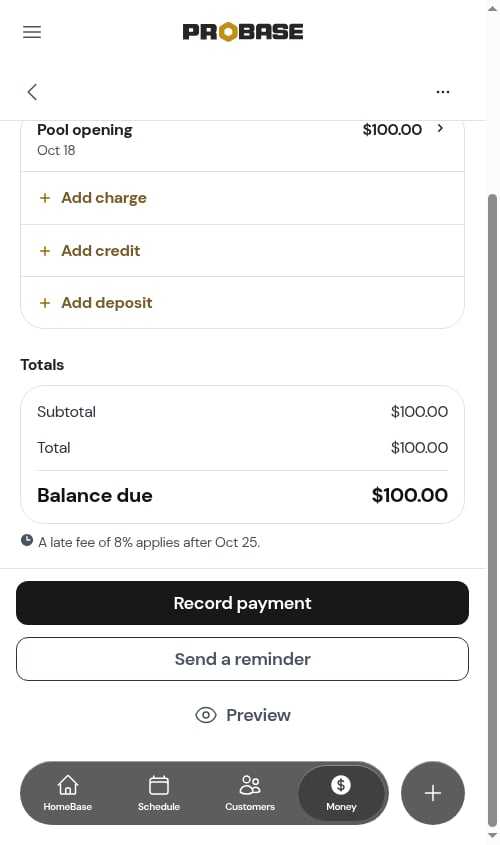
When the fee is added
Every morning, ProBase checks your unpaid invoices. When an invoice is more than the number of grace days past its due date, ProBase:- Adds one charge to that invoice, called something like Late fee (8%). The fee is the percentage of the balance still owed, so a partly paid invoice is only charged on what’s left.
- Records the change in the invoice’s History as automatic.
- Sends the invoice to the customer again with the new total, by text if they have a phone number, or by email otherwise. If ProBase can’t send it, use Resend on the invoice yourself.
- Lets you know in Updates, behind the bell.
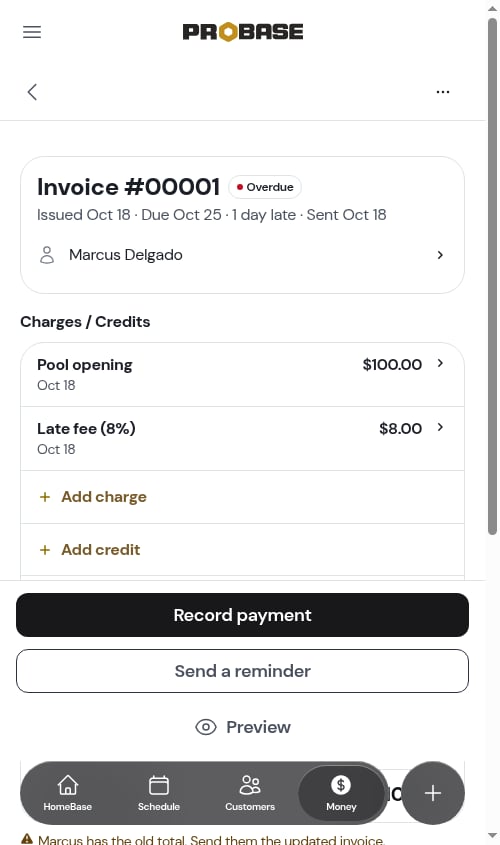
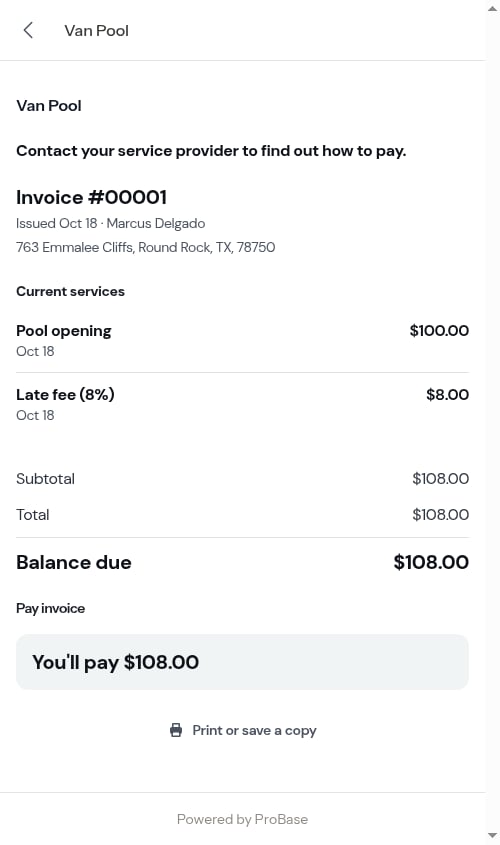
A late fee is only ever added once to an invoice. It’s never added to a draft, a paid invoice, an archived invoice, or a LawnStarter marketplace customer’s invoice. To waive a fee, remove the charge from the invoice like any other charge. ProBase won’t add it again.
Showing overdue status to customers
By default, the invoice your customer opens stays neutral. The page is headed Pay invoice, the Balance Due card shows only the Issued date, and the due date isn’t printed at all — so nothing on the page tells the customer they’re behind, even when the date has already passed.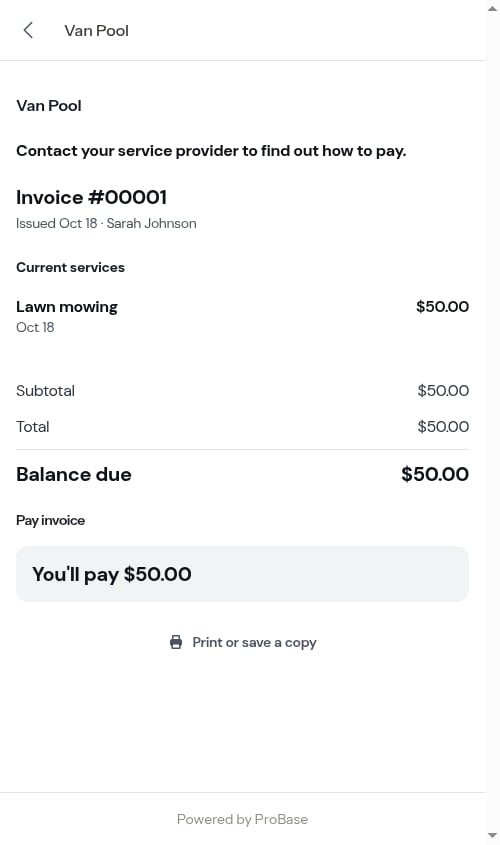
1
Open the Invoice Settings card
Click Payments in the sidebar under Business. The Show overdue status to customers switch sits just under the payment terms in the Invoice Settings card and is off by default.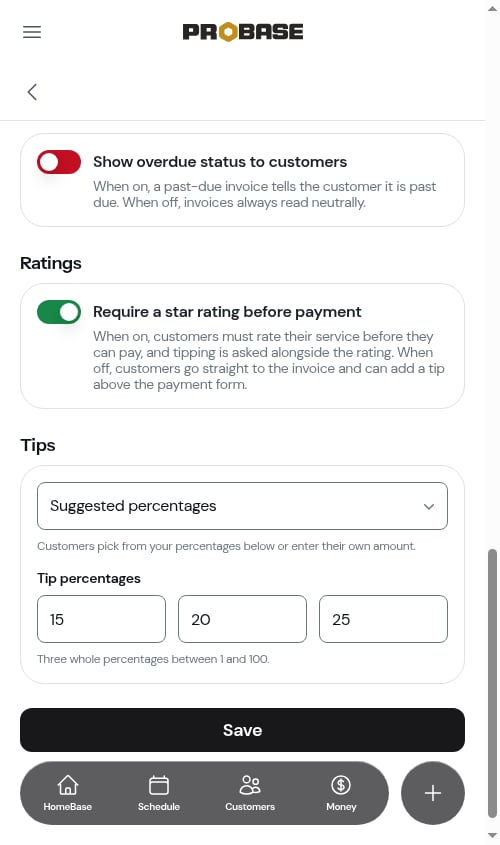
2
Turn the switch on and save
Tap the switch, then click Save. The Invoice settings updated. toast confirms the change.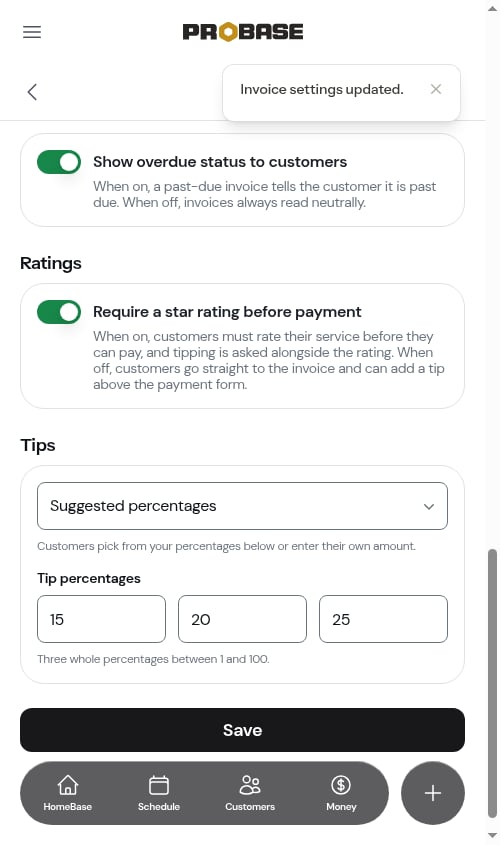
3
Customers now see the due date
The Due date appears on every unpaid invoice. Once that date passes, the payment heading changes from Pay invoice to Pay past due invoice. Invoices that aren’t past due still read normally — they just show their due date.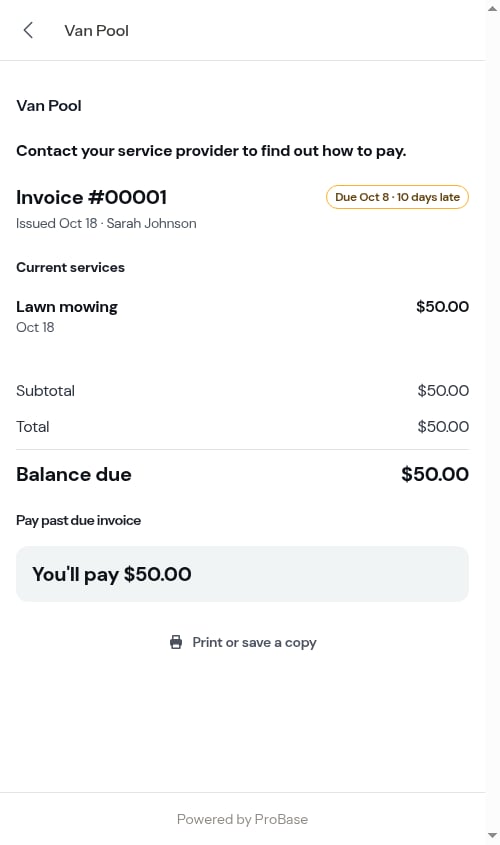
The switch only changes what your customer sees. Your own copy of the invoice always shows the due date — for example Due Sep 6 · 12 days late — and your bookkeeping is untouched either way: overdue invoices still show in the overdue invoices row on Money, still sit in the Overdue group of your Invoices list, and still count on HomeBase’s Overdue payments item. Turning the switch off never changes when an invoice counts as overdue — it only stops the deadline being shown to the customer.
Which one should I pick?
- Leave it off if you’d rather follow up on late payment yourself, in your own words — by text, call, or with Send a reminder on the invoice. The invoice page stays a plain request to pay, with no deadline printed on it.
- Turn it on if you want the deadline visible on the invoice and a past-due label doing the nudging for you the moment that date passes.
Related
- Tips and gratuity — the tipping options in the same card
- Service ratings — the star-rating switch in the same card
- Managing invoices — the invoice lifecycle and statuses
- Money overview — where overdue invoices show up for you
- Customer portal — what customers see when they open their invoice
- Setting up payment processing — connect Stripe so customers can pay online