Dispatch
Dispatch adds visits to your on-demand jobs in one tap. It’s built for work that happens when it’s needed, such as plowing after a storm. Pick the service, tick the jobs that need a visit, and ProBase adds a visit to each one for the day you choose. Then you can text every customer at once.Dispatch is rolling out gradually, and only team members whose role includes the Dispatch on-demand jobs permission can open it. The Owner and the Admin role have it by default. See Roles and permissions.
Opening Dispatch
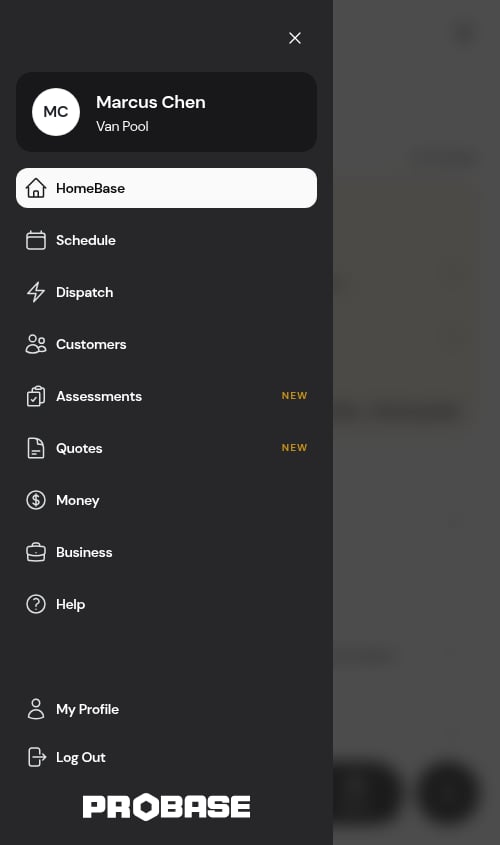
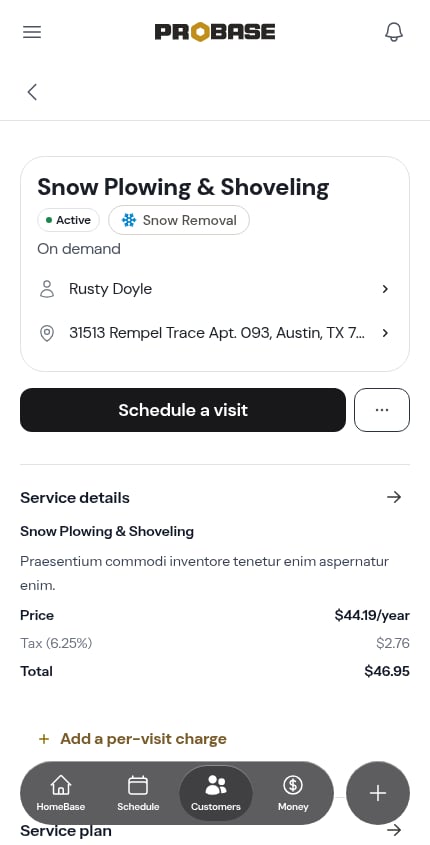
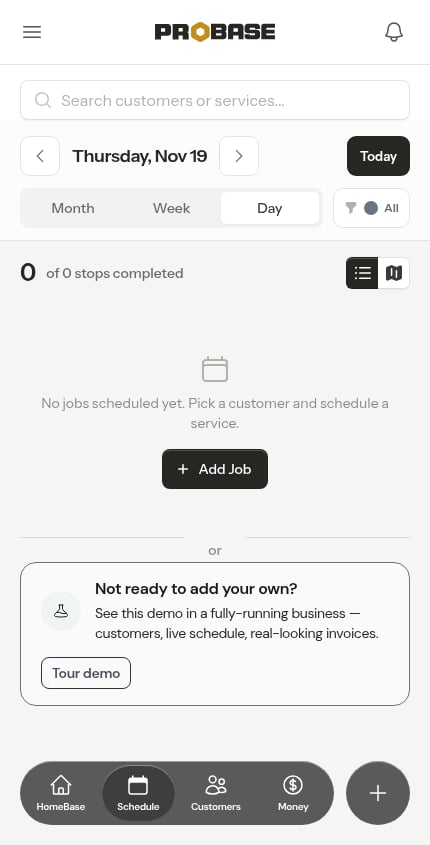
Dispatch opens in a window over the page you’re on. You can open it from three places:- The menu — tap Dispatch in the navigation menu.
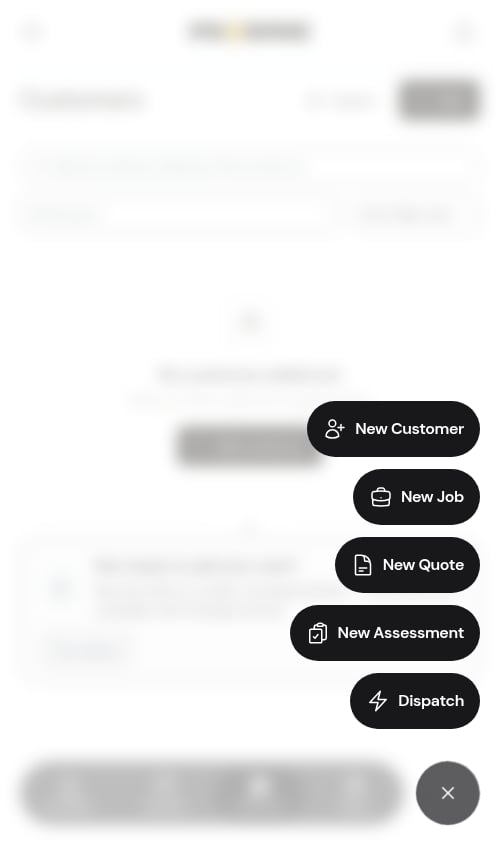
- Quick Actions — tap the + button and choose Dispatch.
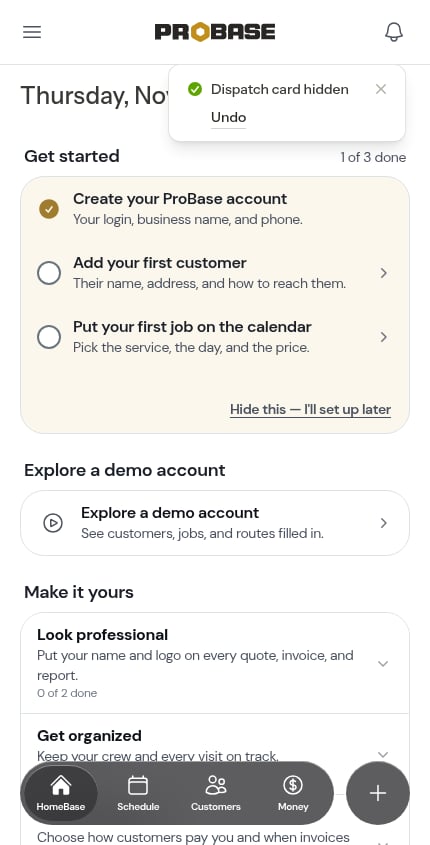
- HomeBase — tap Open Dispatch on the Ready to dispatch? card.
The Ready to dispatch? card
The Ready to dispatch? card shows on HomeBase once one of your services is set to On demand, or once you have an active on-demand job made with a custom service.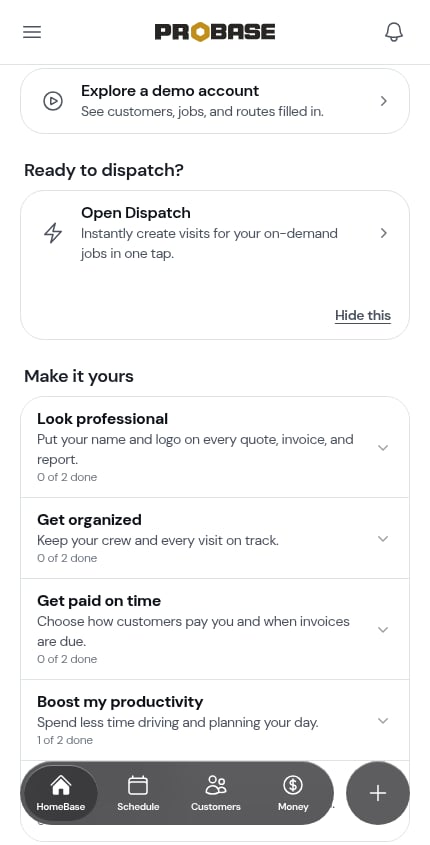
If you have no on-demand jobs yet
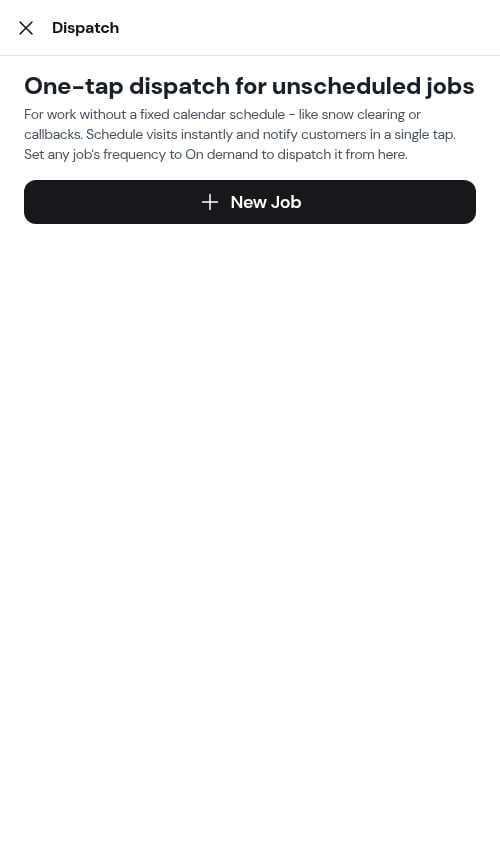
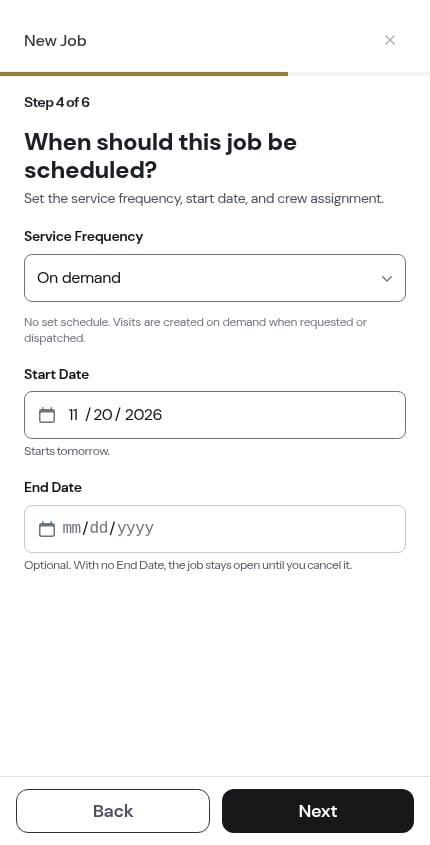
Until you have an on-demand job, Dispatch shows a short explainer: One-tap dispatch for unscheduled jobs. Tap New Job to create one. The new job starts with its frequency set to On demand.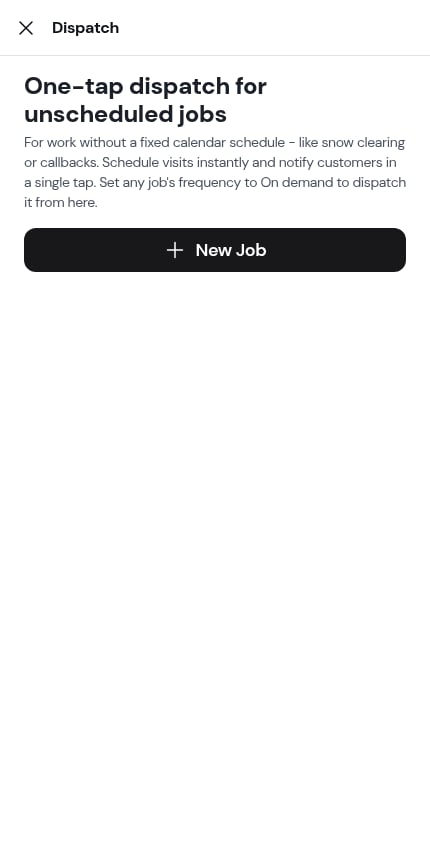
Step 1: Pick the services
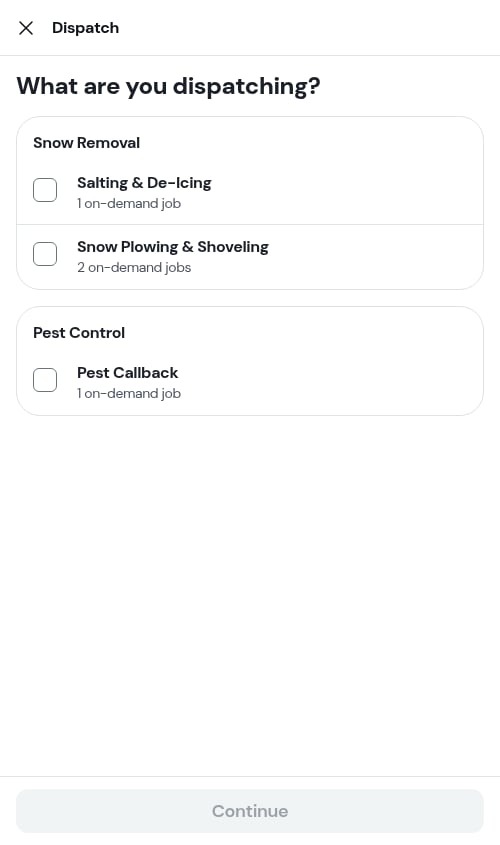
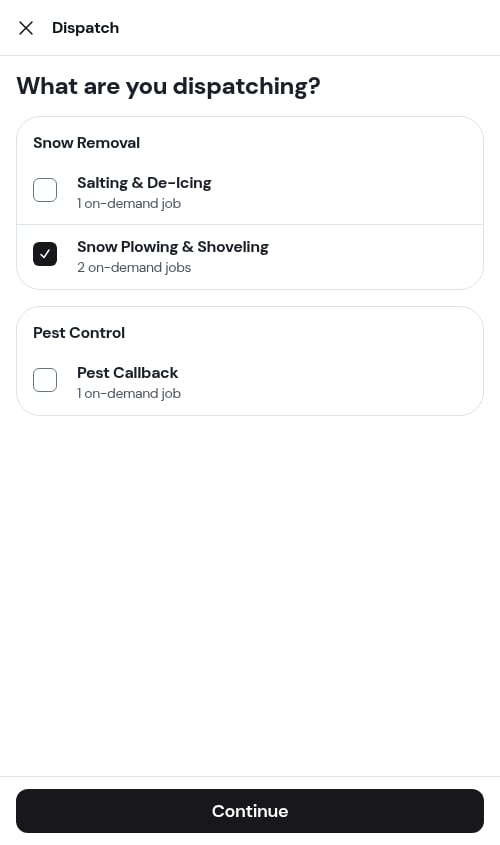
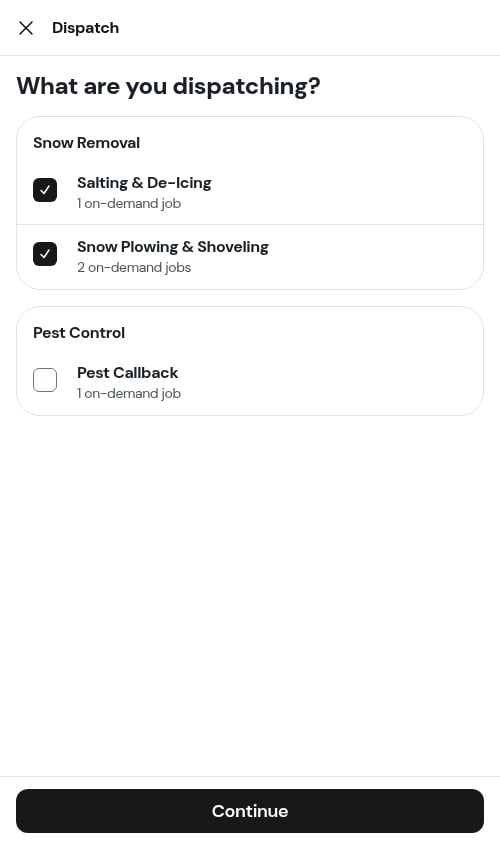
What are you dispatching? lists every service that has on-demand jobs, grouped by trade. Each row shows how many on-demand jobs it has.- Tap a service to tick it.
- Tap a trade’s heading to tick every service under it, and tap again to clear them.
- Tap Continue.
Jobs made with a custom service
On-demand jobs made with Custom service instead of a catalog service are listed too. Each job name gets its own row, such as “Roof rake” or “Driveway clearing”, next to your catalog services. The row sits under the job’s trade, or under Other when the job has no trade. Jobs with the same name share one row.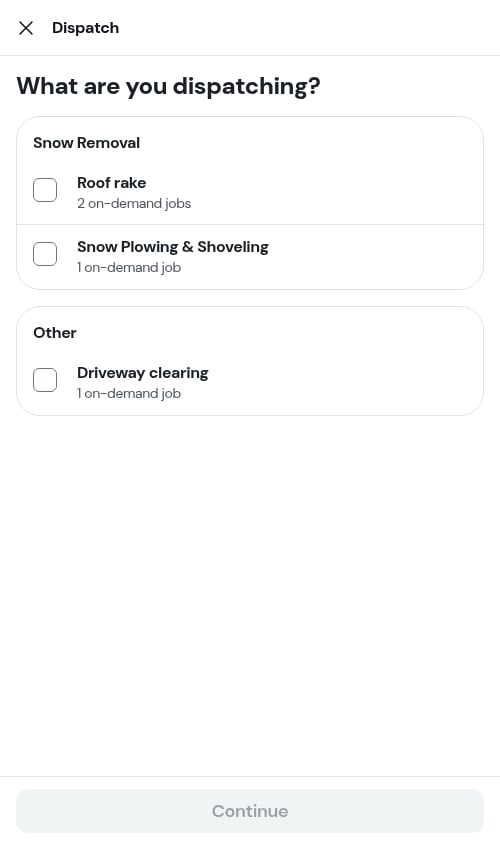
Step 2: Pick the jobs
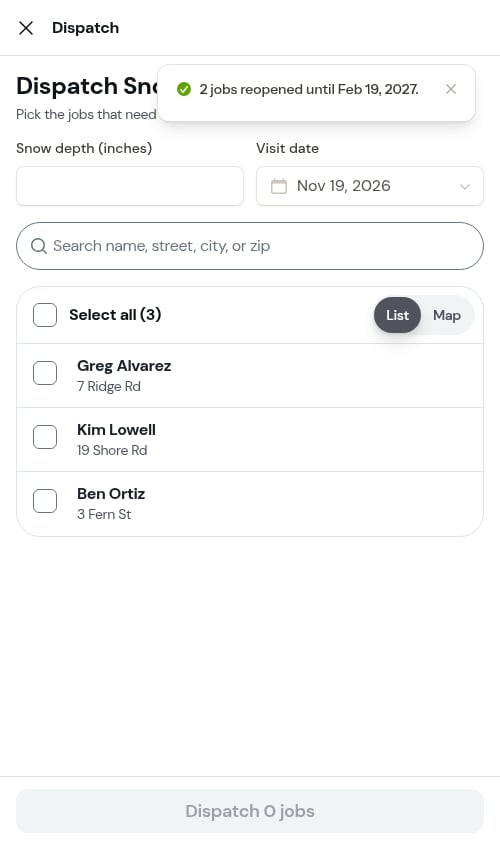
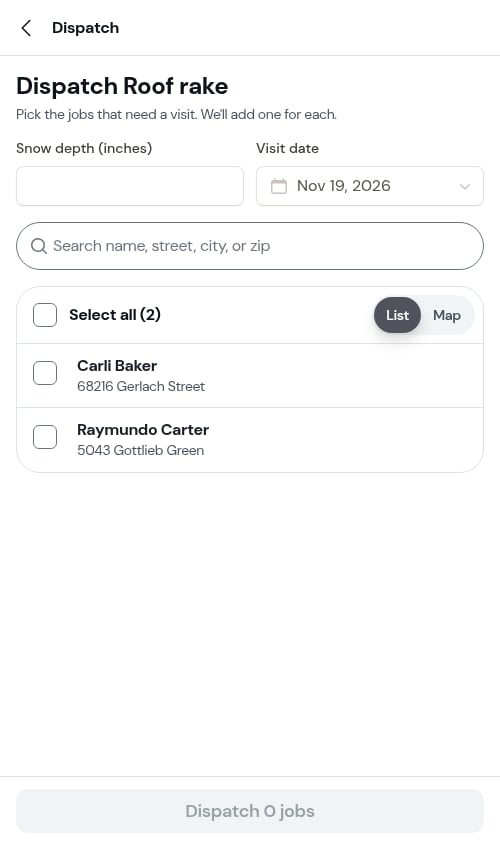
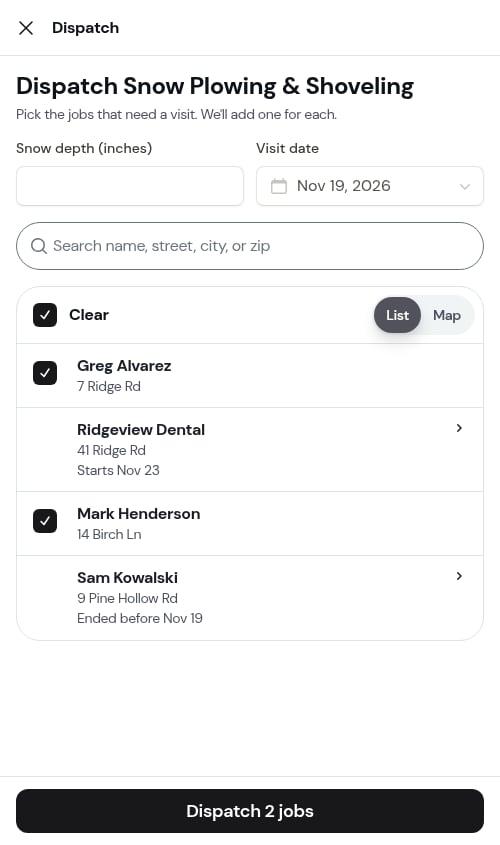
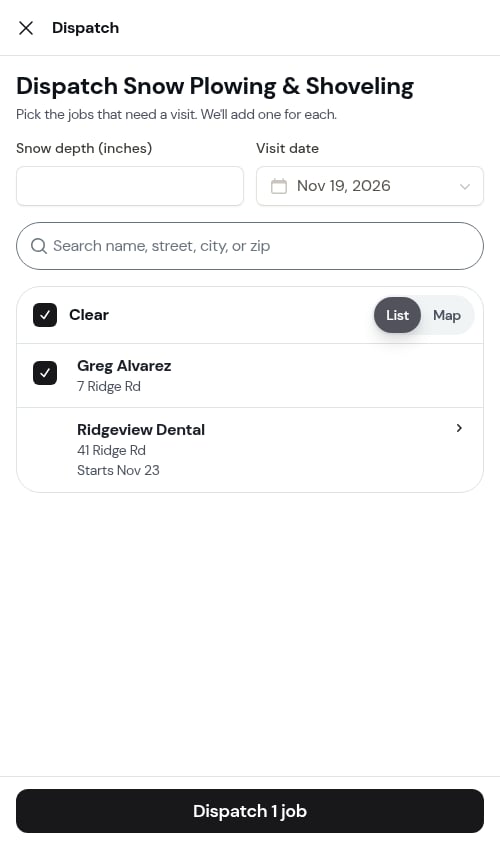
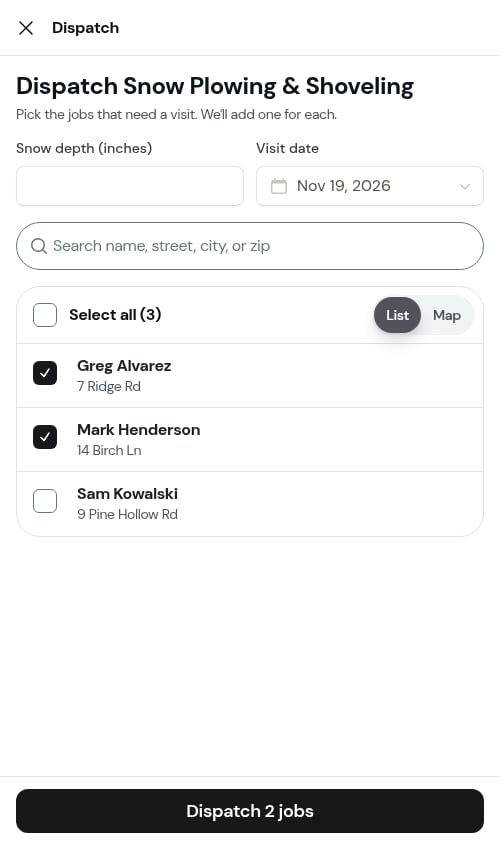
The list shows every active on-demand job for the services you picked, sorted by customer last name.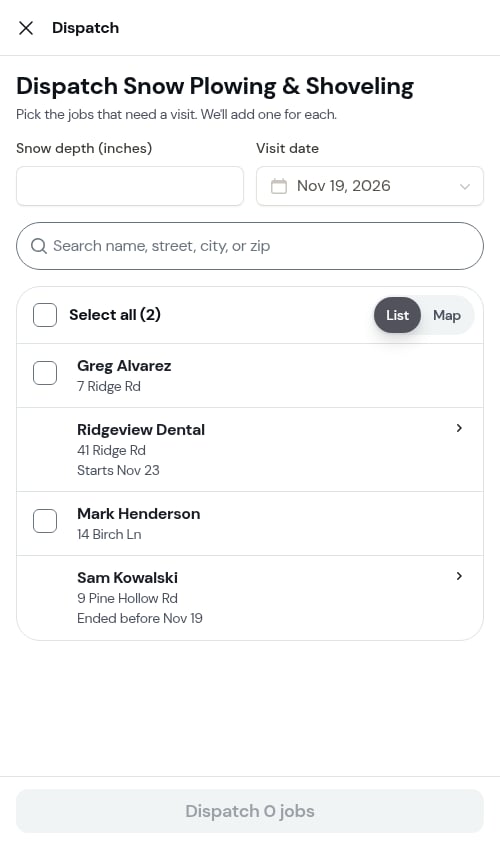
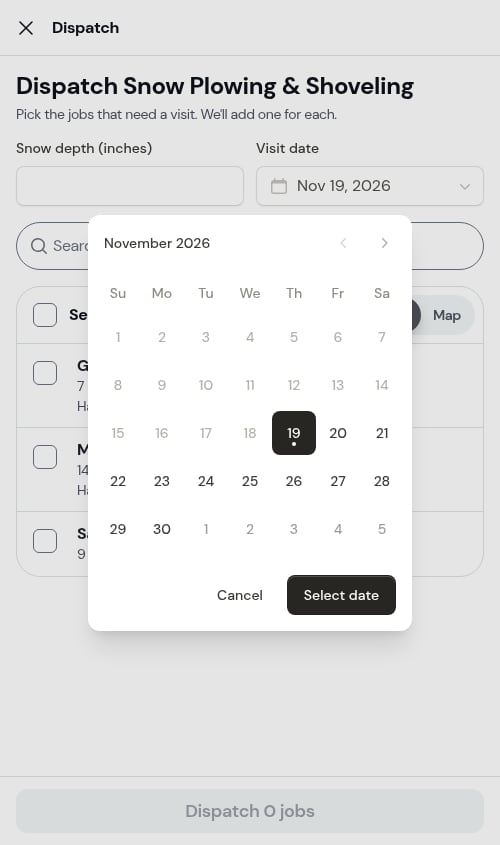
- Visit date — the day the visits go on. It starts on today, and you can’t pick a past day.
- Snow depth (inches) — shows when a Snow Removal service is in the list. Enter how much snow fell, and jobs whose trigger depth is higher are left out.
- Search — find a job by name, street, city or zip.
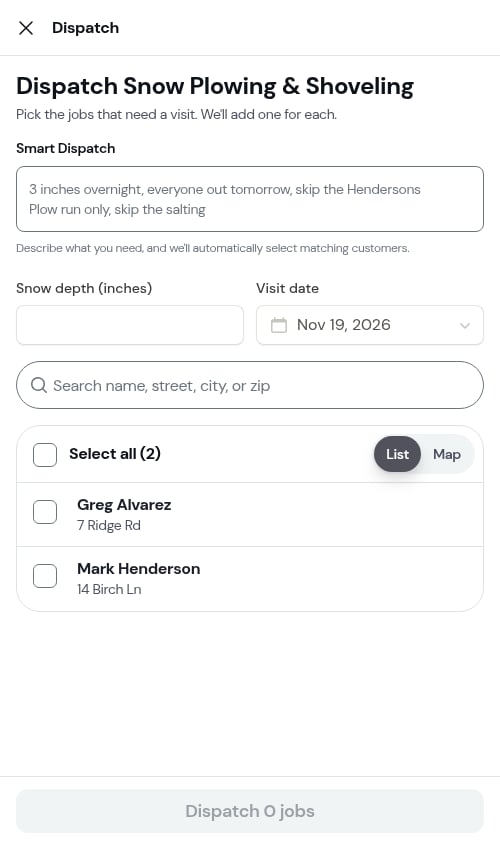
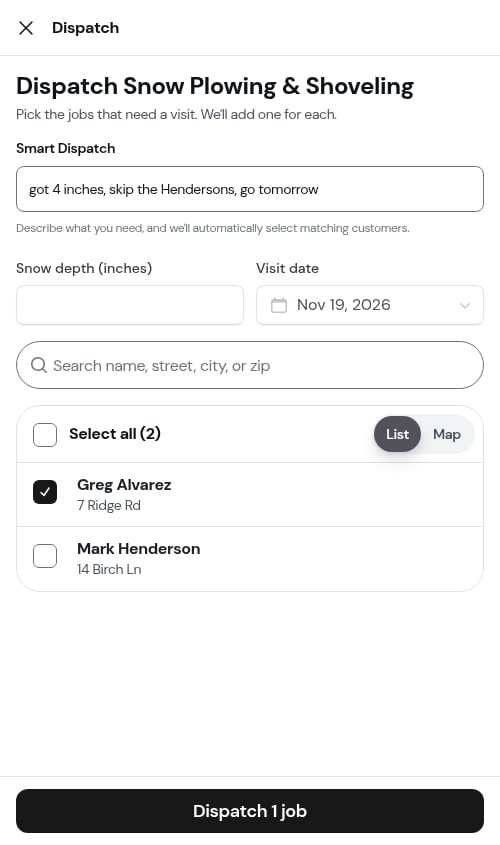
Smart Dispatch: describe what you need
When Snow depth shows on the list, a Smart Dispatch box appears above it. Instead of setting everything by hand, describe the storm in your own words, for example “3 inches overnight, everyone out tomorrow, skip the Hendersons” or “Plow run only, skip the salting”. ProBase reads your note and fills in the list for you.Smart Dispatch is rolling out gradually, so you may not see it yet.
1
Type your note
Type what you need in the Smart Dispatch box. You can mention:
- The snow depth and the day — “3 inches overnight, out tomorrow”.
- Customers by name — “skip the Hendersons”.
- Places — a street, city or zip code, such as “just Elm Street” or “only Denver lots”. Words like lots, driveways, properties or accounts are fine: “only Denver lots” picks the jobs in Denver.
- Trigger depths — “only my 2-inch customers”.
- Services to include or leave out — “plow only, skip the salting”.
2
Pause or tap away
Your note is read when you stop typing for a couple of seconds, or when you tap outside the box. While it’s read, you’ll see Reading your note…. You can keep working on the list in the meantime.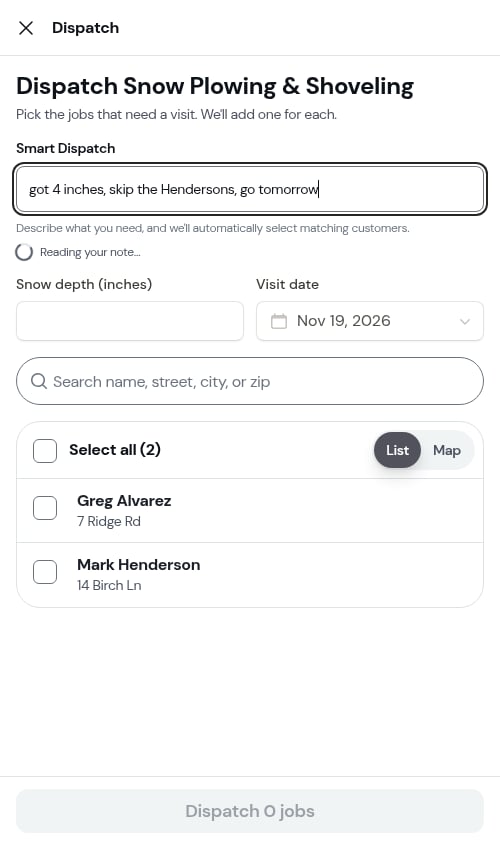
3
Check what changed
ProBase sets the Snow depth, the Visit date and the ticks to match your note. Everything it changed is marked From your note — under the depth and date fields, and under each job it ticked or unticked.
4
Dispatch
Look over the list, change anything you like, then tap the Dispatch button as usual.
- Nothing is dispatched until you tap the button. Smart Dispatch only fills in the list — it never adds visits by itself.
- Your own changes win. If you’ve already set the depth, the date or a job’s tick by hand, your note won’t change it.
- It only ticks jobs that are ready. A job your note matches is ticked only if Select all would tick it, so jobs below their trigger depth or outside their dates stay unticked.
- Couldn’t find. If part of your note doesn’t match any job on the list, a line such as Couldn’t find “Hendersons” shows under the box, in your own words. The rest of the note still applies.
- If the note can’t be read, the list stays exactly as it was. Set things by hand, or try rewording the note.
- A new note replaces the old one. Type a new sentence and it’s read fresh.
Only the sentence you type is sent to be read. Your customers’ names, addresses and jobs are matched inside ProBase.
What the lines under a job mean
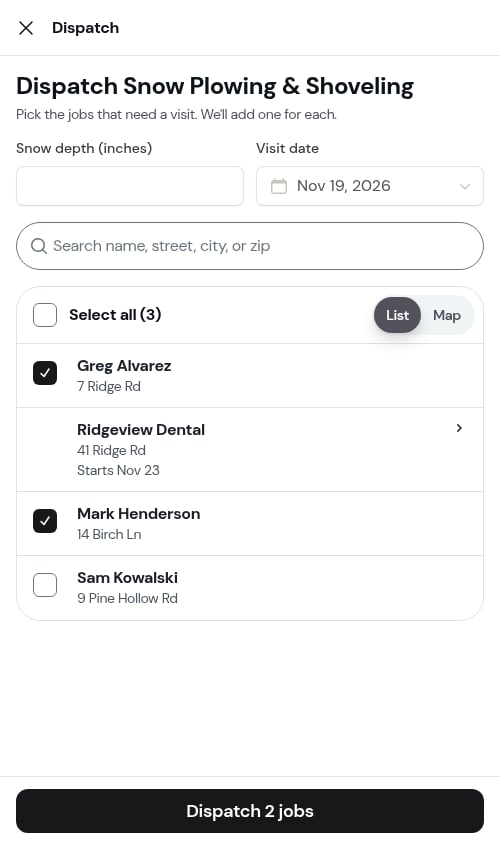
A job may show a short line under its address:
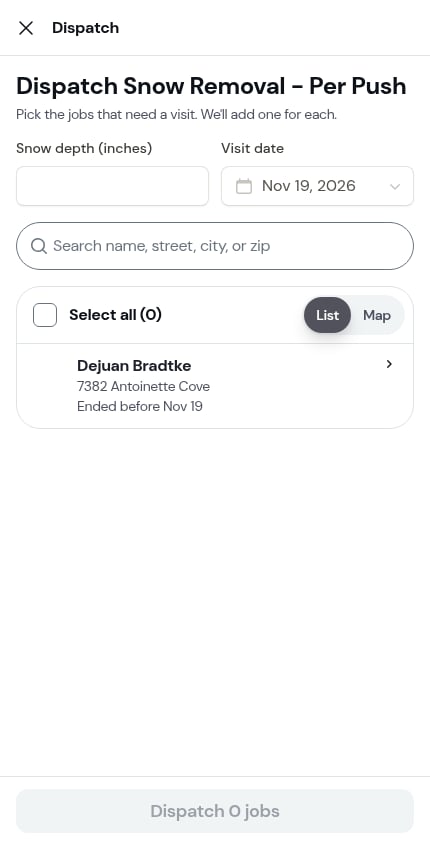
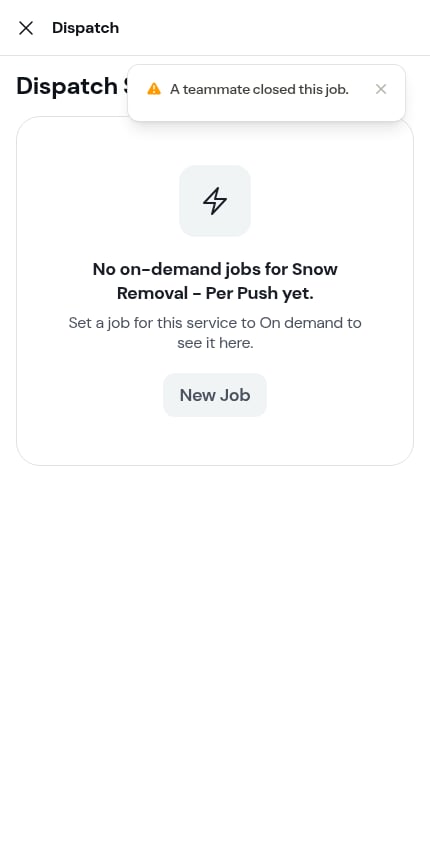
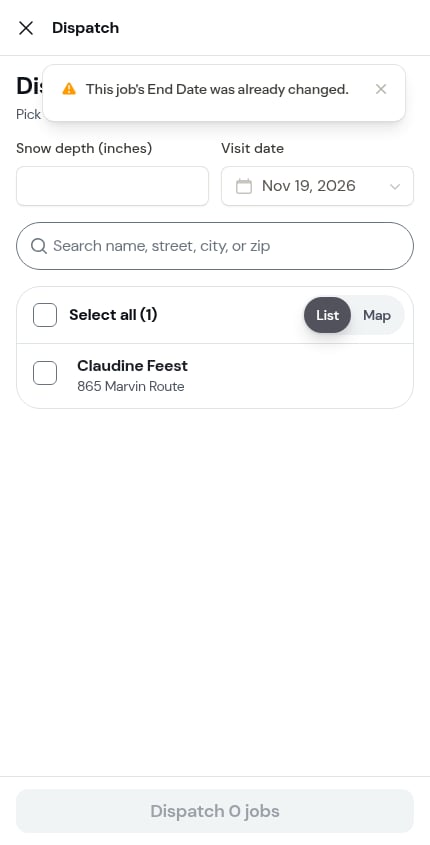
Jobs marked Starts or Ended before have no checkbox. Tapping Ended before opens a sheet where you can save a new End Date without leaving Dispatch.
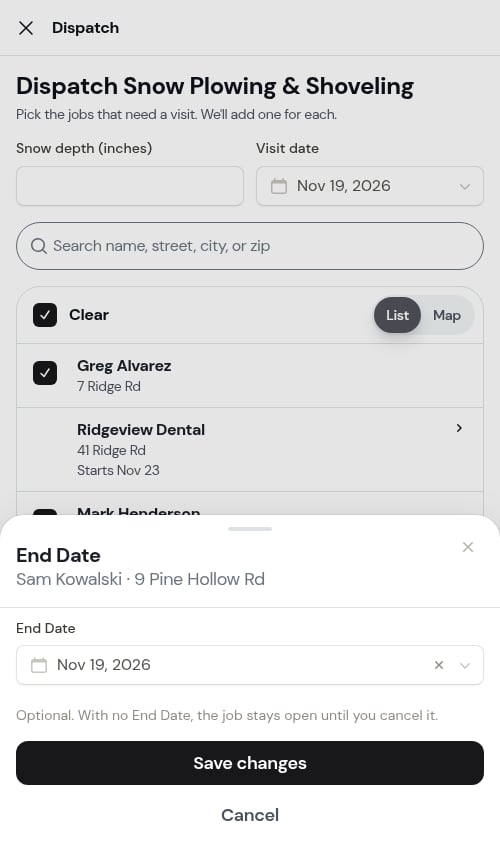
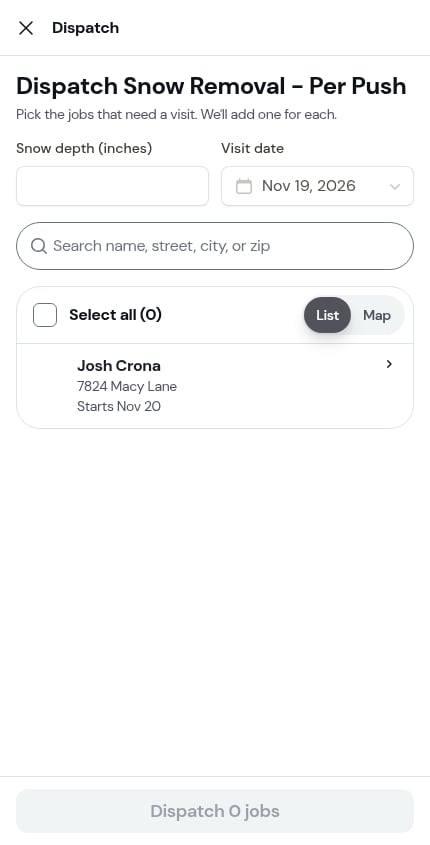
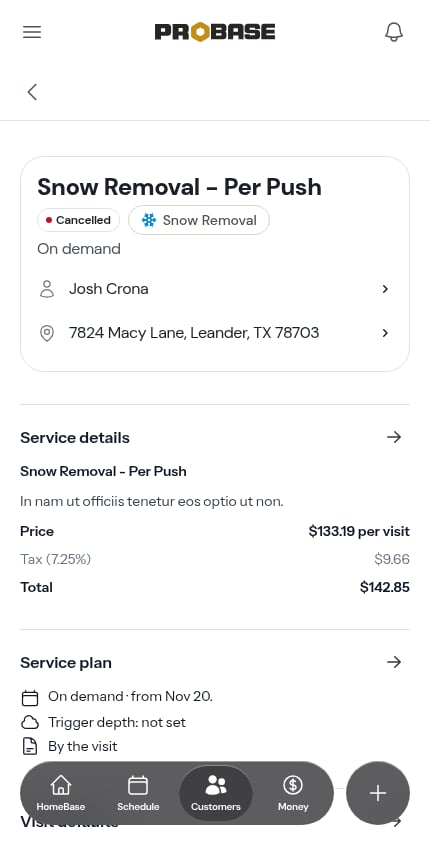
- “A teammate closed this job.” — the job was closed, so there’s no End Date to change.
- “This job’s End Date was already changed.” — a teammate already moved the End Date past your visit date.
Map view
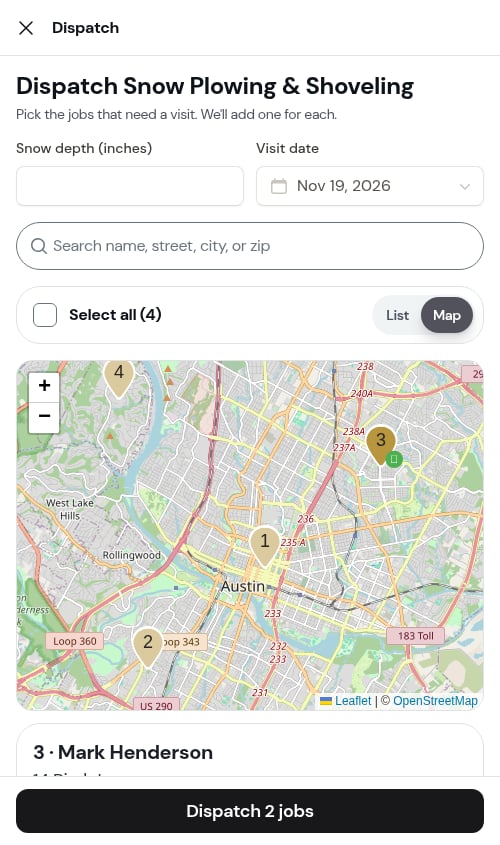
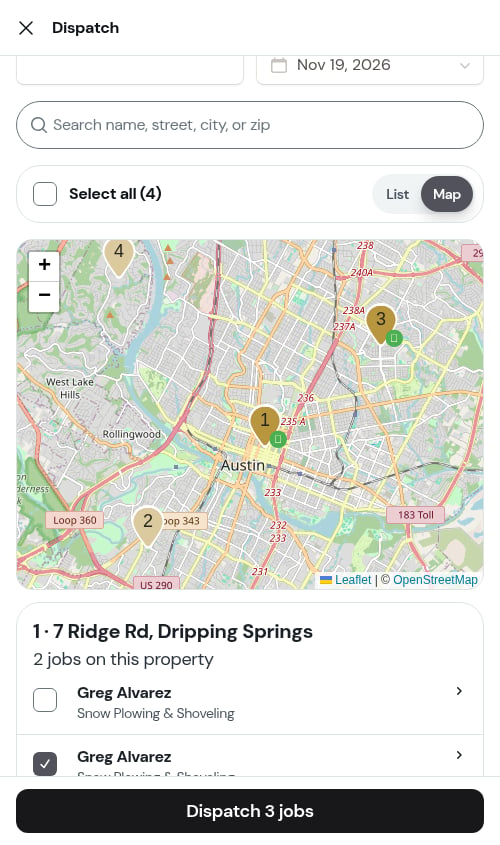
Tap Map at the top of the list to see the same jobs as numbered pins. Tap a pin to tick or untick its job. When several jobs share one spot, tapping the pin opens a list where you tick them one by one. Jobs that aren’t on the map show in a card below it. Tap List to go back. Your ticks are the same in both views.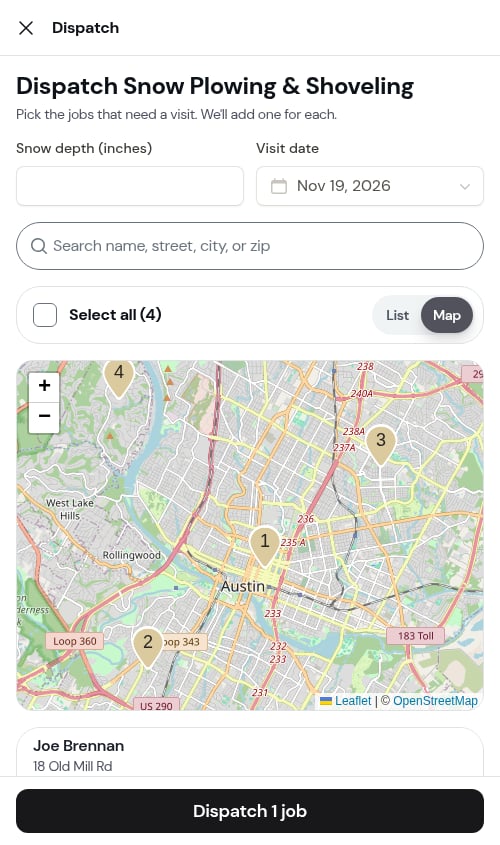
Step 3: Dispatch
The button at the bottom counts your ticked jobs:- Dispatch [n] jobs — adds one visit to each.
- Add another visit for [n] jobs — every ticked job already has a visit that day.
- Add visits for [n] jobs — a mix. A note above the button says how many get a second visit.
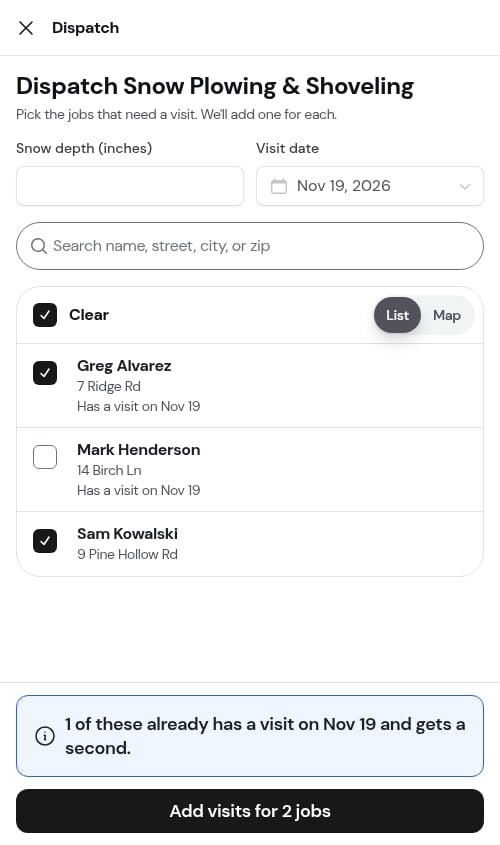
- goes on the visit date with no set time, so it reads Anytime;
- goes to the crew on the job;
- isn’t billed until it’s completed.
Step 4: The Done screen
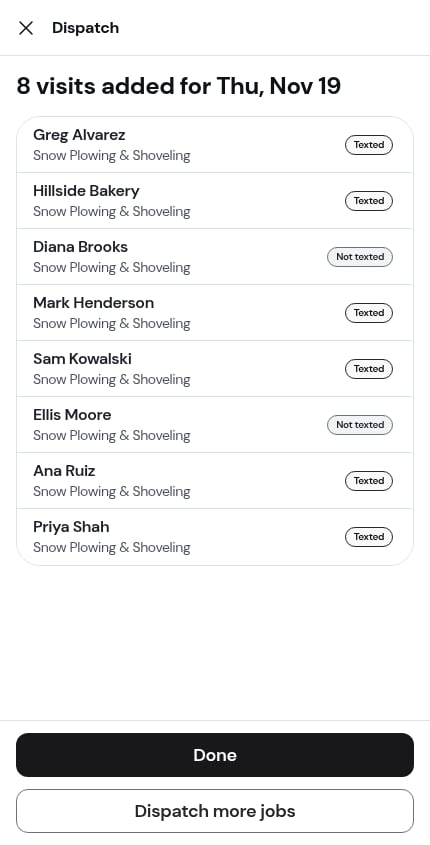
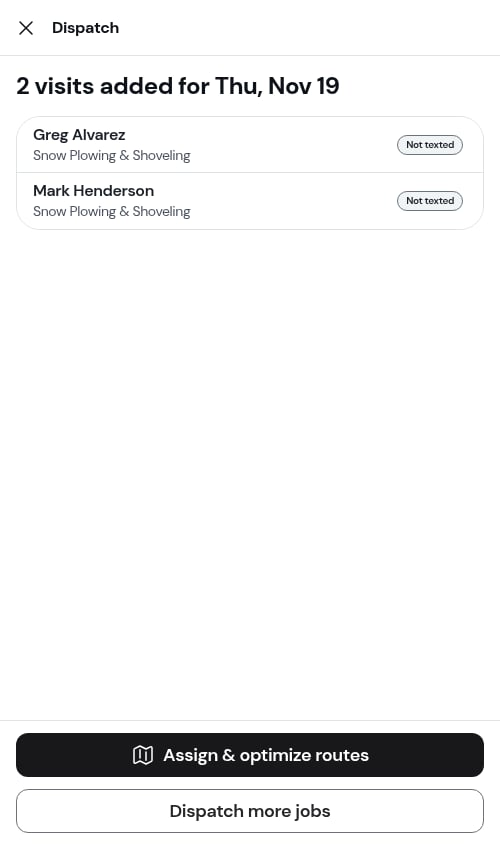
As soon as the visits are added, Dispatch shows a Done screen. At the top, it says how many visits were added and for which day, for example “8 visits added for Mon, Nov 2.” If some of them were second visits, a line underneath splits them, such as “3 new visits · 2 second visits.” Below that is one row for each job that got a visit, with the customer and the service. Each row is marked:- Texted — the customer got the text.
- Texting… — the text is still on its way. The mark updates by itself.
- Not texted — no text was sent to this customer, for example because you tapped Not now or they have no mobile number.
Texting your customers
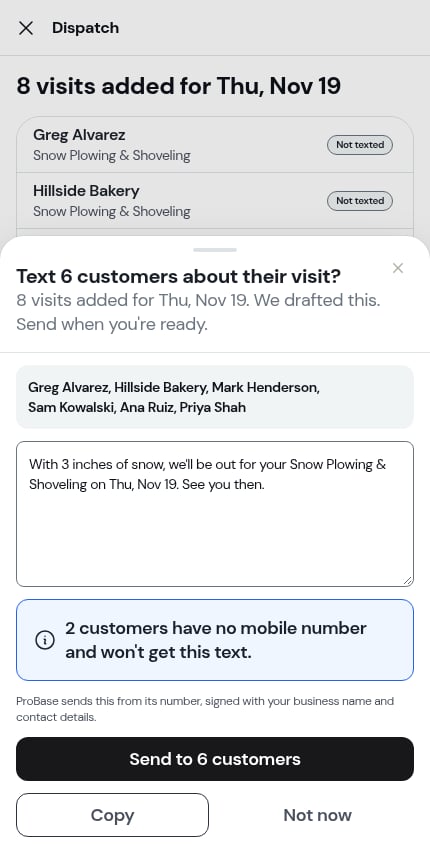
When you first land on the Done screen, a sheet opens over it offering to text the customers: Text [n] customers about their visit? Each customer gets one text, even if they have several jobs.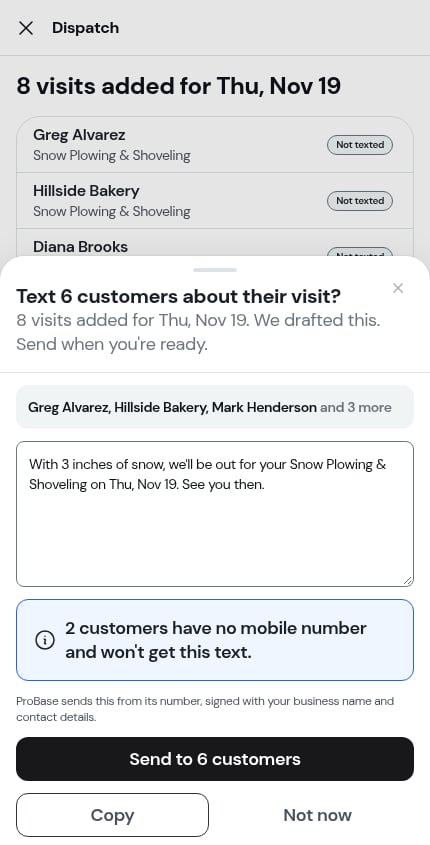
- The first few names are shown. Tap and [n] more to see everyone.
- The message is drafted for you from your Dispatch visit message template, and you can edit it.
- Customers with no mobile number are counted in a note. They won’t get the text.
- Tap Send to [n] customers, Copy to copy the message, or Not now.
Jobs that couldn’t be dispatched
If a job couldn’t get a visit, for example because it was cancelled or its dates changed, the Done screen lists it under [n] jobs couldn’t be dispatched, with the line “Couldn’t add a visit. Open the job to check it.” Tap the row to open the job’s page. When you go back, you land on the Done screen again. The row still opens even if a teammate has changed the job since — for example, archived the customer or extended the season.What to do next
At the bottom of the Done screen:- Done — closes Dispatch.
- Assign & optimize routes — shows in place of Done when you have more than one crew and some of the new visits have no crew. It opens that day on your schedule so you can give them a crew. See Jobs without an assigned crew and Optimizing routes. Going back brings you to the Done screen.
- Dispatch more jobs — goes back to the list with the date picker open, so you can add visits for another day.
Ended jobs and Extend the season
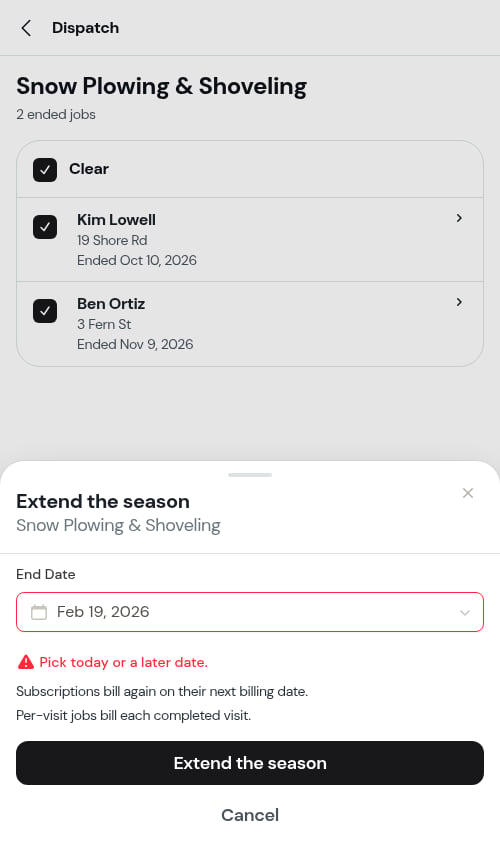
When some jobs for the services you picked have closed at their End Date, the list shows [n] ended jobs. Tap it to see them.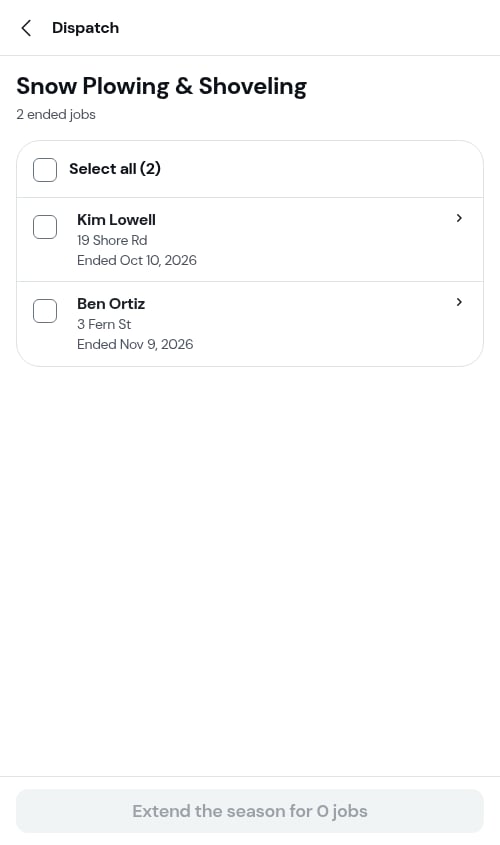
1
Tick the jobs
Tick the jobs to extend, or use Select all. Tap a job’s row to open its page. The row opens the job you saw, even if a teammate has changed it since.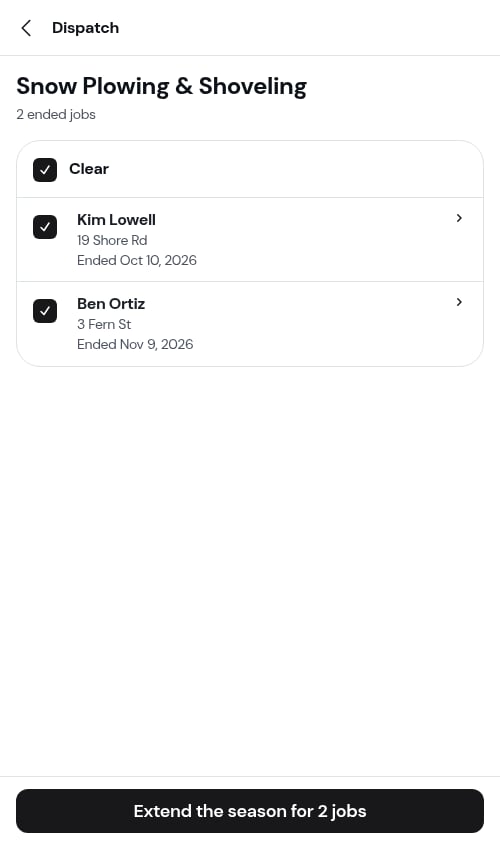
2
Tap Extend the season
Pick a new End Date, today or later and no later than January 17, 2038. The sheet explains what happens: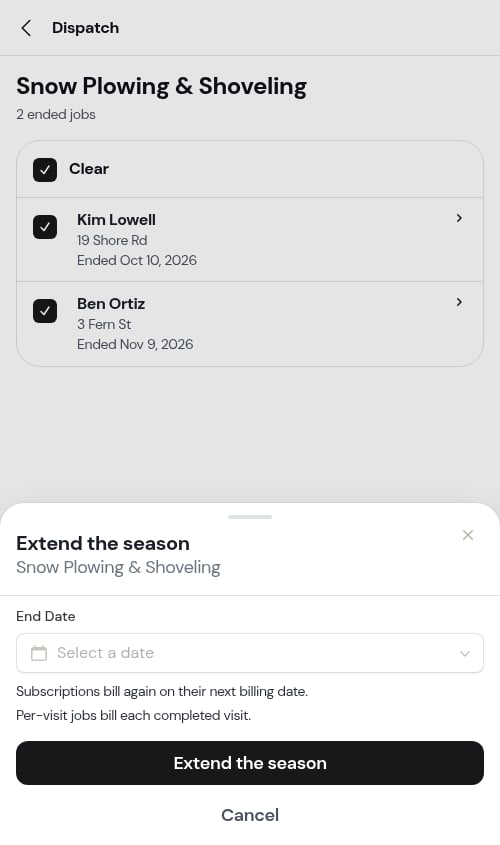
- the jobs reopen until that date, with no new plan started;
- subscriptions bill again on their next billing date;
- per-visit jobs bill each completed visit;
- season contracts continue their term, and the sheet reads No new charges are created.
3
Confirm
Tap Extend the season. You’re back on the Dispatch list with the jobs included, and a message such as “2 jobs reopened until Mar 31, 2027.”